Like most moms, I am always trying to find ways to trim the grocery budget and save a little money. With groceries costing more every day, this gets more and more challenging.
But I really couldn’t believe it when I went to the grocery store, a few months back, and I saw that boneless, skinless chicken breasts were $3.99/lb. For chicken. Seriously??? Chicken and hamburger used to be the cheap meat. Wings used to be cheap meat. Now, they cost almost as much as steak.
The pack of chicken breasts I saw at the store contained 4 breasts, and the package was about $9.00. This makes each breast $2.25. Two breasts (roughly a meal’s worth for my family of 4) cost $4.50.
This is unbelievable to me. Granted, chicken breast isn’t THE most expensive cut of meat out there, but when you’re trying to stick to a grocery budget, spending this much each day really adds up. If you’re trying to eat organic meat, it costs almost twice this much. Even if you choose to go meatless a few days a week, the fresh fruits and vegetables cost a fortune. I knew that there was a way to feed my family healthy food for less . . . I just had to find it.
Enter creativity! I started thinking back to the way our ancestors cooked– they would never have bought a shrink-wrapped package of chicken breast at the store. They made everything last longer, because they used every piece and wasted nothing. I started thinking about how they would have picked vegetables from their garden and butchered a chicken to use for several meals, to go with all those home-grown vegetables.
Unfortunately, I don’t have much room for a vegetable garden– just enough room for a few plants in pots– but I am working on that. However . . . I figured that even I could look more into this business of not wasting . . . of using the entire chicken and not wasting one part. Surely then, I could make that meat stretch into several more meals, which translates into more money saved, which translates into more money for diapers. Yippeeeee!!!!
One day, I saw that Aldi had fresh whole chickens, all the time, for 95 cents a pound. That’s right. 95 cents per pound– without a sale. Every day. This was a revelation to me. Each chicken costs about $5 (depending on weight), and, long story short, I buy one every single week and get about 3-4 meals out of it. Yes. You can get 3-4 meals out of a $5 piece of meat. This means I get the 2 breasts, along with all the other pieces, for roughly the same price as I would have paid for the breasts, themselves. Unbelievable. It just takes a little work on my part. And I’ve never been afraid of hard work. The first step toward accomplishing this goal was to learn to cut up a whole chicken.
I know, I know. I can almost hear your audible shudders from here. TOUCH that??? Touch that slimy thing and cut it into pieces? I think I’m going to throw up!!!!!
I know exactly how you feel. This is the same way I felt, when I first tried cutting up a whole chicken. But I got better at it with practice. Now, it doesn’t even bother me, anymore. I guess it’s kind of like changing a diaper. The first time, you have to check the gag reflex. But the more you do it, the more it becomes second nature, so that you can almost do it with your eyes closed. And I could almost cut apart a chicken with my eyes closed (but don’t do it– knives are sharp 😉
What are we waiting for? Let’s do this!

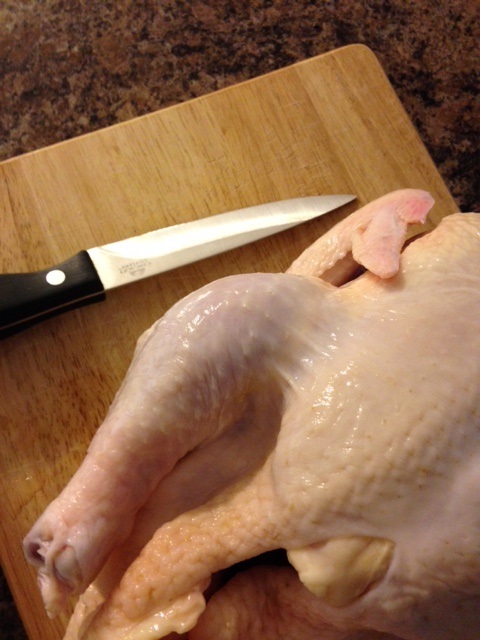
Before you start, there are a few things you want to have nearby. First, you need a really sharp knife. Like, super sharp. My husband got me a knife sharpener for Christmas, last year, and I use it constantly to keep my blades honed to a razor sharpness. You also need a cutting board, and a whole chicken, obviously.
I usually rinse my chicken in the sink, before starting. Check the cavity (the big gaping hole) to make sure that there isn’t a bag of giblets and gizzards in there. This chicken had it, so I removed the giblet bag. I don’t use these, but some people use them for gravy. Ask your grandma about that– I’m sure she knows more about giblet gravy than I do. 😉
I want to mention, too– everywhere the chicken juice goes, you will need to clean super well, when you’re done. Keep an eye out and make sure that you use Lysol or Clorox on every surface that your chicken touches. Also be sure to clean the sink and anything else the juice touched, including cutting board, knife, and even things you wouldn’t think about, like the handle of the faucet that you touched when you washed your hands. We don’t want salmonella 😉 Clean really well afterwards.
The first step is to separate the legs from the body. Make a nice cut there on the chicken’s “underwear line.” haha. It will split really easily, and you’ll know you’re doing it right.
Using your fingers, pop the chicken leg as far left as you can. The bone will kind of pop up. If the bone doesn’t pop, you haven’t pushed far enough yet.
Cut right through the skin beside that popped bone. The leg will cut off really easily, since you aren’t cutting through any bone.
Do the same thing on the other side of the chicken. Now, you should have 2 nice chicken leg/thighs, and one weird looking, oddly slim bird. “Darling! You’re looking so skinny! Have you lost weight??” Don’t worry. We’ll get to that in a minute.
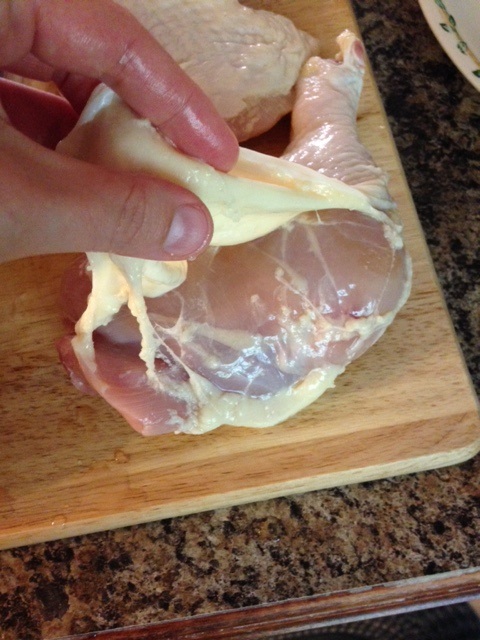
At this point, you can decide whether you want to leave the chicken skin on or off. Some people prefer to leave the skin on, especially if they’re making fried chicken. Personally, I like to cut the skin off, since I prefer the meat to be lean. Think of the skin as kind of a sock the meat is in. Peel the “sock” off. It will come off pretty easily.
There will be a few spots where the skin is attached. Just use your knife to gently skim that away.
I also like to cut that little shred of fat off, at the top of the thigh. Again, just my preference.
You can leave the chicken leg and thigh together, if you like, but I like to separate them, so I have more pieces. This part is really cool. As we cut, there are almost like dotted lines all over the bird to guide you where to cut. See where I’ve drawn that little black guideline? If you look, there is a fat line right there– straight as an arrow. Cut right here if you want to separate leg from thigh, and it will cut clean and pretty as you please.
Here are my finished legs– I cut each one up, and now I have 2 thighs and 2 legs.
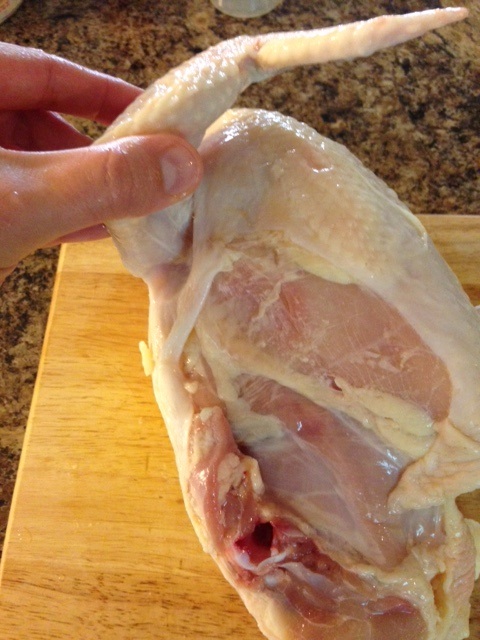
Now, we will separate the wings. Grab the wing and look at how it’s attached. You’re basically going to draw a “smile” with your knife blade, exactly where you would put deodorant on this chicken, if things were getting a little sweaty. haha. Let’s do it.
Start drawing your “smile” or “U” shape, with your knife blade.
Continue down and finish the U shape.
I, personally, don’t like the wings cooked separately, so I use them for stock (more on this, later). But if you want to fry your wings or bake them, here is where you would cut them (look for fat lines and cut on those). You will get 2 little wingettes out of each wing. If you want more than 4 wings, just freeze them for several weeks until you cut up enough chickens to get enough.
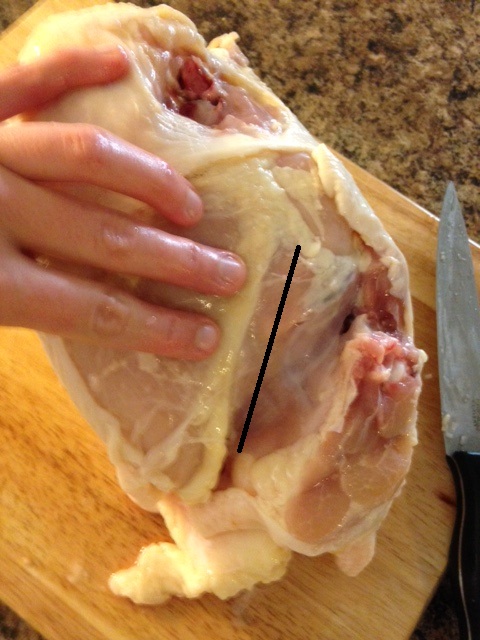
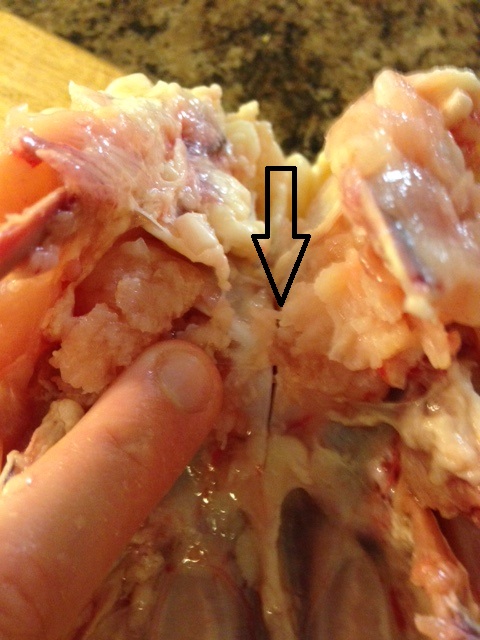
After you have removed both wings, it’s time to cut the back from the breasts. See where I’ve drawn that little black guideline? It’s a perfect, white, fat line to follow. Cut right along there. You can use kitchen shears if you prefer them to the knife– the knife works just fine for me.
This is the back after you have cut along the “dotted line.”
Make an identical cut on the other side of the back.
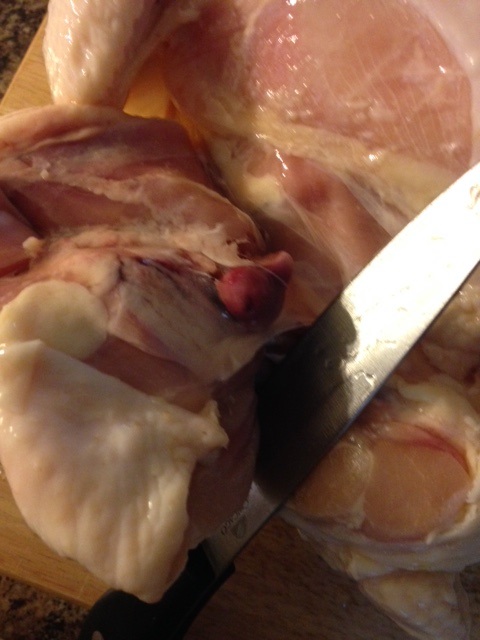
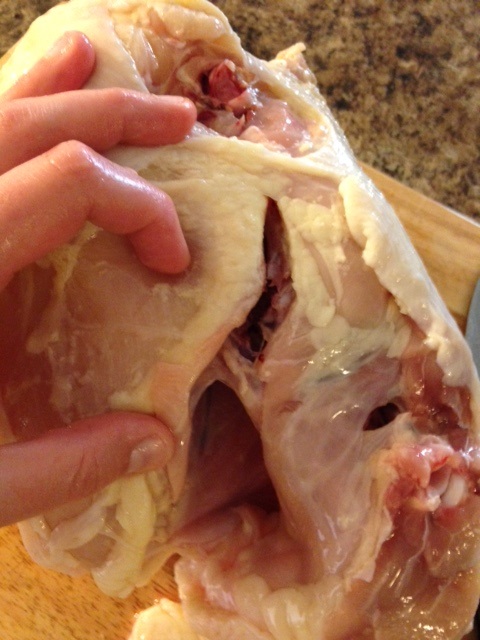
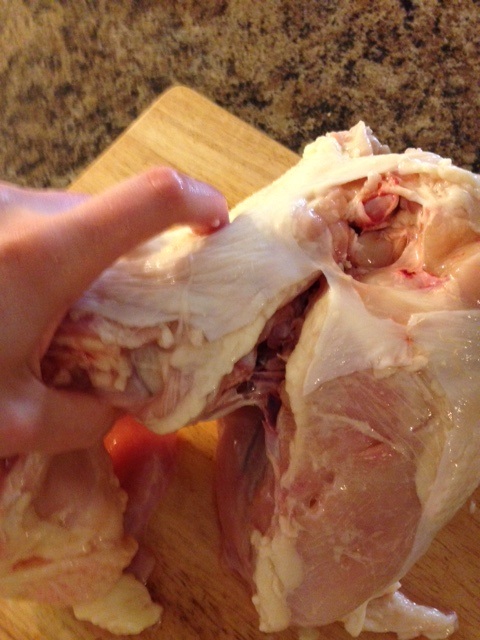
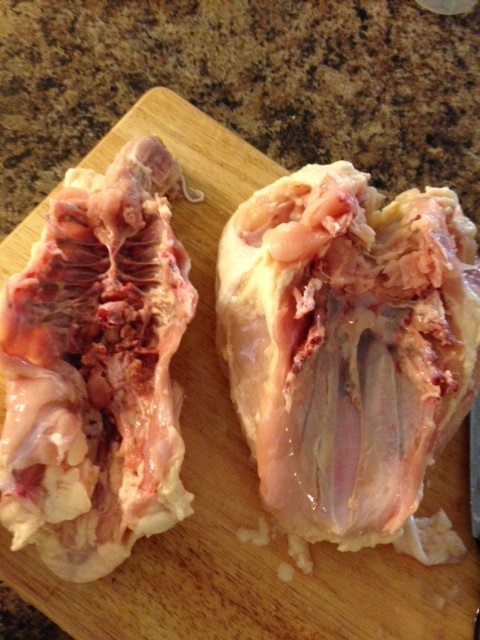
Once you have both sides cut, pull the breasts and the back apart. This is probably the trickiest part, since sometimes you need a few extra cuts here and there to free the back, completely. Just work slowly and carefully, and don’t cut yourself. 😉 When you’re done, you will have the back (pictured left), and your two breasts, which kind of look like a heart (pictured right). Save the back for the glorious chicken stock, at the end. Now, we’re going to get those chicken breasts!
Make a small, roughly 2 inch cut right at the top of the “heart” (chicken breasts).
Turn the breasts over, so that your cut is facing the cutting board, and the skin side is up. It’s ironic that this looks like a heart, because you’re going to do a “CPR” move on it. Take your hands and, just like you were doing CPR, press firmly on it until you hear a little crunch.
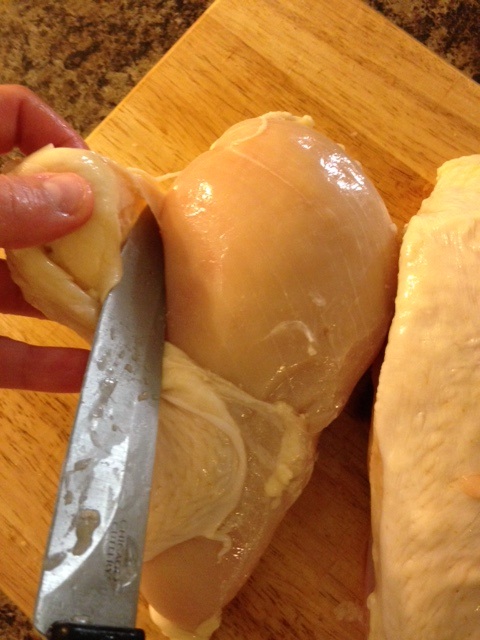
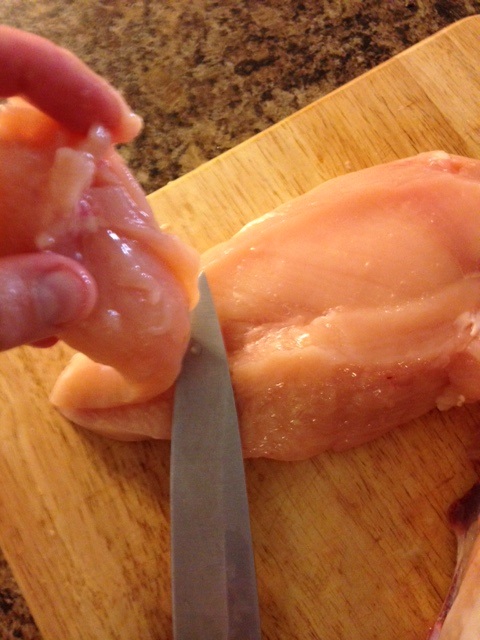
Once you hear the crunch, the breasts are ready to separate. Take your knife and make a cut right down the center.
They should split apart pretty easily.
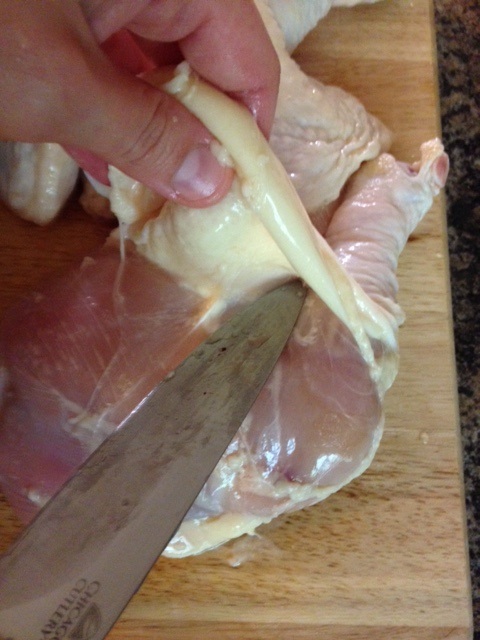
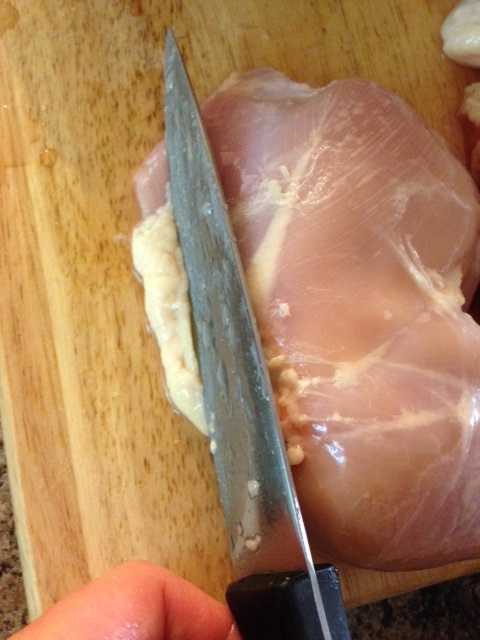
I like to take the skin off. Do this the same way as you took the skin off for the legs– pretend the skin is a sock, and just carefully cut it off and slide it down.
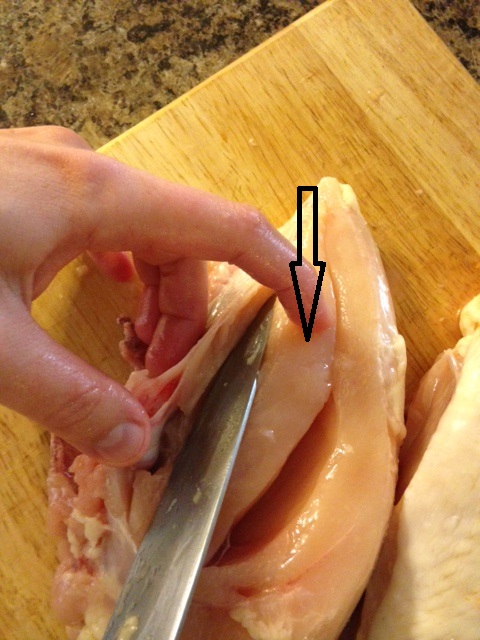
I wanted to point out, here, that if you want to separate the tenderloins from the breast (you can buy tenderloins separately, at the store, for a pretty penny, and now you can get them for no extra charge! :), this is the tenderloin. The breast is upside down, and it’s right along the bone.
I like to de-bone the breasts– to do this, just cut carefully along the tenderloin, separating it from the bone.
Once you cut the bone off, separate the breast from the tenderloin, if you want. It’s OK to leave these as one unit, if you like, but I like to make these into chicken tenders for my 3 year old. He loves them. And there is no extra cutting required! 🙂
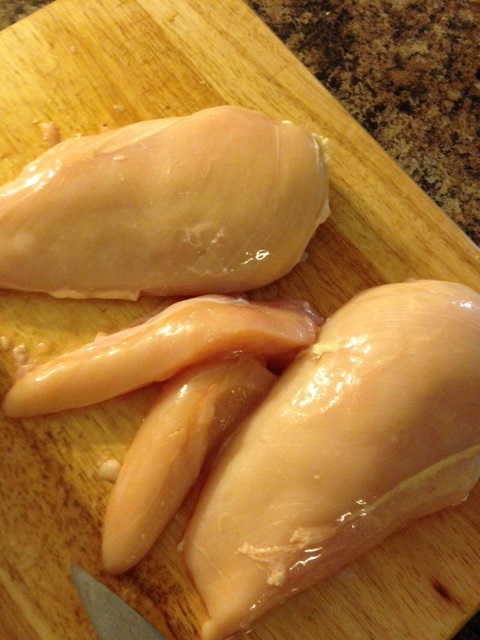
Do the same for the other breast. Here are the 2 breasts and the 2 tenderloins, separated, skinned, and de-boned. If you like, you can further cut the breasts into pieces or strips, but I generally just do this.
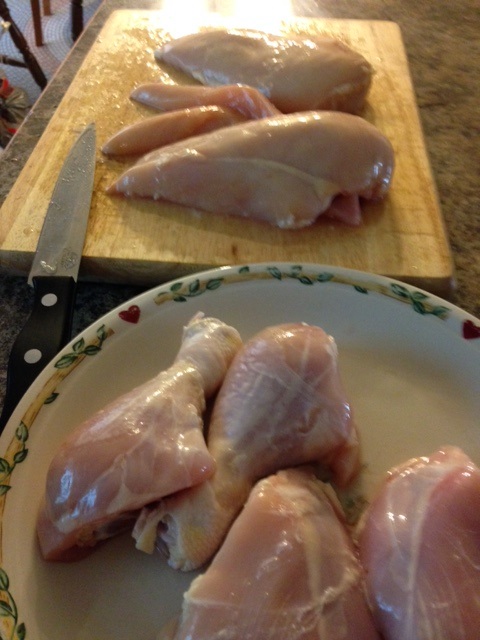
This is all the meat. Look at that. You get 2 chicken breasts, 2 tenderloins, 2 thighs, 2 legs, and . . .
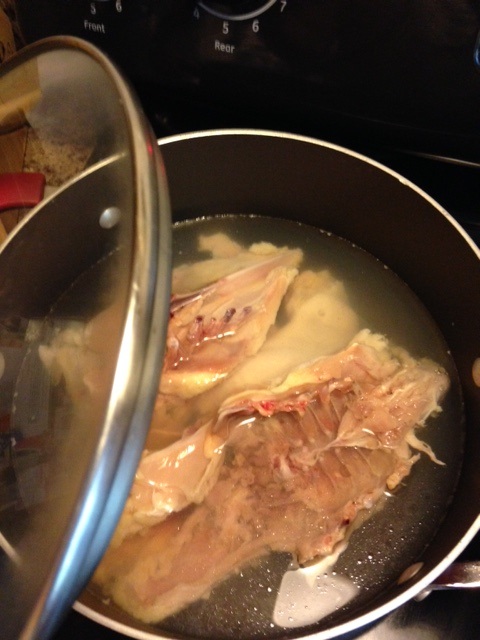
A fantastic pot of chicken stock, completely with chicken shreds. Remember I told you I was going to tell you how to make chicken stock? Here it is.
First– chicken stock is that stuff you can buy in cartons at the store– it’s about $3, and you just made it for free. You haven’t lived until you taste homemade chicken noodle soup with homemade stock.
To make the base of chicken noodle soup, get yourself a nice pot of boiling water, and place all the extra chicken parts in the water. If you choose to use your wings separately, just put in the wing tips that you have left. I have included in this stock (1) the wings, (2), the back, and (3), the bones from the breasts (which still have a teeny bit of meat on them). If I’m making chicken stock or soup, I add several carrots, a few ribs of celery, and an onion, chopped. Sometimes I add salt and pepper to taste, or a little chicken bullion. I let this simmer for about 45 minutes, until the meat is cooked and falling off the bone. I allow the bones to cool, and then pick the meat off of them and chop it finely. Voila– the bones (pun intended!) of homemade chicken noodle soup. We will do another tutorial on chicken noodle soup another day.
Today, I’m not making soup, so I leave out the vegetables and just boil the chicken in water (you can use salted water, if you want your chicken to have more flavor). After the water has boiled about 45 minutes with the bones in it, I allow the bones to cool and pick/chop the meat off. I don’t have an immediate use for this chopped meat, today, so I store this cup of extra meat in the freezer, in a freezer bag. The next time I’m ready to make soup or chicken salad, it will be there. You’d be amazed how many recipes call for cooked chicken. And now you have some, already chopped and ready to go– and it would have just been thrown away by your local butcher when you bought those pre-packaged breasts. See? Not only are you saving your wallet . . . you’re saving resources, too.
I should mention that little tips and tricks like this– spending $5 for 4 meals worth of meat, vs. $5 for 1 meal of meat, really add up. We have paid off almost $90,000 in debt in the last 5 years, doing little tricks like this. And you can, too. What is it they say? “A penny saved is a penny earned.”
You did it. And I’m just so proud of you 🙂

Disclosure: This post may contain affiliate links, which just means that we get a few pennies if you purchase through our link. I never recommend products that I don't personally use and love. Thanks!


Pingback: Herb Grilled Chicken – Cookies for England
Pingback: Easy BBQ Chicken – Cookies for England
Pingback: Simple Roast Chicken – Cookies for England
Pingback: Comforting Chicken Noodle Soup – Cookies for England
Pingback: “Green Chicken” (Honey Chicken Curry) – Cookies for England
Pingback: Perfect Picnic Chicken – Cookies for England