
Look at that sweet little cookie bouquet. Imagine your daughter’s birthday party, with arrangements like this along the table. Do double duty with décor and snacks. Yessss. Today, I’m going to show you show to make cookie pop arrangements, like this, so that you can mop up the party preparations like there’s no tomorrow. Yesterday, we conquered cookie pops. Today, we conquer cookie bouquets. Tomorrow, we conquer the WORLD!!!!! (Mighty music swells in background).
Well . . . maybe not the world. Let’s take things one step at a time.
Let’s start with those Cookie Bouquets I was telling you about. Who doesn’t love a beautiful bouquet? You just can’t beat a bouquet of flowers . . . unless it’s a bouquet of flowers you can eat.
First, you need some cookie pops in the theme of your choice. To find out how to make cookie pops, check out my tutorial here. Today, I’m going to make a true “bouquet,” with flower cookie pops. I can’t think of a sweeter way to brighten someone’s day than by giving them a sunny vase of flowers . . . that everyone can EAT! Edible flowers. Oh yeah.
What are we waiting for? Let’s do this!

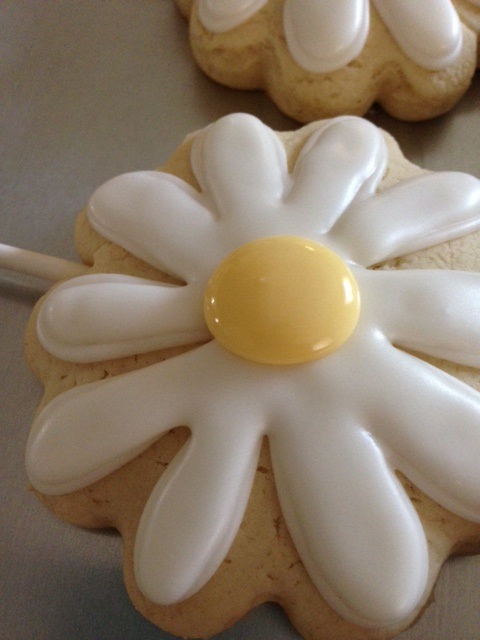
I decided to do daisies. They are sunny and happy . . . and every time I see one, it makes me smile. Start by making your cookie pops with a basic flower cutter. Outline a basic daisy shape and flood the flower in white. Of course, you could use a variety of colors if you prefer Gerber daisies 🙂
Allow the white to dry for about 1/2 hour. It doesn’t have to be solid, but the top needs to be firm enough to hold the flower center without the colors running. Once your white flower bases have dried a bit, go ahead and add a nice yellow dot to the center. Allow the flowers to dry completely (overnight is ideal) before arranging or decorating them.
White these are drying, assemble your decorating supplies. These are pretty basic . . . you want a few sheets of tissue paper in complementary colors, some ribbon, and a jar. Don’t spend a lot of money on this– I just used an old, washed out spaghetti sauce jar.
When the cookie pops are dry, go ahead and tie little ribbons around the base of the flowers. This adds a little pop of color and really sets them off, I think.
Aren’t they pretty? So many pretty little flowers . . . and you thought gardening required a green thumb!
Now, for the jar. Lie your tissue paper sheets kind of opposite each other– so that the corners of one lie on top of the flat parts of the other.
Grab the paper sheets in the center and pull up, forming the paper into a cone shape.
Gently stuff the center that you have grabbed into the jar. Very carefully maneuver the paper into the jar, allowing the corners to remain sticking out in all their fluffy glory. I used the broad handle of a plastic pancake turner, inserted into the center, to gently push the paper into the bottom of the jar.
Now, for the fun part– plant your “garden.” Arrange the cookie pops in the jar. The paper will hold them in place and also hide the cookie sticks. Make sure that they seem secure so that they don’t tip out once you have finished arranging.
There is another way to do this, too . . . it all comes down to personal preference, really.
Stuff your jar with a piece of plain newspaper or white tissue paper.
Arrange your cookies in there. Use the white paper to anchor them.
Wrap with your piece of yellow tissue paper and secure with a ribbon or rubber band. This yellow paper will hide the stems and look super cute, too. Either way you choose to do it, your flower bouquet is bound to bring a smile to someone’s face.
And there you have it! How cute is that? And I like even better how easy and cost effective a gift this is. It can also be personalized for any occasion and with any colors. What could be better than that? Not much! And sometimes, we all need to take time to stop and smell the roses . . . er, daisies.
Because you did it. And I’m just so proud of you.

Disclosure: This post may contain affiliate links, which just means that we get a few pennies if you purchase through our link. I never recommend products that I don't personally use and love. Thanks!


Pingback: How to make Royal Icing Transfers – Cookies for England