Well, it’s finally March, and, at last, winter is beginning to loosen its icy grip on the weather. Despite ‘Ole Man Winter’s best efforts, I am starting to see the first signs of spring– crocus and daffodils are peeking their brave heads through the soil, robins are frisking through the fallen leaves looking for insects, and the breezes, though still cold, whisper with the freshness that only the warming of the Earth can bring. And, today, when I went on my daily walk, I smelled one of my favorite telltale signs of summer: someone outside, barbecuing in the fresh air. There is just nothing better than the combination of outside breeze and smoky, slow-cooked ribs marinating in a sweet, sticky sauce. The best part of these ribs is that you can make them for yourself anytime you want, using your very own oven– no fancy smoker required. And this means that if you wake up one morning to the dreaded “freak snowstorm,” you don’t have to put your forehead against the frosty windowpane and moan in despair. Have a perfect summer picnic in the comfort of your own home– make fresh lemonade, let the kids help create a beautiful fruit salad, and make succulent BBQ ribs in your oven. Ahhh . . . the gorgeous smells of summer. Have faith, loved ones. It will come.
What are we waiting for? Let’s do this!
Oven BBQ Ribs
(adapted from Food Network)
Ingredients:
1 can regular Cherry Coke or Root Beer
1 cup packed brown sugar
1 tbsp. apple cider vinegar
1/4 tsp. cayenne
1 tbsp. cooking sherry
3 cloves garlic, minced and mashed with salt (more on this in a minute)
1/2 can tomato paste
1 rack pork ribs (either baby back ribs or spareribs)
Directions:
Mince 3 cloves of garlic and sprinkle salt over the cloves. Use your knife to rub the garlic against the cutting board in a circular motion, until the garlic is soft and almost mashed. Combine garlic and all other sauce ingredients in a saucepan and bring to a boil. Simmer for 20-30 minutes, until the sauce has thickened. Pour 3/4 of the sauce into a separate bowl, cover, and refrigerate. Pour the remaining sauce over ribs and place on foil-lined baking sheet. Cover ribs tightly with foil and bake at 275 for 2 hours. After 2 hours, uncover ribs and brush sauce overtop of ribs with a clean brush. Bake for 30 more minutes, then rebrush with more sauce. Repeat this process 3-4 times, brushing every 30 minutes, until ribs are fork-tender (mine took three 30 minute sessions). You can slice ribs, separately, if you like, or just eat ’em caveman style, no napkins required 😉
Now, in pictures! And please remember to follow me on Facebook and Pinterest for more great recipes! ?

First of all, let’s get this out of the way . . . I call it “pop.” Yes. I totally do. I am from Pennsylvania, and it’s “pop” there. In the South and Northeast it’s “soda,” and in Georgia it’s “Coke,” no matter what is inside the can. Well, whatever you call the stuff, dump a can of it into a saucepan, along with your brown sugar. I am using Cherry Coke, but you can use any kind of pop that you like– Root Beer, regular Coke, and Pepsi all work great. We will add the rest of the lovely stuff here, in a minute. Turn the heat on medium low and give the sweet mixture a stir.

Now here is a neat trick. I don’t know if there is really a “name” for this trick– I learned it from a fantastic cook in Tennessee– we are going to kind of make our garlic into a pulp. Take 3 cloves of garlic and finely mince them. Then sprinkle salt liberally over the top (maybe 1/4 tsp. or so, total) and let the garlic sit for a few minutes. The salt will start to pull the juice out of the garlic. After a few minutes, use your knife to rub the garlic around and around in a circle on the cutting board. Keep scraping the garlic pulp back to the salty mixture and scraping it around with the knife. If you have a mortar and pestle, I think that would work even better for this. If you don’t have one of those (I don’t), then this knife method works fine, also. When the garlic has become kind of like a smooth pulp (or as close as you can get), it’s ready. This process just makes the garlic extra flavorful and keeps you from getting chunks in your sauce. Surprisingly, it doesn’t seem especially salty, either. I don’t know why . . . but I just go with what works 🙂

Scrape your garlic puree into the pop/brown sugar mixture. Add in your vinegar. Mmm. You are basically making homemade BBQ sauce, here. Isn’t that neat! You had a hidden talent and didn’t even know it.

Next, go ahead and add your tablespoon of sherry. I never used to cook with alcohol, but an Italian friend of mine, Jacqui, got me started using it in certain dishes, and I can’t believe the depth and richness of taste it adds to the flavor. All the alcohol evaporates out, also, so you don’t have to worry about hungry guests getting alcohol poisoning 😉 Only amazing flavor is left behind. Sherry adds an almost smoky richness to dishes– the best way I can describe the flavor of sherry in food is the feeling you get when you come inside, after being cold and shivering all day, and someone wraps you in a warm blanket and hands you a mug of steaming soup– it’s like a deep warmth and coziness. I know that sounds weird, but that’s really the taste I get when there is sherry in a sauce or stew. To these ribs it gives warmth and a little teeny bit of smoke, which is just awesome in BBQ sauce. YUM.
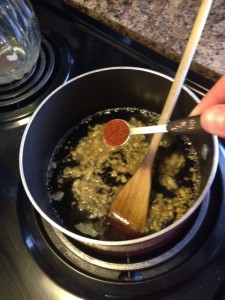
Now comes the part where you decide how spicy you want your sauce to be. My family prefers a mainly sweet and sticky sauce, with a teensy bit of spice for taste, so I added 1/4 tsp. cayenne. I’d say on a scale of 1-10, with 1 being no spice at all and 10 being “Melt your face off,” these ribs are probably a 2. If you want your sauce to be spicier, you can add more cayenne pepper, or even hot sauce. Taste your sauce and adjust to taste. Keep in mind that the spiciness will dilute as the ribs cook. So take your spice level one notch spicier than you like, and when it bakes on the ribs, it will be perfect.
Next, add in your 1/2 can tomato paste. Don’t throw the rest away– just scrape out the other 1/2 can into a Ziploc bag, label it (you think you’ll remember what’s in there but trust me– when you’re staring at identical frozen ice cubes and trying to remember if that’s leftover pizza sauce or tomato paste, you’ll thank me), and freeze it. That way, the next time you make delicious ribs, you can use your leftover tomato paste, and you won’t have to buy another can. Yay for saving money and saving up for a trip to England (Oh me, oh my . . . will I EVER get there? Sigh). Speaking of that trip to England (which is the whole reason behind the name of my blog– more on this here), I had saved up about $900 last year from scrimping a little here and a little there, but then my baby girl had to have surgery, and POOF went my carefully-saved vacation money. 🙁 So I am back at square 1. But no worries– I keep saving a few dollars when I can, and hopefully, someday, I will get there 🙂
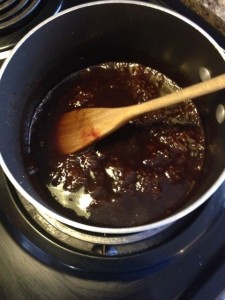
But back to the RIBS! Add in your tomato paste and whisk the sauce so that all the tomato paste is incorporated, and you don’t see any lumps. Simmer the sauce on medium low heat for about 20-30 minutes, until it thickens and gets nice, slow bubbles going, like in the picture. It won’t be as thick store-bought sauce, but don’t worry– it will thicken even more as it cools. When it’s the consistency of a thin gravy, turn off the heat and pour about 3/4 of the sauce into a separate bowl. Cover this bowl and place it in the fridge to finish cooling.
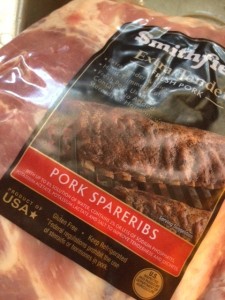
Now that our sauce is ready, let’s talk ribs. There are basically 2 “schools” of pork ribs– baby back ribs, and spareribs. The ones most commonly sold at BBQ places are baby back ribs– these are about 6 inches long, and they are much leaner than spareribs. They are also about twice as expensive, because they are cut from up around the backbone, where the $$ pork loin comes from. Hey . . . the right address makes all the difference. haha. Spareribs are the lower part of the ribcage, around the belly– where glorious bacon comes from. This means that they are similar in consistency to bacon– marbled with more fat, but incredibly tender and flavorful if they’re cooked right (low and slow, to tenderize that marbling). They are also about half the price of baby back ribs, and they are longer (maybe 8 inches long). In a nutshell, you can use either kind of ribs you like. I am going with spareribs (mainly because I’m poor. haha.). I also love low and slow meat that has tenderized to the point of butter, with all the glorious taste that goes along with that. YUM.

Split your rib rack in half, with a knife, and place both pieces on a foil-lined baking sheet that you have sprayed with cooking spray, to keep the ribs from sticking too much. Using the 1/4 sauce you didn’t put in the fridge, brush the ribs on both sides with sauce. *Note: Do not use the same brush or sauce, again, after you have brushed the raw ribs. Raw pork is not something you should mess with– go ahead and pitch whatever sauce is left, from that 1/4 (or just keep globbing it on until you use it all up). That’s why we reserved some sauce in a separate container– raw and cooked pork should never mix because we don’t want anyone getting sick. Cover the “sauced” ribs tightly with foil covering the whole pan, and then roast at 275 degrees for 2 hours. Yes. You can watch a movie and still call it “cooking,” because you are technically “monitoring” the ribs. Hehe.
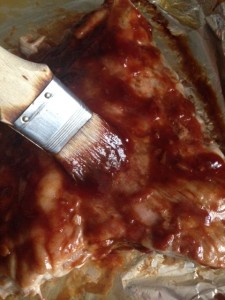
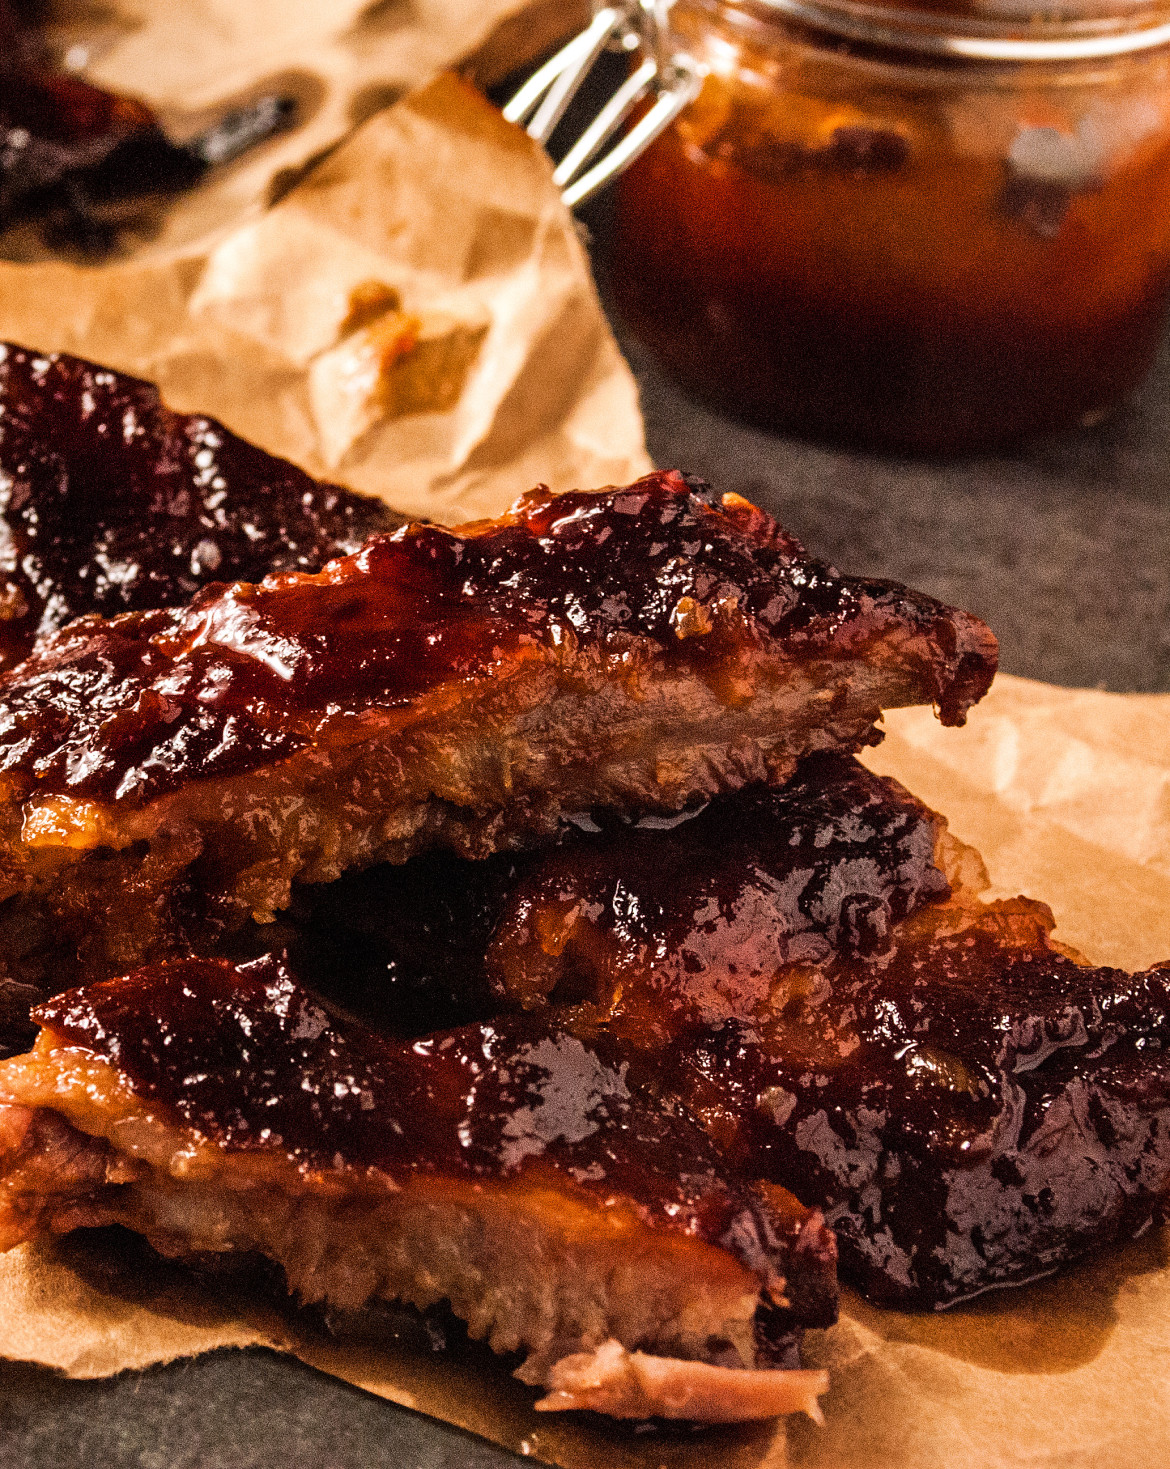
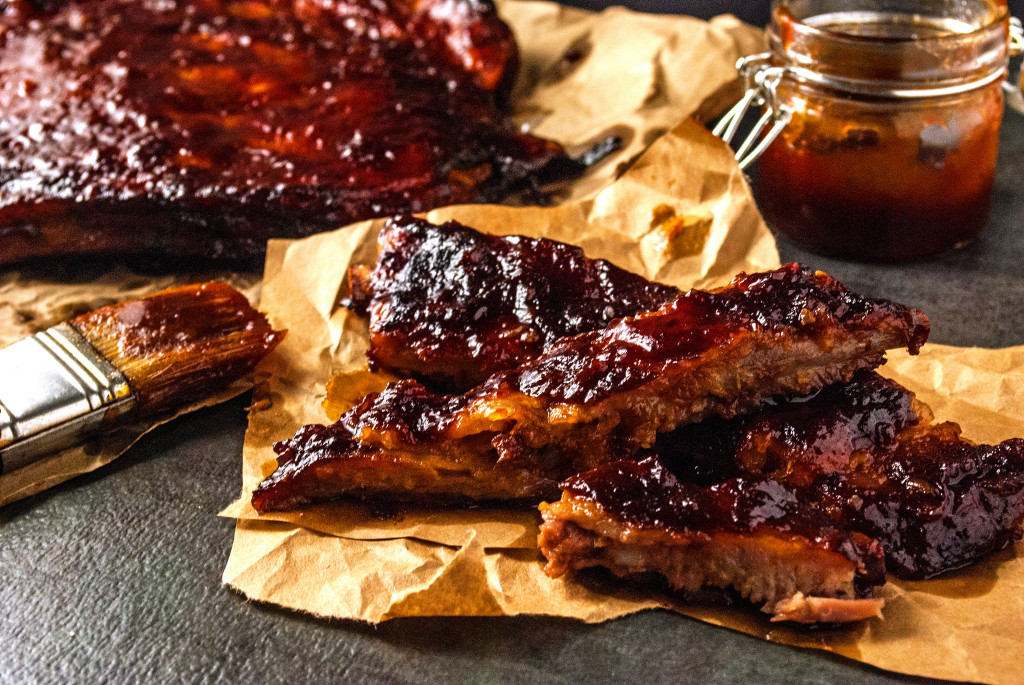
After 2 hours, pull those ribs out and have a look. Pull off the top layer of foil and raise your oven temperature to 300 degrees. Take a fresh brush and the bowl of sauce you reserved in the fridge, to use when the meat was no longer raw, and brush another layer of sauce over the top of them (you don’t have to worry about coating the bottom– just brush the part that is showing). Put them back in the oven and bake, uncovered, this time, for another 30 minutes. Repeat this basting/baking process 2-3 more times, depending on the thickness and size of your ribs. The larger the pieces of meat, the more cooking time they will need to become tender. My spareribs took 2 hours covered in foil, and then three 30 minute “sessions” without foil, being brushed with sauce in between. After that extra hour and a half, my ribs looked like . . . (go ahead– I know you want to look and see what all that barbecued glory looked like . . . keep scrolling . . .)
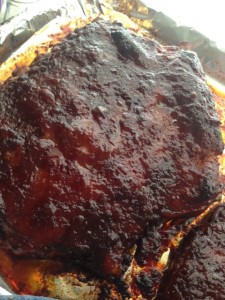
THIS! Seriously. Look at that gorgeous, baked-on stickiness that is so essential to a tasty rib. It wasn’t one bit burned, but the sauce had caramelized and reduced, over the multiple bastings, so that it had a rich, smoky taste and a sticky sweetness that was to die for. To make sure your ribs are done, gently poke a fork into them– the meat should be so tender that the fork goes through without any problems, at all– the meat may even flake, because it’s so tender. If it’s tough, put your baking sheet back into the oven for another 20-30 minutes and then test the ribs, again.
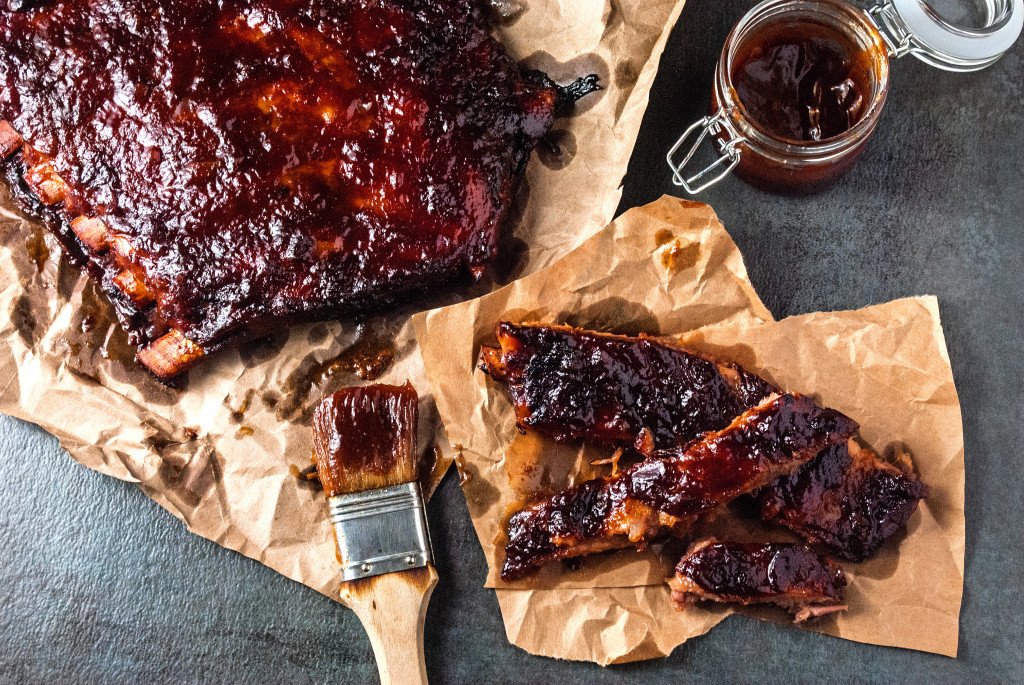
When your ribs are tender, try to avoid turning into a caveman and stuffing the ooey, gooey sticky meat into your face, and spitting out bones as you belch. I know. It’s tempting. But restrain yourself. 😉
If you want, you can use a knife to cut between the bones and make individual portions, or you can just let everyone cut off the amount that he or she wants. Make sure you have plenty of napkins handy, because the sauce is messy, and the ribs are so delicious that you will have amazing, sticky loveliness all over your hands, face, and . . . oh, I don’t know . . . hair? (Gives the hairy eyeball to my toddler and gives a deep sigh . . .)
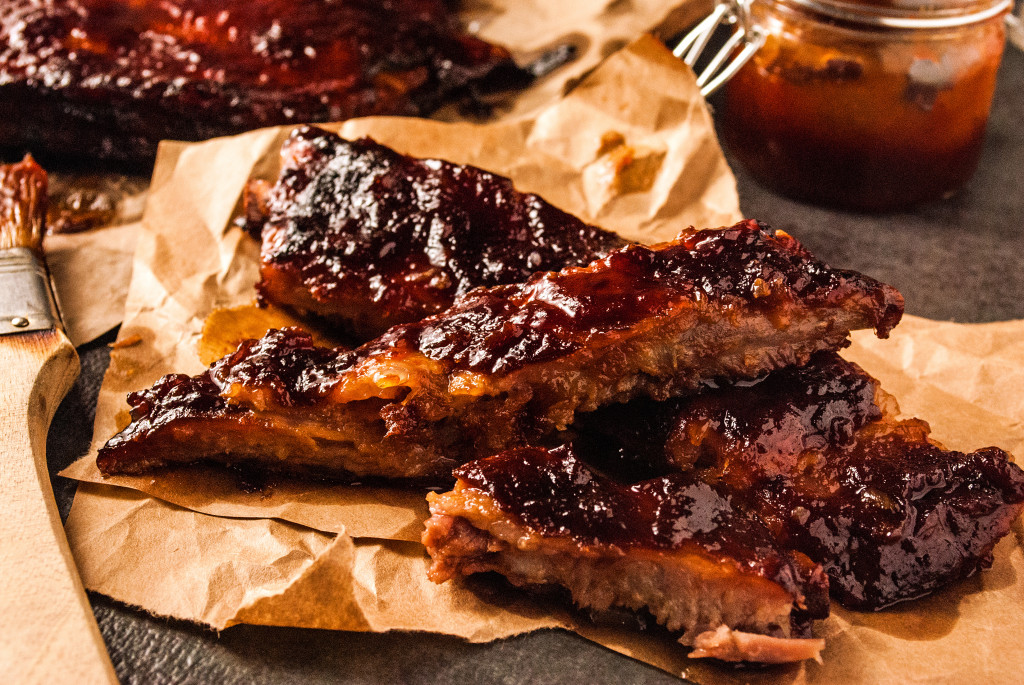
Ribs take a little while, but they are awesome for a big get together– fix yourself a big batch of these for the next Super Bowl party or get together– your guests can bring side dishes and desserts. But you may not even need any other food, because everyone will be eating these, instead. Mmmmm . . . Pees Pash da Napkinsh . . . I mean, uh, chomp, chomp . . . please pass the napkins.
You did it. And I’m just so proud of you.

Disclosure: This post may contain affiliate links, which just means that we get a few pennies if you purchase through our link. I never recommend products that I don't personally use and love. Thanks!

