Easy Homemade Cloth Napkins
I was once desperately, head over heels in love with a man. It was so bad that I once ran an entire bathtub of water, jumped in, dreaming of my dreamboat, only to leap out, realizing that I had run the entire tub full of cold water. Love makes you stupid.
I used to cry myself to sleep every night, for months. I felt sick to my stomach at all times. I lost 20 pounds. I used to pray, every night, that I would hear a knock on the door, and, miraculously, it would be my love, transported from thousands of miles away. But he never showed up. Love makes you sick.
But, one day, I woke up. Well . . . technically I woke up all those other days, too, but I digress. One particular day, when I woke up, I realized that this man was never going to come for me. His promises, stringing me along, waiting for him, were never going to happen. I would never, ever open the door and see him standing there smiling at me. Love makes you sad.
Stupid, sick, and sad. I hope you appreciated that alliteration.
And I decided to grow up. I heaved my sick, hurting, broken heart off the floor, and I poured my frustration and pain into other things. I became a teacher. I started to volunteer with charities– and was amazed to find that I really enjoyed it. I dusted off the long forgotten cooking skills my mother had taught me. I started to sew. I prayed. And I started to live, again.
Love makes you smarter. Look at that. Alliteration, again. Sorry. I couldn’t help myself.
The holidays can be an emotional roller coaster for many people– especially for those who may have recently lost a loved one or undergone a major life change. If you find yourself in a place of sadness or heartbreak, now . . . or if you have gone through some kind of change in your life that leaves you lonely, sad, or depressed, sit back and take a breath. Realize that life is still beautiful– even if things didn’t turn out the way you planned. I once had a very wise college roommate who told me, “When you are hurting, reach out to help others. Nothing will help heal your heart like filling the hearts of others.” And she was so right.
So let’s do just that. What are we waiting for? Let’s do this.
An easy way to bring a smile to the days of others is to make them something beautiful and thoughtful. Today, we have just the ticket– homemade cloth napkins. I can think of so many uses for these little darlings. You could choose a cheerful pattern and line a basket with this beautiful napkin, and then fill it with your neighbor’s favorite treat or baked good. How about Cranberry Almond Scones? Or homemade Milano cookies? Spend some time baking with your kids. Make some memories and try not to sweat the mess. And bring some joy to someone’s day.
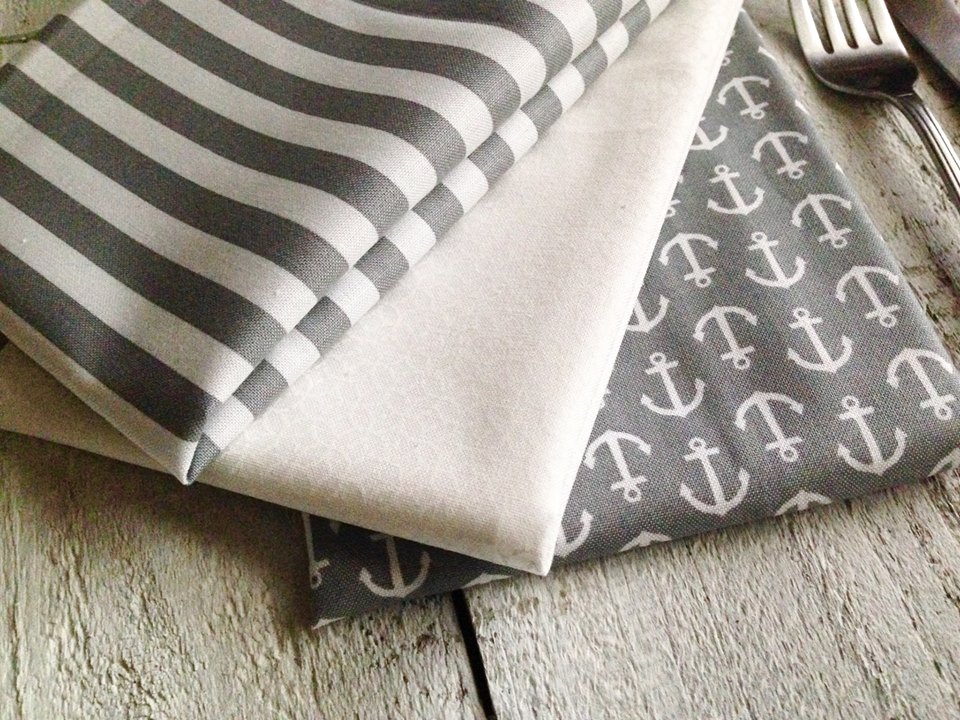
To start with, decide what color napkins you want to make. You can choose a variety of colors to match your baked goods (like a beautiful ruby red for the Cranberry scones), or you can decide to make an entire set of napkins, for a beautiful Christmas dinner setting. Cloth napkins can run you about $5 apiece, at the store– make your own for 1/5 of the price, and hand choose your patterns, too. I like to use fat quarters for cloth napkins. At Walmart, these little babies are 97 cents, apiece. Each one will make a generous napkin, with material to spare. And who doesn’t love a cute fabric stash? You can use your leftovers for cute projects, like the Folded Star Potholder we did, here, the other day.
I like to get a variety of patterns, but all in the same color palette. It’s nice to have a little variety, but not so much that it jars the eye or your table’s color scheme. Today, I am going with gray and white– always a classic color combo. Gray doesn’t get enough credit. It instantly classes up any other color, and it looks good with everything. Start learning to accessorize with it, now. When you have gray hair, you’ll thank me for the experience. 😉
Get out a ruler and measure yourself a square 18″ by 18″. The fat quarter should be 18″, already, on the short side, but check it, just to make sure. If your quarter is exactly 18″, then you can fold the material, triangle, across itself, and just draw yourself a nice square and check that. Easy peasy.
Once your square is cut out, go ahead and measure 2 lines all the way around– 1/4″ and 1/2″. Basically, just make yourself several pencil lines as markers, and then connect them. Watch out for little baby hands, while you go! They grab your materials quick as a flash! But they’re so cute, with those little dimpled fingers, that you don’t mind, do you? Go play for 5 minutes and then come back. No wonder I can’t ever get anything done.
This is what your finished 1/4″ and 1/2″ lines should look like. When you get to the corner, measure yourself 1″, square. That is just to help you with a neater corner– I’ll show you how to do that, in a minute.
Fold the corner to meet the 1″ mark. Crease it with your finger. This is going to be the basis for our mitered corner. Mita-whahh? I’ll show you! Never fear.
Leave your crease at the corner and go ahead and start your side folding. Remember those 2 lines we drew? Time for them to come onstage– they’re the star, right now. Fold your material on the 1/4″ line. It should perfectly meet the 1/2″ line. But don’t sweat if it’s not 100% accurate. These are napkins, after all– not the Mona Lisa. Just try to make your material a little sandwich that stops at the innermost line, and you’ll be good to go.
When you get the initial side folded, go back and fold your “fold” one more time. Fold first on the 1/4″ line, and then fold up, again, on the 1/2″ line. You are basically turning the rough edge, in on itself, so it doesn’t unravel.
You run into a snag when you hit the corner. Remember that corner crease we did? I have drawn a black line on it, since it was hard to see. Bend your corner, again, so that it touches the first crease.
Fold your corner back on the original line. It should look about the same as the first time you did it, except the very tip of the corner will be folded under.
As you fold and then fold, again, with your sides, you come to the corner. Just fold and fold again with the corner piece, just as if it were a regular piece of the side. Continue folding the other side, the same way. Gosh. I’m sorry that this seems confusing. Hopefully the pictures make it clearer. This is called “mitering” the corners– folding them into an angle, at the corner. Pin your corner in place, so it doesn’t shift. I generally pin the sides, too, just to make sure they stay where I want them. If you look at the above picture, in the bottom right of the napkin, you can see the folds more clearly. Fold once, then fold it over again. Do this double fold all the way around. It will make more sense once you start doing it, even if it’s hard to describe.
This is an example of another corner that I chose to do in a point, rather than as a squared edge, like I did with the striped napkin. You can do your corners either way– or use a variety. Whatever floats your boat. If you want the corners more pointy, just pull the pieces together so that they touch. If you want squared edges, don’t allow the sides to touch. Just keep messing with it until it looks the way you want it to be. Then pin in place.
Sew your hem along the top edge. Make sure you remove the pins, as you go. Sometimes, you can get to sewing, and you’re clicking along, humming a song, and you sew right through a pin. Ouch! Don’t do that to your faithful little machine.
When you’re finished hemming your napkins . . . take a breath, because that’s all there is to it! You’re done! Give them a good ironing, and they’re good to go. Make a beautiful collection of napkins for your next holiday. Make a set of napkins, wrapped in a beautiful ribbon, as a hostess gift for the next time you are invited over for dinner, somewhere. Use a napkin as a pretty basket liner for a cheer up gift for a friend or neighbor who could use a little pick me up. Fill it with baked goods and your favorite coffee or tea. Take a minute to talk– and several more, just to listen, without talking at all. Sometimes, all someone needs, is a little care.
You did it. And I’m just so proud of you.

Disclosure: This post may contain affiliate links, which just means that we get a few pennies if you purchase through our link. I never recommend products that I don't personally use and love. Thanks!


