
Yum
When I was a kid, my Mom used to make a sticky, sweet, slightly savory chicken dish that we all loved. I now know it was a honey curry sauce she poured over the top, but as kids, we used to shriek in mock horror and say “Mom it’s GREEEEEEEEEN chicken!” To this day, I always secretly chuckle when I make this recipe. There’s nothing like calling something sophisticated with honey and curry a childish name like “Green chicken” to bring it down a few notches. 😉
But whatever you call it, this recipe truly is delicious. And it will surely become a favorite in your house, just as it was in ours. It is quick enough for a busy weekday meal, and easy and delicious enough to whip up for a last minute summer picnic with friends. But wherever you choose to eat it, I hope you love “Green Chicken” as much as I always did as a kid, growing up.
What are we waiting for? Let’s do this!
Honey Curry Chicken
(Adapted from Taste of Home and my Mom’s recipe)
Ingredients:
6 pieces of bone-in chicken, skin removed (I used 2 legs, 2 thighs, 1 breast cut in half)
Salt and Pepper
1/2 cup all purpose flour
4 tbsp. butter or margarine, melted
Honey Curry Sauce Ingredients:
1/4 cup brown sugar
1/4 cup honey
1/4 cup lemon juice
1 tbsp. soy sauce
1 1/2 tsp. curry powder
Directions:
Salt and pepper chicken pieces on both sides. Roll in flour to coat. Melt 4 tbsp. butter or margarine and pour into a greased 13×9 baking dish. Place floured chicken pieces into melted butter, turning once to coat. Bake chicken at 350 degrees for 30 minutes, and then remove from oven and pour whisked sauce ingredients overtop. Bake for 45 minutes more, basting frequently so that the sticky glaze adheres to the chicken.
*note: if your glaze starts to stick or burn to the pan toward the end, add a few tbsp. of water. You have to watch sugar sauces. Like seniors on a FL beach, they are prone to burning. 😉 Let’s take a look at the process in pictures.
This is one of those awesome recipes that you can make ahead of time, stick in the fridge, and then just pop into the oven when you get home from work. While you’re changing your clothes and getting the kids’ bookbags unpacked, your house will start to smell divine. You supermom, you. 😉
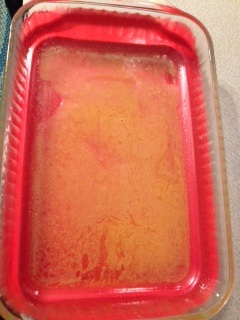
Start out by melting your 4 tbsp. (1/2 stick) of butter or margarine, and pouring it into a cooking-spray greased 13×9 baking dish (I have the best luck with glass dishes– metal cookware does not seem to thicken the sauce. I have no idea why).
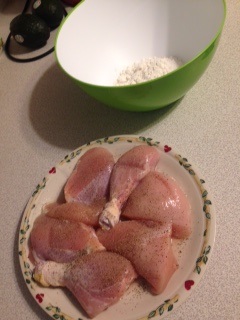
Next, take your chicken pieces and sprinkle them with salt and pepper. I like to spice the chicken with one hand, and then with the other hand flip the pieces and salt/pepper again with the clean hand. That way you don’t have to clorox your salt and pepper. 😉
Roll the seasoned chicken pieces in flour– it’s easiest to use one hand to handle the wet chicken and one hand to roll the pieces in dry flour. Your hands won’t get so caked up with flour that way. Don’t ask me how I know that. 😉
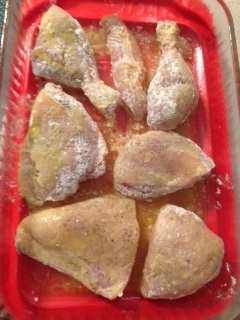
Once you have coated your chicken with flour, place your chicken into the melted butter in your baking dish. Turn over each piece so that you get butter on both sides. Don’t be super picky about this– just lay the chicken down, then turn it over, butter side up. Voila. Done. At this point, if you’re making the meal for later on, cover your pan and stick it in the fridge. If you’re baking right away, pop this chicken, “unadorned,” into a 350 degree oven for 30 minutes. We want the chicken to bake a little bit before adding the sauce so that our sauce doesn’t scorch or burn before the meat gets completely done cooking. Again, don’t ask me how I know this. 😉
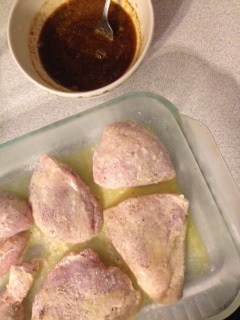
After 30 minutes of baking, your chicken really won’t look too much different. It just has a little head start, but it will still be raw. Whisk together your honey curry sauce ingredients and pour them over the top of the meat pieces.
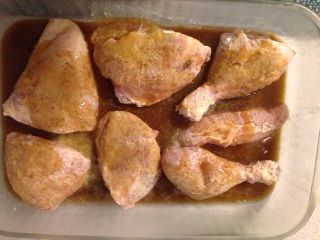
Don’t be too picky about this, either. You might not “douse” every single inch of the chicken pieces this first time. No worries. We are going to baste these little chickies for a while, so you’ll have a chance to apply bronzing tanner, er, sauce, to their little legs as we go.

After you have poured the sauce over the chicken pieces, bake for roughly 45 minutes more, basting every 15 minutes or so. Basting just means that you pull the pan out of the oven and spoon pan sauce over the meat. Each of these “baptisms” just gives the chicken another layer of sticky loveliness to be baked on. It hasn’t happened often, but in the event that your sauce starts to dry out or get a little burned looking, just add a few tbsp. of water to the edge and swirl it around. It should be enough to keep your sauce from drying out, and enough to keep the chicken nice and toasty at the spa. 😉

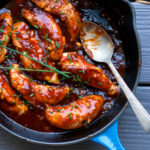
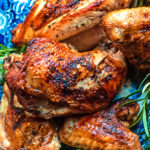
After 45 minutes, your chicken should be done. Your sauce should be *divine.* Actually, I’m pretty sure if this came in a mix, it would include a free halo. 😉 I usually give the chicken one final basting and let it sit for 5 minutes or so, to let the juices go back into the meat. You can lightly tent with foil to keep it warm, or you know, grab one right there without a plate and pretend you’re “tasting.” You are the chef, after all. 😉

Just like ribs, these are sticky, delicious, amazingly fun to eat pieces that beg to be brought to a picnic or invited to a backyard BBQ.

I can’t think of anything better than planning a huge, backyard BBQ with your friends, and letting this chicken shine. Laugh at the sauce all over each other’s faces. Smile and look at your saucy teeth. Eat corn on the cob and have a watermelon seed spitting contest. The last, glorious days of summer should be savored, and good food is always a way to laugh and have fun with those you love.
You did it. And I’m just so proud of you.

Disclosure: This post may contain affiliate links, which just means that we get a few pennies if you purchase through our link. I never recommend products that I don't personally use and love. Thanks!
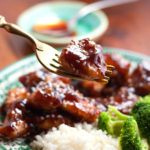
This was so tasty! The sauce wasn’t as thick but got it there on the stovetop and it was so yummy! We will definitely be putting this in our regular rotation!
I’m so glad you tried it! 🙂 I seem to have better luck with the sauce thickening in a glass baking dish rather than metal– I’m not sure why. But I think thickening the sauce on the stove sounds like a quick tip to remember! 🙂 Thanks for giving it a try!