
Have you ever wondered how to age paper? My quest started when I needed some ancient looking “clues” for a pirate birthday treasure hunt. I couldn’t find anything I wanted at the store, so I did a bit of research and made my own. And I’m sorry, but after you see how fun it is to make paper look ancient, you will be “antiquing” everything from your treasure hunt clues to your water bill. It’s just too cool– and did I mention it was easy?
What are we waiting for? Let’s do this!
How to Age Paper
Supplies you will need:
Paper (I used plain printer paper– you can print your message out ahead of time and the message will survive the process)
Instant Coffee (1/2 cup to 2 cups water)
Directions:
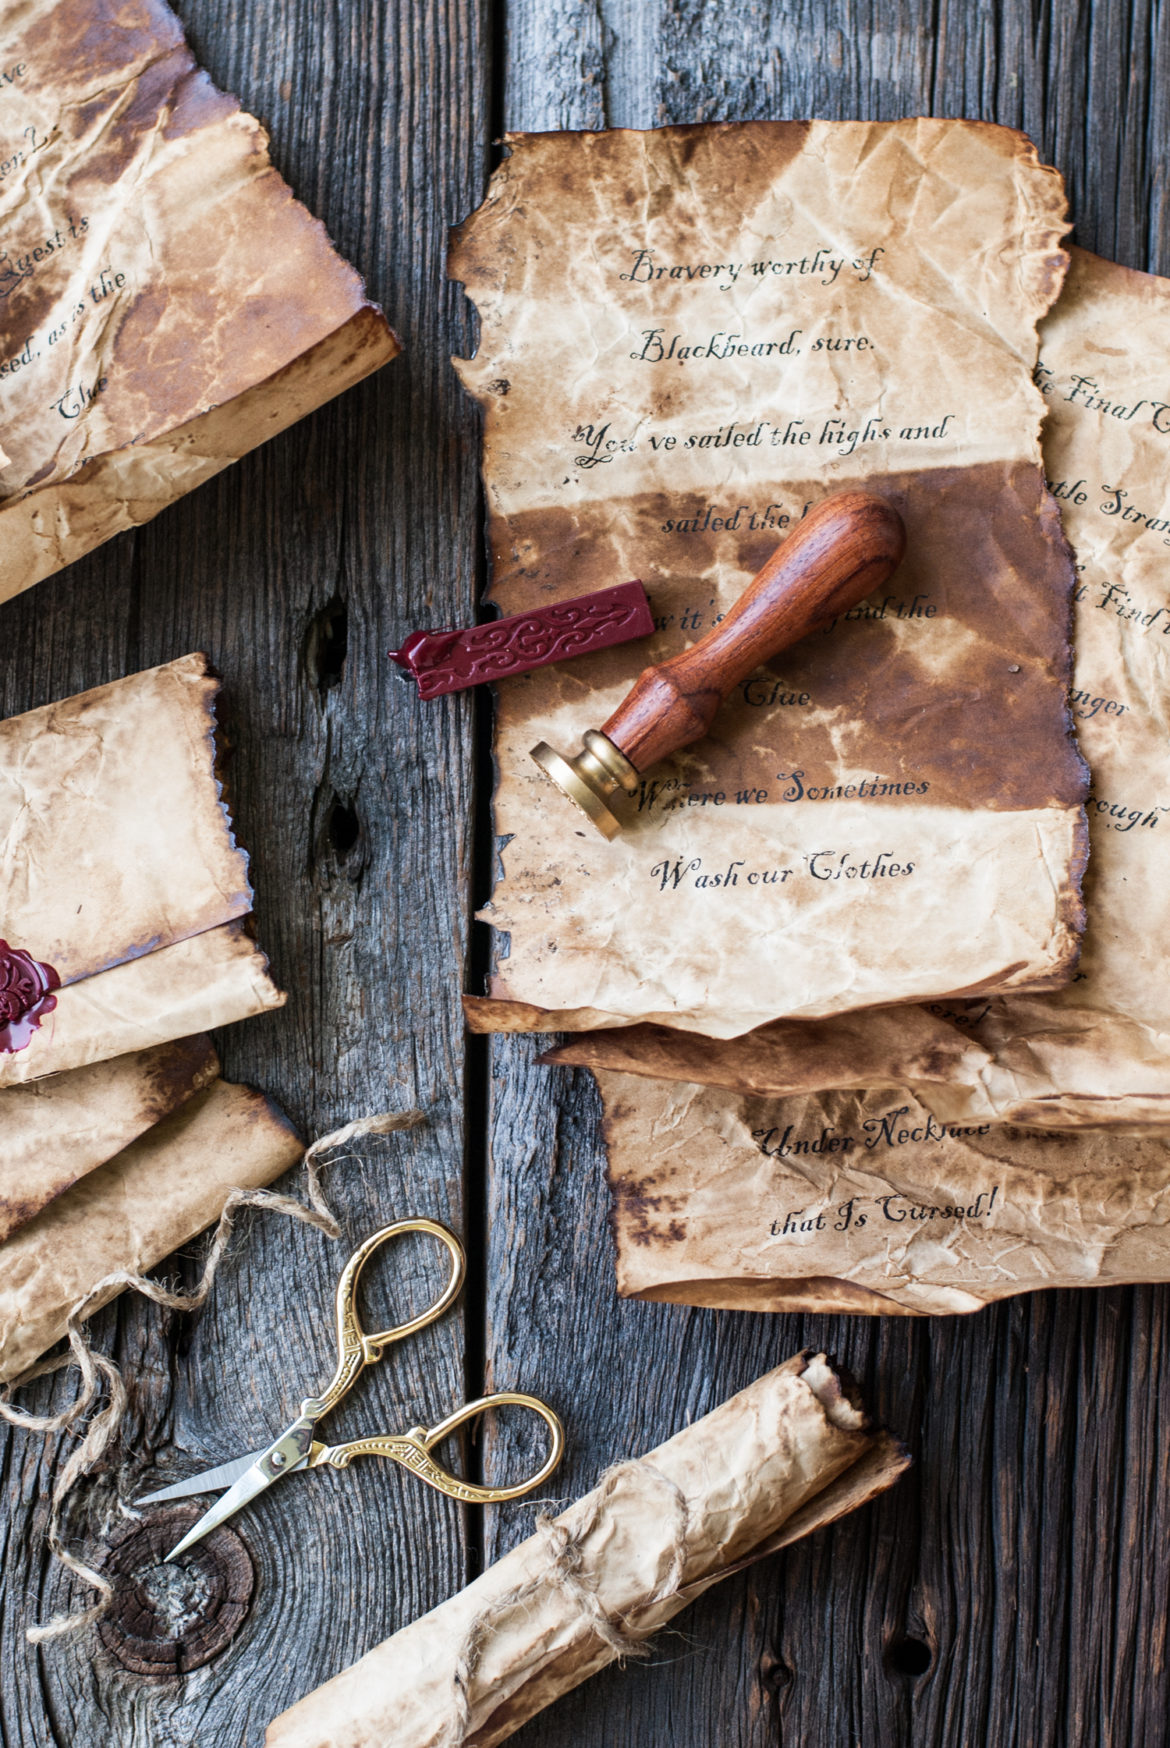
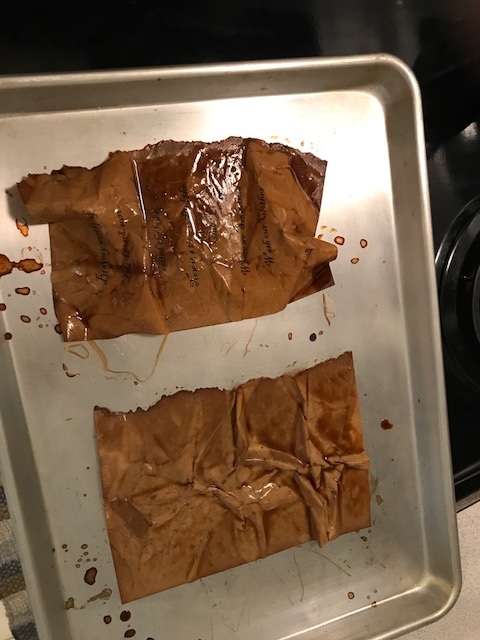
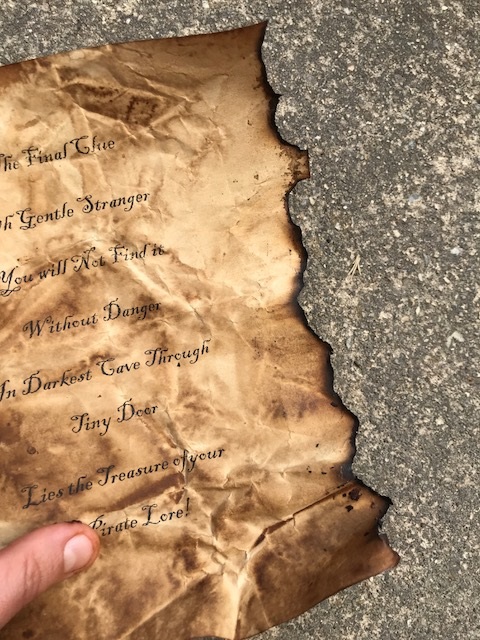
Print out desired message on printer paper. Preheat oven to 225 degrees and prepare paper. If you need to split sheets in half, trace a line down the center using water and a paintbrush and let the water soak in before tearing– the “tear” mark will be much smoother this way. Crumple up paper and dip papers in coffee mixture (it helps to make water warm when you mix in coffee so that it combines more smoothly). Allow excess coffee to drip off paper and place, slightly crumpled, on cookie sheet. Bake 5 minutes at 225 degrees and then flip over, baking another 3-4 minutes on the other side until paper is dry and crisp. If paper is not to your desired darkness, re-dip and re-dry for an even darker shade. When sheets are finished, roll up and burn edges slightly. Make sure to put out the smoldering parts with a wet stone rubbed over the burned marks, to avoid further burning once desired result is achieved.
This is seriously just so cool. Let me show you how I turned plain ‘ole printer paper into the coolest pirate birthday treasure hunt of the century. And you can, too! 🙂 Let’s take a look at the process in pictures.
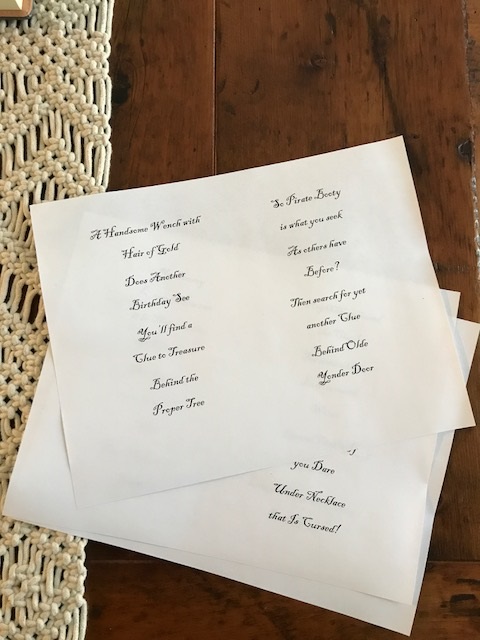
The coolest thing about this is how ridiculously simple and fun it is to do. My 6 year old helped me. That’s how easy it was. You can “print” your message first, so you don’t have to hand write everything. I wanted my papers to be kid sized, so I did 2 columns and landscape format in Word. While you are setting everything up, preheat your oven to 225 degrees (use an oven thermometer to make sure your temperature isn’t too high or too low). That way, when your papers are ready, your oven will be too. 🙂
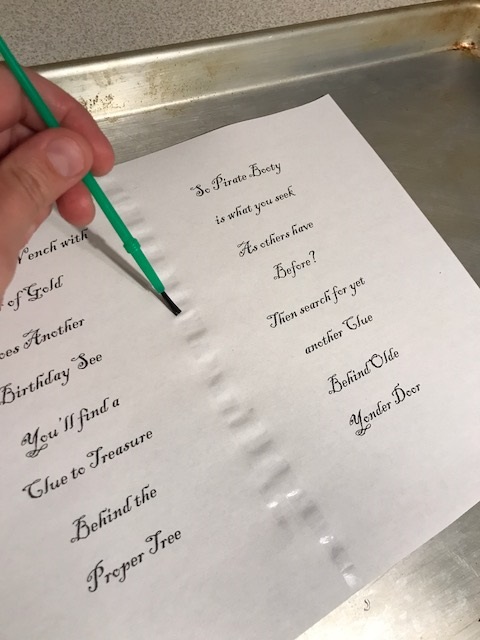
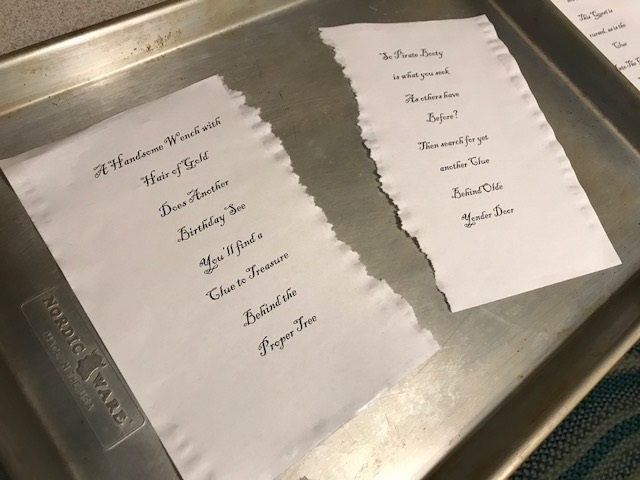
If you need to split your papers in half (as I did), it helps get a cleaner “tear” if you wet the line you want to tear with water, first. Just use a cheapie paintbrush and get the line nice and moist. Let it sit a few minutes, and then gently pull apart.
See how easy that was? You’re so smart. I love working with you.
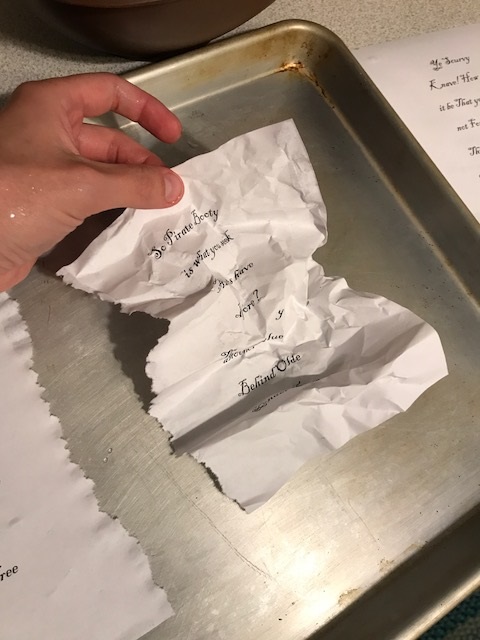
Crumple up your papers if you want them to look weathered. I also tried some without wrinkling (kind of boring), and one in which I folded the paper in fours (the fold was hard to see in the end result). Crumpling produced the best texture.
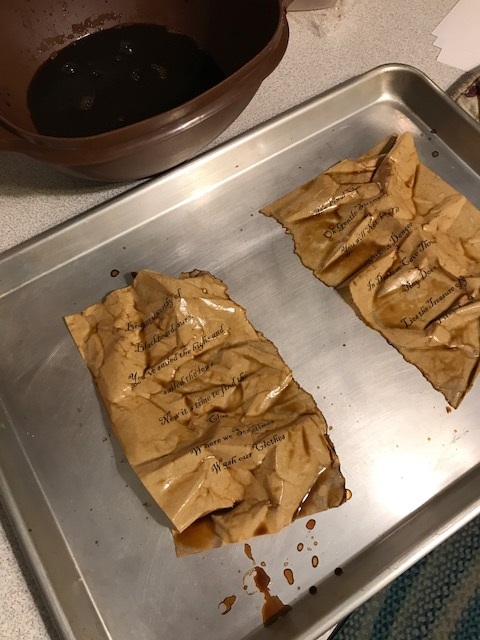
You can use any coffee you want, but I used instant coffee because I was able to achieve a deeper stain than my normal “drinking” coffee would give me. I added 1/2 cup instant coffee granules to 2 cups warm water and whisked until everything was well mixed. Dip your crumpled up papers into the coffee and let some of the excess liquid drip off. You don’t want to lose all your liquid– see where the coffee pools in those cracks and crevices? Those extra dark parts look super cool in the end product. Don’t worry about your cookie sheet either– the coffee all washes off at the end.
I kind of “ruffled” the paper, carefully, once it was on the cookie sheet. I wanted to make sure that some of those peaks dried in place, rather than everything flat. I also experimented with putting one with words up and one with words down, to see if it made any difference in the finished product.
And it did. I found that the “up” side was the darkest. That surprised me, but here you see why. When the coffee lay on top it dried there, whereas the coffee on bottom tended to stick to the pan. I also found that the wetter the paper to start with, the more severe the lines because the more coffee pooled in the crevices during the drying process.
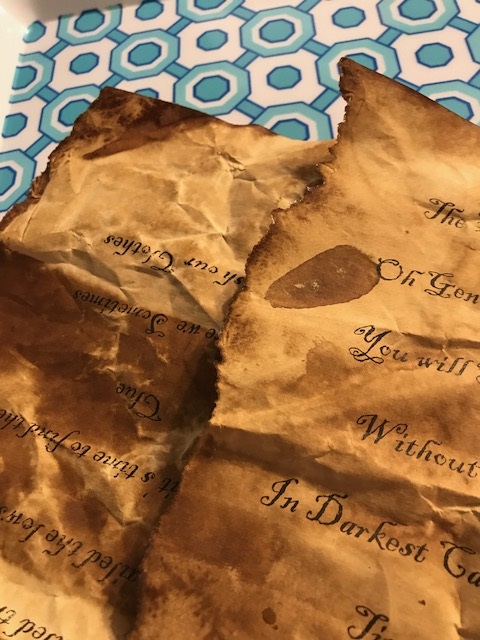
Even though I liked how they looked, I wanted my parchments to be darker. (“Parchments” is what they are now. They have grown up and graduated from pure printer paper. They don’t call themselves regular “paper” anymore. They wanted me to tell you). So after they went through the oven the first time, I re-dipped in coffee (DOUBLE DIPPING!!) and dried them the same way in the oven. I liked the “twice dipped” parchments better. They were just the color I was looking for. Plus, my entire house smelled like Starbucks while they were baking, which was a nice added bonus.
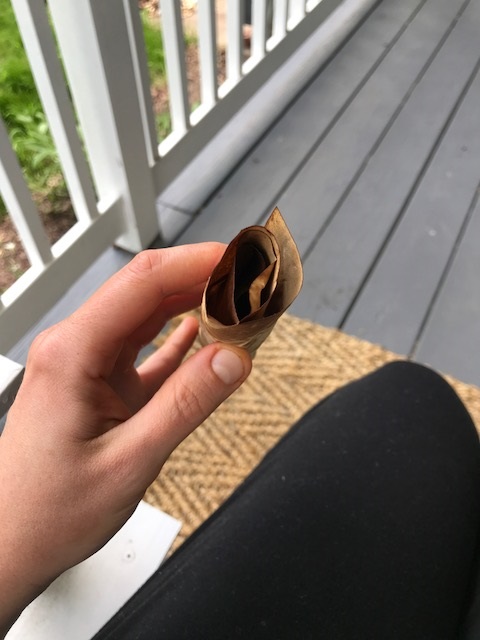
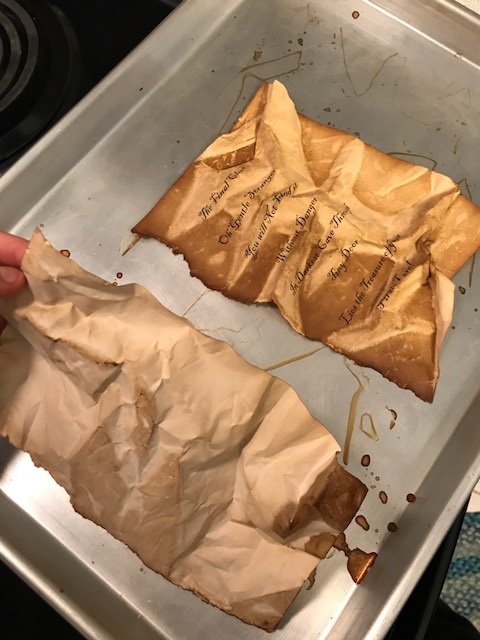
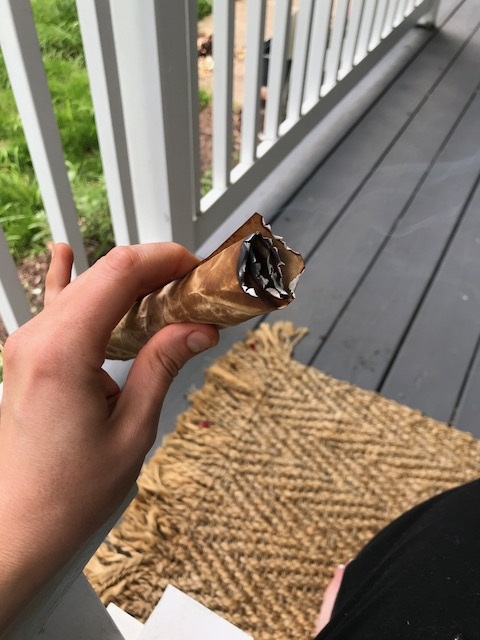
Once my parchments were dried completely, I took them outside . . . to the woodshed. Ok well maybe not to the woodshed. But I knew this part would smoke, and I wanted that smoke outside instead of inside. Roll up the parchments and slightly burn the edge that you didn’t already tear. The torn edge already looks nice and raggedy, but a little singe will help the straight edge to look more weathered. You don’t want to catch the entire thing on fire– just start it smoldering and then blow it out.
Like this.
Have a rock or pebble nearby, and some water, I found it worked well just to use a smooth stone from the garden (which, conveniently, was already wet from rain) and just smooth over the burned edge right after burning. That puts out all the white ash so that your paper doesn’t burn any more than you want it to. If you don’t do this, your paper will quietly burn and smoke until the burned part eats away at your message. Dipping the edge straight into water messes it up. So a wet stone rubbed over that smoking edge will put out all the fires and make your paper look “FAHHHHBULOUS DAHLING.”

And if you want to add that little bit of “extra magic,” I strongly recommend a personalized wax seal. These parchments are already amazing, but the wax seal takes them from “awesome” to “Um, this is the coolest thing I have ever seen in my life.”

I mean, who doesn’t love a treasure hunt or an “aged” letter that is sealed with a wax stamp and smells like Starbucks? I’m sorry– is this heaven? I think I’ve just arrived.

I’m contemplating doctoring up my electric bill this way. Perhaps I will sign it “Lower your rates lest ye regret.”

But no matter what you choose to make, aging paper is just a cool skill to know how to do. Whether you are aging treasure hunt clues or just making a fun set of stationery for a friend, this technique will bring the WOW factor to anything you decide to make. 🙂
Because you did it. And I’m just so proud of you.

Disclosure: This post may contain affiliate links, which just means that we get a few pennies if you purchase through our link. I never recommend products that I don't personally use and love. Thanks!


Thank you for this – its excellent – and so is the comedy -needed that too! ‘Yer awesome!
haha I’m so glad you enjoyed it. Happy creating! 🙂 — Emilie