Coffee cake is that siren of rich, buttery cake and decadent cinnamon/sugar/nutty goodness that pairs so well with coffee that it married coffee and decided to take its name. It is “cinnamon sugary” enough that you could *almost* make it pass for breakfast. It is the cake that you dream about at work, counting down the minutes until you can race home to it at the end of the day. A good coffee cake is hard to find, but this is the recipe upon which I settled after exhaustive (and delicious) tweaking of a basic recipe. I think the ratio of cake to topping is just right– but don’t take my word for it. Give this a try– and then taste it again (and again if necessary). Someone has to do it. 😉
What are we waiting for? Let’s do this!
Pecan Coffee Cake
(Adapted from Allrecipes.com)
Cake Ingredients:
1/2 cup butter, softened (no substitutes)
1 cup white sugar
2 eggs, room temperature
1/2 tsp. salt
1 tsp. baking powder
3/4 tsp. baking soda
1 3/4 cup all purpose flour
1.5 tsp. vanilla
1 cup sour cream
Pecan Streusel Ingredients:
4.5 tbsp. melted butter (no substitutes)
Scant 1/4 tsp. salt
1.5 tsp. cinnamon
1/2 cup white sugar
1/2 cup brown sugar
3 tbsp. flour
2.5 cups roughly chopped pecans (may substitute walnuts or use a mixture if you prefer)
Directions:
To make the cake, cream together softened butter and white sugar. Beat until the mixture comes together without being too crumbly. Add in the eggs, one by one, stirring after each addition. Add in dry ingredients and stir just until combined. Add in vanilla and sour cream and mix until combined and smooth. Set batter aside and make the pecan streusel mixture (these will alternate in the pan).
To make pecan streusel, melt butter and mix in other ingredients. Stir until all ingredients are coated completely with the sugar/butter mixture.
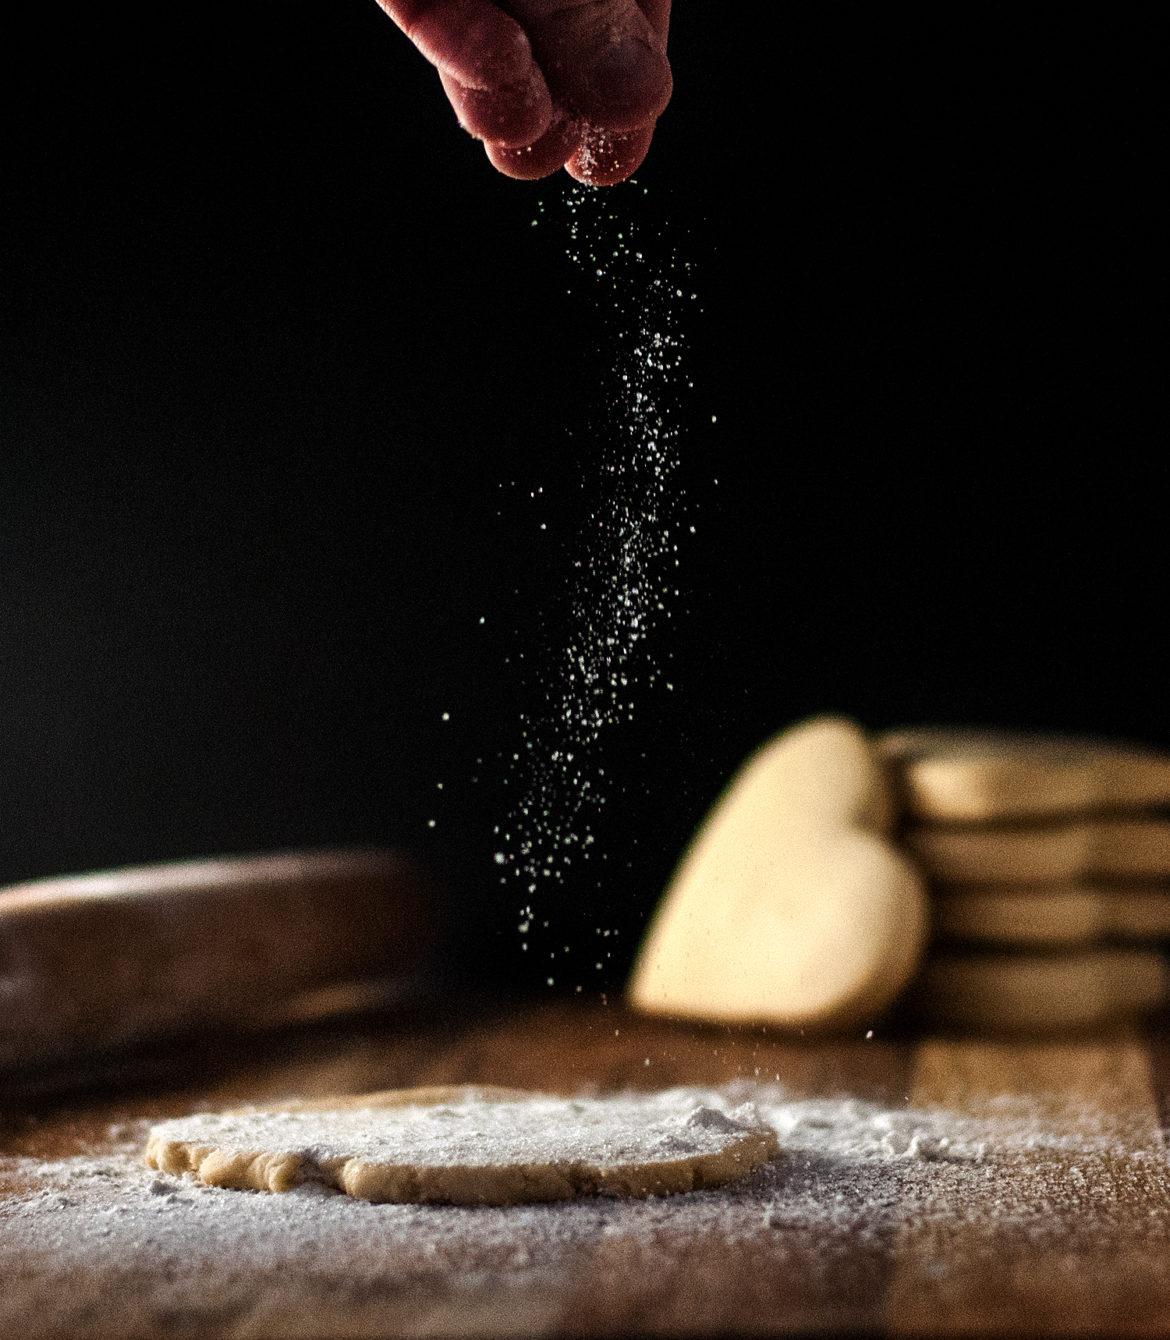
Line an 8×8 baking pan with foil and spray the foil with cooking spray (this helps for neater cutting later). Place half of your batter in the bottom of the pan and smooth it lightly with an offset spatula or the back of a spoon to distribute it as evenly as you can across the pan. Sprinkle with half of the pecan mixture. Top with the rest of the batter, and put the rest of the pecan mixture on top.
Bake at 350 degrees for 30 minutes (this can slightly overflow, so bake it over a cookie sheet to be safe). After 30 minutes cover loosely with foil and bake approximately 1 hour more, until the center of the cake springs back lightly when touched and a toothpick inserted into the center comes out clean or showing only a few moist crumbs (no liquid batter). Allow to cool completely before lifting cake out of pan with the foil and slicing into pieces.

Coffee cake has always been my nemesis. I could never get it *exactly* right– that decadent, perfectly moist cake bursting with rich, moist, buttery flavor, and that to-die-for top crumble that was just sweet and nutty enough without being floury in my mouth. Too short slices never seemed to get the proportions right– the crumb layers kind of melted together into a gooey mess that felt almost uncooked (eww). I tried many versions of this cake, and each time I made notes, corrected my errors, and tried again.
This is my version 6, believe it or not. And this is the version that I will make from now on. Some things seem crazy (an hour and a half bake time??? REALLY???), but trust me, that’s what it took. It surprised me too. I kept putting it in for 10 more minutes, and 10 more minutes, writing it down and thinking “it’s going to be burned to a CRISP!” but it wasn’t. I also found that cutting into the cake early destroyed that perfect, moist crumb and the niceness of the layers. So as hard as it is when your cake tests done (springs back lightly when touched, toothpick inserted into the center comes out with a few moist crumbs or clean– no gooey batter), let it sit on top of the stove to cool completely before you dig into it. Allowing the cake to cool also makes it easier (and prettier) to slice. When you place perfect little cubes of coffee cake loveliness on a plate in front of your friends when they come over for tea or coffee, you will be glad you skipped to my tips in version 6 instead of discovering all this stuff the hard way. You are oh so welcome.

To start with, this cake, as many baked goods do, requires room temperature butter and eggs. And WHY must you use room temperature ingredients, you might ask? Well, think of it this way– when you go to a party and the room is abnormally cold, what do you do? You keep your coat on, huddle in the corner, don’t talk to anyone or enjoy yourself.
But what if you step out of a cold, drizzling evening into a warm, beautiful room full of little glowing lamps, comfy couches, a roaring fire in the fireplace, and the smell of cookies baking? People are laughing and smiling. There are appetizers that smell amazing. You take off your coat. You want to be PART of that get together. You enjoy it. You have a good time.
Baked goods are the same way. They don’t want to be cold and uncomfortable when they meet up with other ingredients for a field trip. Take them out of the fridge about 1/2 hour before you’re ready to bake so that they can warm up a bit, take off their coats, and start doing the limbo with the other ingredients. Bring the butter and eggs (and even sour cream if you remember) to room temperature. You don’t want to be the one who throws the lousy, frigid party that no baking ingredient wants to go to. Trust me.

Start out by creaming together your butter and white sugar. The room temperature butter will whip much more nicely than cold butter that isn’t comfortable enough to take its coat off and PARTAYYYY. See? Room temperature butter is better butter. You are so smart– I love working with you. It takes a few minutes to beat the butter and sugar in your stand mixer until they actually come together as a fluffy mixture, rather than just crumbs. But keep going, and after a few minutes you will have a beautiful, whipped batter.
Next add in your (room temperature– you already did it??? SO SMART!!) eggs. Add an egg, and then beat a few seconds. Turn off the mixer, add an egg, beat a little bit. This gradual adding keeps the mixture creamy and avoids a broken batter (don’t ask). Just add those eggs gradually. Trust me.
Next, it’s dry ingredients. Turn the mixer on low and slowly mix just until combined. This is not the time to flip the mixer to high and go call your Aunt Mildred (sorry, Aunt Mildred). Just a few mixes until the dry ingredients are mixed in. After the dry ingredients are gently stirred in, then go ahead and add the vanilla extract and sour cream. Whirl those babies in for a minute. Don’t go crazy– just get everything nice and satiny and silky. Mmmmmm doesn’t that look delicious. It is. OHHHHH it is. You are creating greatness right here, my friend.

Now, making the pecan streusel topping takes a degree in bioengineering from NASA and of course a host of other qualification that take years . . . ahem. I’m kidding. It’s so easy . . . are you ready? MELT BUTTER IN THE MICROWAVE. Yep. That’s it. Melt butter and stir the other stuff in. This is the step your child could help with (supervised, of course). “Stir this for Mommy! Good job! Thanks for helping!”
Now, in my exhaustive testing I tried many types, styles, sizes, and shapes of pans. I was looking for a piece of cake that had the buttery, moist cake clearly defined, without being lost in “cinnamon goo.” I also didn’t want the cake to swallow up the crumbs, because the chunky bites of cinnamon sugar goodness on top are one of the best parts of coffee cake. So here are my thoughts on the pans I tried:
- Bundt pan. Pretty shape, but there wasn’t enough batter to make the layers easily, which was a pain. Also a PAIN to clean, as well as to get the cake out in one piece. X on Bundt.
- 9×13. Again, not enough to do 2 layers of crumbs without it overflowing. If you are using a 9×13 you will need to make 1.5 times the recipe and do only 1 layer of each thing (cake in single layer, topped with all crumbs). It wasn’t terrible, but the cake was just “meh” to me. It was cake with topping, rather than coffee cake with that cinnamon sugar swirling seductively throughout, with those gorgeous hunks of crumbs on top. I could see myself using 9×13 in a time crunch, though, since it took less time to bake (because it was thinner).
- 9×9. I had high hopes for this one. It took less time to bake than the astoundingly long hour and a half taken by the 8×8, and it didn’t play the “almost, I’m threatening! I’m threatening!!!” game of running over in my oven. However, spreading those 2 layers is already tricky, and a larger pan made this even harder, resulting in a TIIIIINYYYY bottom cake layer, which was basically nonexistent. Tragically, I had to vote X on 9×9, although I could see myself using it in a pinch if I simplified it to 1 layer of cake, 1 layer of topping (and adjusted baking time to be a little less). But you know, I’d kind of miss that internal swirl . . .
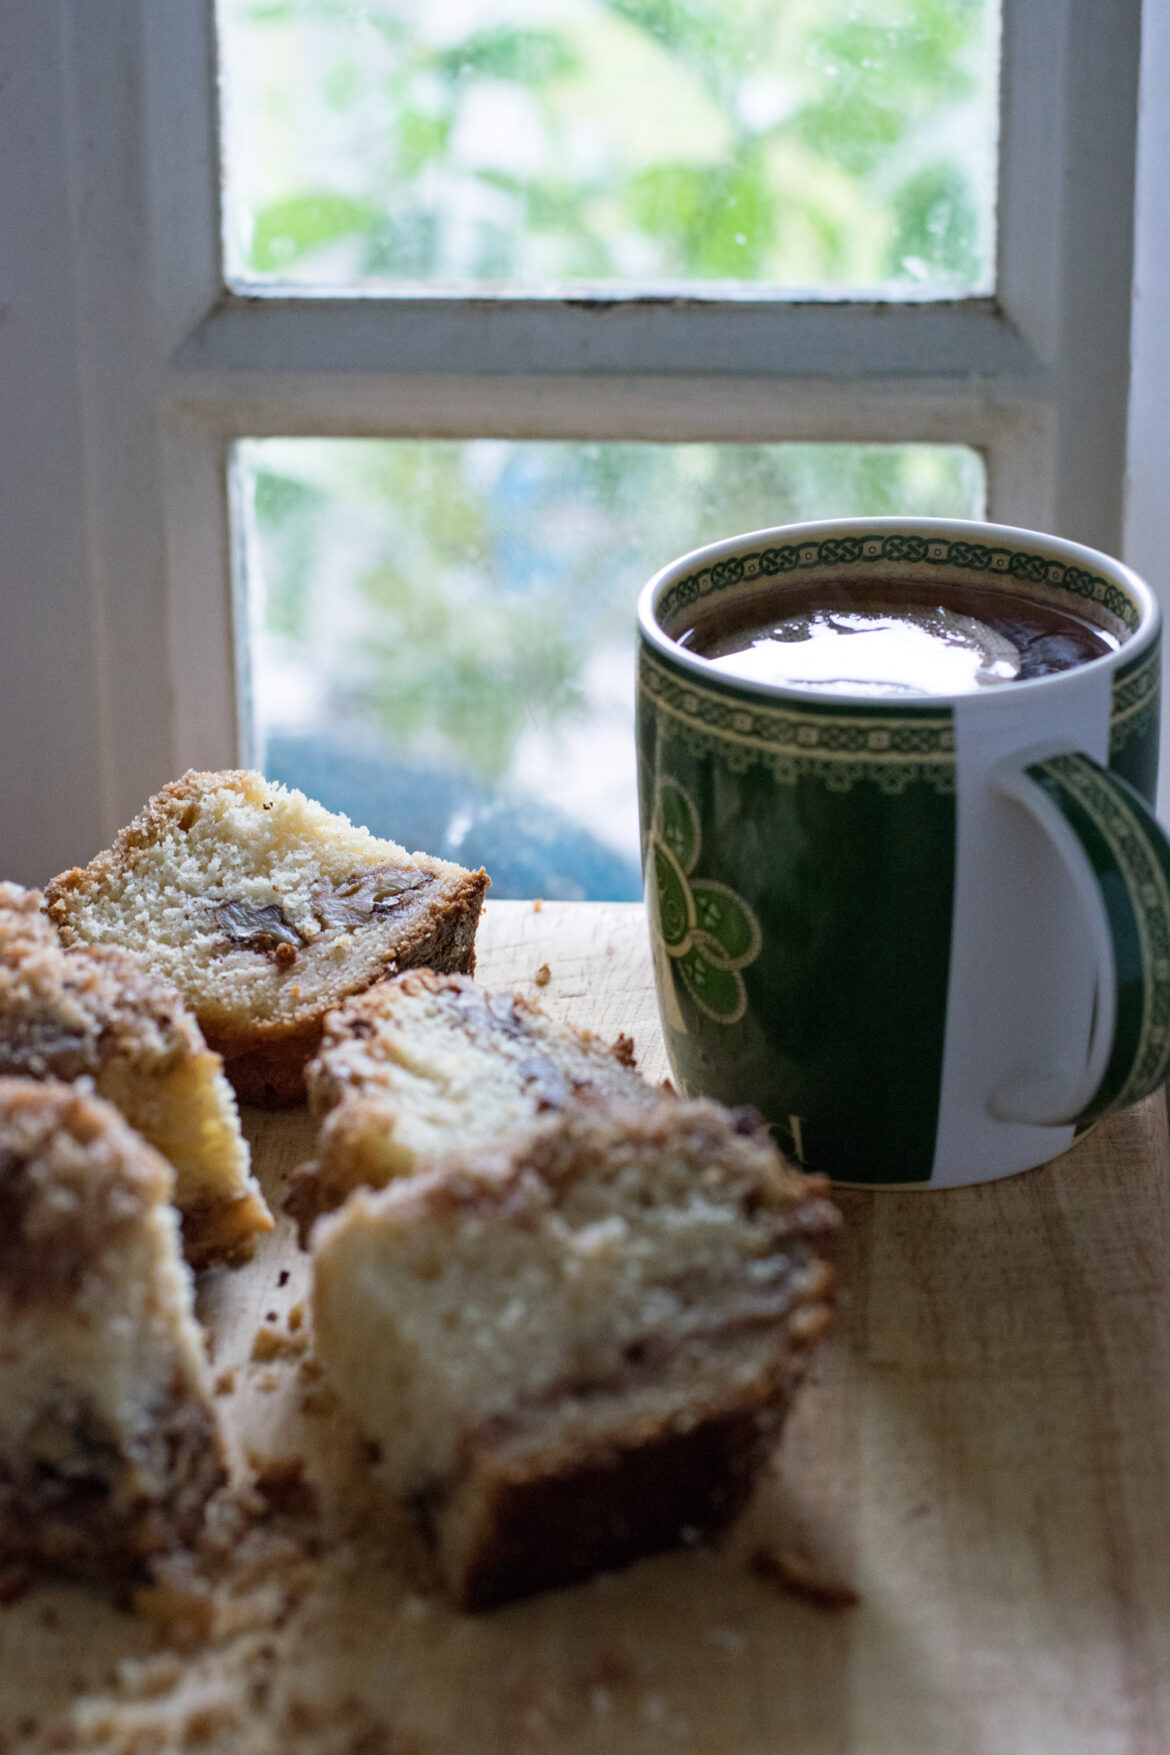
- 8×8. Well, what do you know. I didn’t expect this tiny pan to be my front runner. It seemed OHHHH so small. Yet, somehow, it turned out the best coffee cake of the bunch. Some possible issues I could see someone having with the 8×8: it takes a FREAKING HOUR AND A HALF to bake completely. Whoa, folks. That’s a LONG time. I couldn’t believe the edges didn’t burn, but they didn’t. After half an hour I had to lightly cover this bad boy with foil, or the top would have been burned to a crisp. I kept putting it in for “ten more minutes,” then ten more. I kept a tally of how many minutes until a toothpick came out with moist crumbs (no wet batter), and the cake sprung back lightly when touched in the center. I couldn’t believe it when I tallied up my marks and got 90 minutes. Whoa. Another issue with the 8×8 is that it *almost* runs over. A few times I got a drizzle of hot sugar down the side. Better be on the safe side and bake this over a cookie sheet, just to make sure you don’t get a hot mess in your oven. That being SAID . . . this pan made phenomenal coffee cake. The pan was small enough that I could make the layers very clear, and the cake was moist, delicious, buttery, and completely distinct from the streusel layer. I wanted to be able to see layers, and the 8×8 gave me tall, proud slices of coffee cake heaven. Apparently, like women’s lingerie, the more you squeeze into a small space, the more seductive it becomes. Make a note.
Bottom line: you can do your cake in any of these pans. If you just want a quick, tasty cake, then you can go with one of the single layer ones. If you want tall, proud, amazingly moist, buttery cake with separate layers and divine beauty on your tea table, then, as much work and time as it takes, go with the 8×8. Cover your cake after 30 minutes so it won’t get too brown, and make sure your oven really is 350 degrees and not running hot, by using an oven thermometer. I also moved around my oven racks to bake the cake in the center of the oven and not too close to the bottom heating element (we can’t have their pretty little cake bottoms too brown, now, can we?)

No matter what pan you use, make sure to let the cake cool before you cut into it. Yes, I know it’s hard. Yes, I know your entire house smells like the spirits of 1,000 grandmas were in there, whipping up snickerdoodles and banana bread and chocolate chip cookies and godliness. But loved ones, as hard as it is, you must wait. If you dig into that coffee cake while it’s hot, then sometimes the center isn’t done and you get weird, gooey, steamed cake instead of decadent, perfect, “this should be on the cover of a magazine but my family just inhaled the whole thing because it was so good” cake. If you want warm cake, then you can microwave your slice for 10 seconds before eating AFTER it cools. Trust me on this. Waiting is worth it.
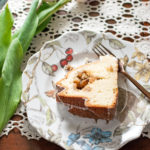
When your cake is cool (you waited. Good job. You’re such a good student), use the foil you put in the pan to just lift the whole thing out of the pan, and onto a cutting board. You can fold away the foil sides and Voila . . . it’s perfectly easy to cut the beauties into perfect little tea cakes, now. I like to cut mine into thin, tall slices about an inch wide. They look perfect that way– you can see all the layers, you can line them up on the plate, and you can set dainty slices at each place to complement the coffee or tea.
Or, you know, you can eat them all yourself and call it “recipe testing.” You’re studying, in a way. Aren’t we SUPPOSED to do our homework?
But whether you decide to eat this yourself or share with a friend, I can definitely predict one thing for sure.

I bet you won’t have any leftovers. 🙂
You did it. And I’m just so proud of you.

Disclosure: This post may contain affiliate links, which just means that we get a few pennies if you purchase through our link. I never recommend products that I don't personally use and love. Thanks!