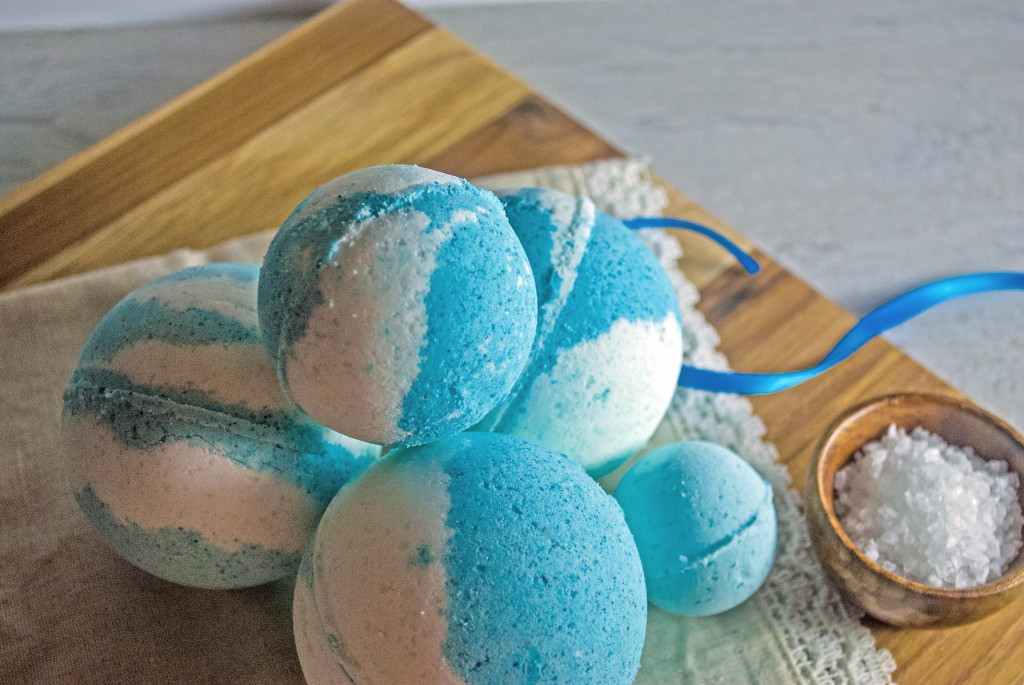
Have you ever tried a Bath Bomb? A WHAT??? A bath bomb– also called a “Bath Fizzy.” These adorable little spheres are sold in places like Lush, and high-end spas, you can also buy them online at https://www.amorbathbombs.com. You can come home after a long day, run yourself a tub of hot water, and drop one of these babies in. Soon your bath is fizzing like a Jacuzzi, and after a few minutes the bubbles die away, and you are left with an incredibly fragrant, softened bath that leaves your skin feeling pampered and velvety smooth. The only problem is that these little beauties cost about $6, apiece, at Lush, and this makes the fizzy pleasure all the more enticing and out of reach.
Unless . . . we could make our own (*Grinch’s face curling into an evil smile*).
Last week, after I left a store with one of those expensive bath bombs, I knew it was a love affair that wouldn’t die. And it was a habit too expensive to keep. So I went back to the drawing board and tested/tweaked online tutorials until I came up with a bath bomb recipe that you can make, yourself, at home, for pennies apiece. The finished Bath Bombs can be packaged in adorable ways and in many amazing scents . . . helloooooooooo holiday themed gifts! Homemade gifts are some of my favorite to receive, because they show that someone cared enough to craft something special just for me. So make yourself a batch of these beauties– and whether you keep them for yourself, or give them away to some lucky friend, they’re sure to be a big hit . . . Bombs away!
What are we waiting for? Let’s do this!
Homemade Bath Bombs
(My own adaptation based on multiple recipes that I tried– feel free to change it up and switch it up, but please link back here so no one steals my work 🙂
Ingredients:
–1/2 cups baking soda
–1/4 cup Epsom salts
–1/4 cup cornstarch
–1/4 cup citric acid (I found the cheapest place to get this was on Amazon here. I chose to get the 5 lb. bag because 1 lb. was $10, and for only $5 more I got 5x the citric acid, so I went the bulk route. But there are smaller containers if you want a smaller amount.)
— 1 1/2 tbsp. baby oil (I used scented baby oil so that I could save money on extra scent. You can also use plain baby oil and scent it with 5-10 drops of scented oil, if you prefer– I found that a great mix of quality and affordability for soap scents was P&J Trading here. They have a huge variety of scents at an affordable price, as well as excellent customer service. You can mix and match scents to create your own flavor combos, too, which is super fun!)
A few squirts of water from a spray bottle (if you add too much water it ruins the bath bombs, so applying the water with a spray bottle helps you to add water in tiny amounts)
Gloves (optional) and bath bomb molds (I found cheapie plastic molds at Hobby Lobby for $1.50, but I had much better luck with the metal ones from Amazon here, if you want to make Bath Bombs multiple times. I just found that the metal circles held up better in the long run.).
Directions:
Combine baking soda, Epsom salts, cornstarch, and citric acid until well combined. Add in baby oil, scent, and gel food coloring, if desired, and use your hands (using gloves keeps your hands from getting a gritty feeling) to mix the wet and dry ingredients together. Using a spray bottle, add water several squirts at a time, mixing well after each addition, until your mixture holds together when you squeeze some of the mixture in your hand. You want to add as LITTLE WATER AS POSSIBLE to get the mixture to stay together, or the bath bombs will not hold their shape while drying (too much water makes them flatten out instead of holding the round shape). I generally use about 7-8 “squirts” per recipe.
Once your mixture is sticking together, place just enough granules into each side of the round molds to fill them snugly, without packing, and then squish the rounds together, without twisting. Gently tap the top mold with your hand, remove half of the mold, and then turn the circle bomb-side down in your hand and gently lift off the remaining mold. Place the finished bath bomb onto a soft towel covered with a piece of wax paper, to keep it from denting while it dries. Allow bath bombs to rest, without touching each other, for 24 hours until completely dry. Carefully package in airtight bags so that the bath bombs stay dry until “tub time.” 🙂 Bath bombs will keep in an airtight container for several months.
Now, in pictures! And please remember to follow me on Facebook and Pinterest for more great recipes! ?
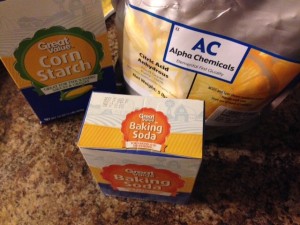
To start with, this process isn’t difficult– it just takes some practice. And the best part is that you can still “fizz” your mistakes. haha. Yes– as I learned what I was doing, I made a lot of weird, misshapen bath bombs, but they still fizzed like champs and delighted my kiddos at bathtime (eh– who am I kidding– I loved ’em at bathtime, too!). Most of the ingredients are things you probably already have around the house, for the exception of the citric acid, which I bought on Amazon here. I chose to get the 5 lb. bag, because 1 lb. was $10, and 5 lbs. was $15. Seemed like a no brainer to me, and this way I had a ton of citric acid to play around with as I experimented and made all kinds of fizzy delights for the bathtub.
Because I was trying to keep costs down, I also used lavender scented baby oil. That way, I didn’t have to buy a separate scent for the bath bombs– it was already included. Win/win. However, if you want, you can use essential oils or soap making scents. I have ordered scents from P&J Trading here, with great success. They aren’t super expensive, and the customer service is top notch. So that’s an option if you decide to go all “Becky Home Ecky” and mix and match scents to create your own combos. If you want to use your own scent, be sure to use unscented baby oil so your flavors don’t clash.
.
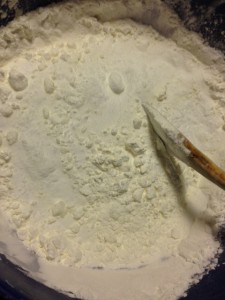
Start out by mixing your dry ingredients together (the baking soda, Epsom salts, cornstarch, and citric acid). Make sure that they are well combined. Try not to get any water into the mixture– water will activate the “launch sequence” and start the fizzing prematurely, ruining your bath bomb (yes. I totally did that by accident on my first batch, and we had “growing foam” all over the kitchen. It was like something out of an old horror film. Make it stop!! It’s going to eat us alive! Ahhhhhh!!!!!).
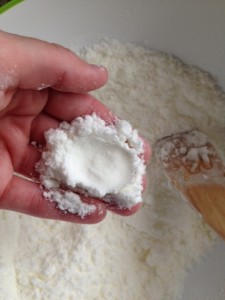
Next, add in your baby oil (and scent, if you’re using it). I am using lavender baby oil for this batch, so I didn’t have to add any extra scent. This time through I also used my bare hands to mix everything in, but then my hands had that “gritty” feeling like after you handle sidewalk chalk. Eeeeek. Use some gloves if you have them. I hate that “nails on the chalkboard” feeling. Use your (gloved) hands to kind of mix the oil and dry ingredients together, until everything is mixed in. I had the best luck mixing the ingredients by rubbing them between my hands, like when you rub your hands together to warm them. If you want to add color to your bath bombs, now is the time to add it. I used about 1/4 tsp. of gel food coloring and mixed it in with my gloved hands. Keep mixing until the entire mixture is the color that you want.
When the oil is mixed in, grab your spray bottle and give the mixture about 4 squirts. Yes, that seems like not very much water, and that’s on purpose. You want to use as LITTLE water as possible. The mixture will start to foam a little bit as soon as you add the water– quickly use your hands to continue mixing the water and powder together. I had the best luck mixing with the same motion you use when you rub your hands together on a cold day– kind of rubbing the layers together.
As you mix, the fizzing will stop. Keep adding water, a few squirts at a time, and immediately mixing the ingredients together. You want to add as LITTLE WATER AS POSSIBLE. Stop adding water as soon as the mixture hold a shape. When I first made bath bombs, I made the mistake of adding too much water. The bombs molded nice and beautiful, but then they flattened out as they dried. If this happens to you, try adding less water next time. It seriously doesn’t take much. If you can’t get the mixture to hold together, try adding 1-2 more squirts and remixing. Keep gripping handfuls of the mixture, and as soon as it holds a shape, don’t add any more water– it’s ready for the molds! 🙂
*I generally use about 7-8 “squirts” of water for this mixture. But start with fewer and see if it will hold together. Stop as soon as it does.
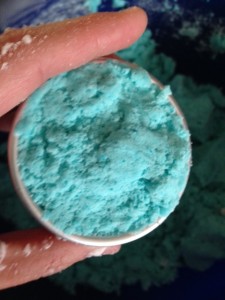
Now comes the fun part– let’s make some Bath Bombs! 🙂 I found that the best molds were the metal ones. I got a set of 3 different sizes on Amazon here. I also found some plastic cheapies at Hobby Lobby for $1.50 apiece. The plastic ones didn’t work quite as well (harder to mold and un-mold), but they did get the job done, and if you’re staying on a budget, you can definitely make those work. But if you can afford the $7, the metal molds are much better and will last a lot longer (the plastic ones crack really easily and are harder to fit together). You can also use soap molds, or even plastic Easter eggs, in a pinch. But those round bath bombs were so cute that I sprung for the metal molds, and I’m super glad that I did.
Fill one half of your mold with the Bath Bomb Mixture– you want to smoosh it down, but not pack it as tightly as it will go. You want to leave enough “packing room” to squish the final bath bomb together. I push down with about as much force as I use to press a doorbell– not much, but enough that the mixture will be slightly pushed down. Then, use your finger to “clean” the edge of the mold so that the pieces can fit together. Leave the center mixture heaped up, as the 2 centers will need to squish together and hold to keep the circle together, at the end.
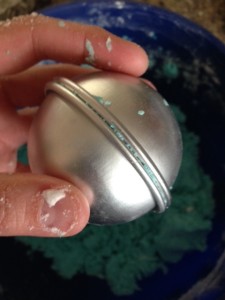
Do the same thing to the other side (lightly pack it, clean the rim of the mold, and leave the center mounded slightly). Press the two sides together and then squish it as tightly as it will go. This squishing (without twisting it) helps the bath bomb to stay together and not come apart when you take the mold off.
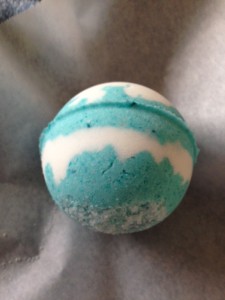
When you’ve pressed the two sides together, it’s time to have a look at your finished bath bomb! Gently tap the top of the mold with your hand, then remove one side of the mold. Next, carefully place the “opened” end (mold side up, exposed bath bomb side down) in your palm. When the opened end is sitting in your hand, gently pull the top mold off, revealing a finished (and, hopefully, gorgeous) bath bomb. If your bath bomb falls apart (usually because it wasn’t packed tightly enough), you can always dump it out and re-pack. That’s the great thing about these things– you can just keep working, adding another squirt of water if your mixture dries out, and going along your merry way. Once I even molded and dried a batch of bath bombs, and the next morning they crumbled to powder when I picked them up. “Hmm. I guess I needed a little more water,” I thought. So I dumped them all back into the bowl, re-added water, and remolded. And they were perfect when they dried. This recipe takes some trial and error, but it really is very forgiving, and once you figure out what consistency you need (it took me 3-4 tries to get it just right), you will become a bath bomb extraordinaire. 🙂
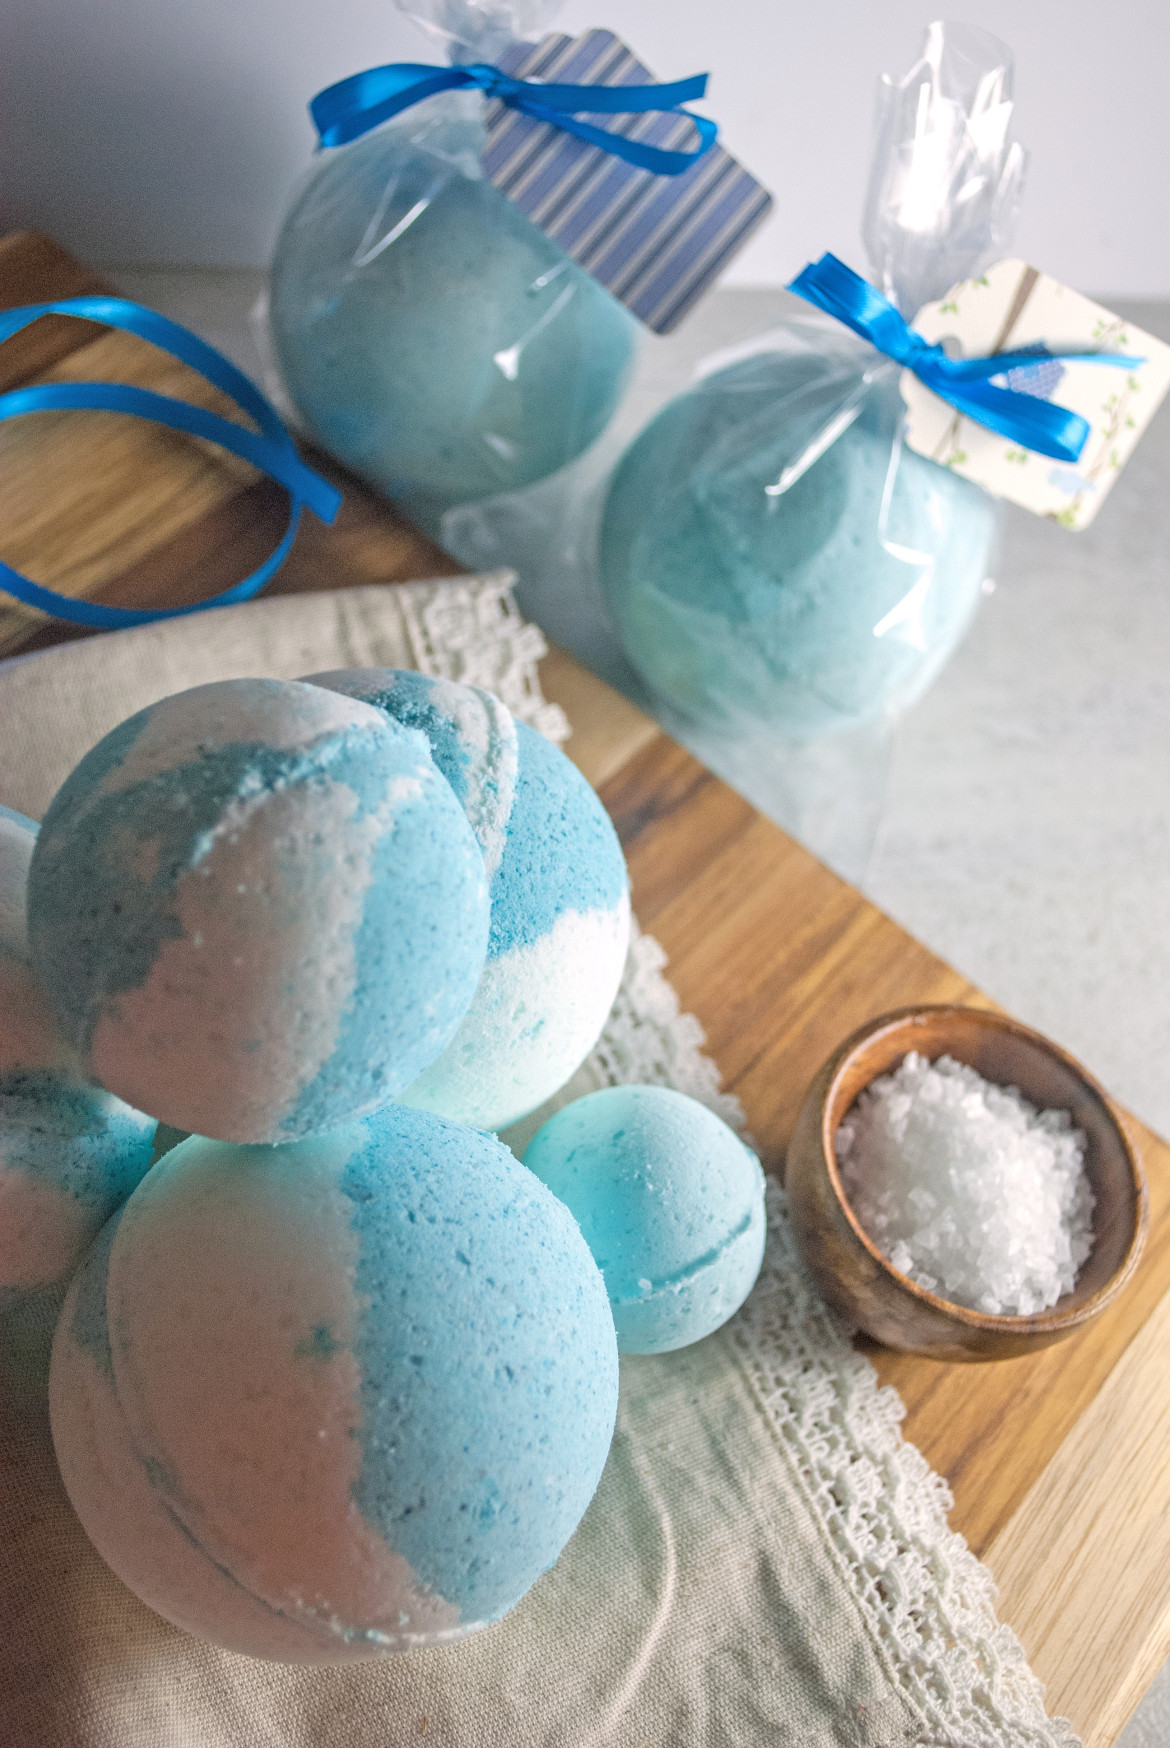
For this batch, I layered white and teal powder because I wanted my bath bombs to look like a sunny blue sky full of puffy clouds. Mmmm. It smelled and looked awesome. I also put some Epsom salts on the bottom of one side of the mold to give it a “glittering” top. You can place all kinds of “extras” on top of your bath bombs– from lavender buds to rose petals. Just keep in mind that flower petals will not dissolve in water, so if you want the entire bath bomb to dissolve, use something like Epsom salts for your decorations.
When the bath bomb is finished and “de-molded,” very gently place the entire bath bomb on a soft towel that has been covered with a piece of wax paper. The wax paper keeps the Bath Bomb from “absorbing” the marks from the towel, and the towel keeps the Bath Bomb from flattening while it dries.
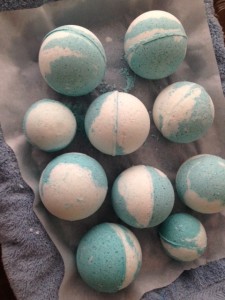
Let the Bath Bombs dry, without touching each other, for 24 hours, until they are completely dry. All I can think of when I hear “don’t touch each other” is my kids fighting in the back seat: “Stop TOUCHING me!!! Mom, she’s TOUCHING me!!!” Ah, the joys of parenthood. 😉
When the Bath Bombs have dried, completely, go ahead and package them. I made adorable paper boxes using the Gift Box Punch Board (an amazing tool that lets you create gift boxes of any size using just paper) that I got here. Of course, you don’t have to make a separate box for each Bath Bomb, but I thought it looked awesome– almost like a jewelry box with a single, gorgeous beauty inside. I wrapped each Bath Bomb in a small 5×7 clear bag (cheapest I could find were here
), then tied each bag with ribbon (48 cents per roll at Walmart) and placed it in a tissue paper “nest” inside the paper boxes I made. Oh man . . . they were so adorable.
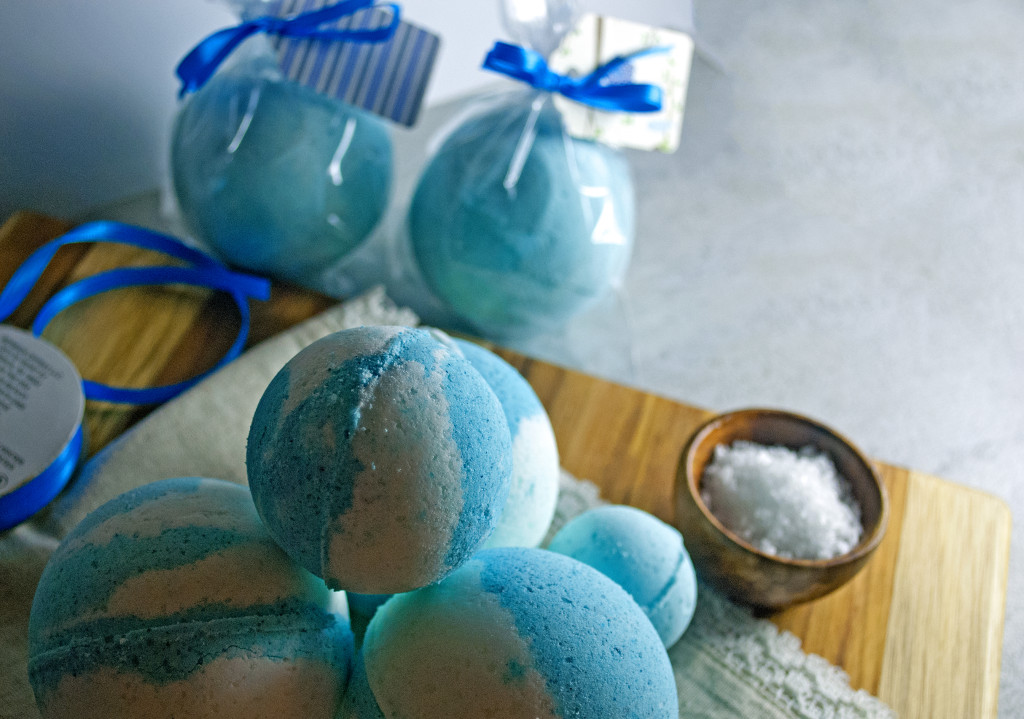
You could package these individually, or make a nice basket of goodies for a friend or neighbor. Hey– good neighbors are hard to find. Appreciate them as often as you can!
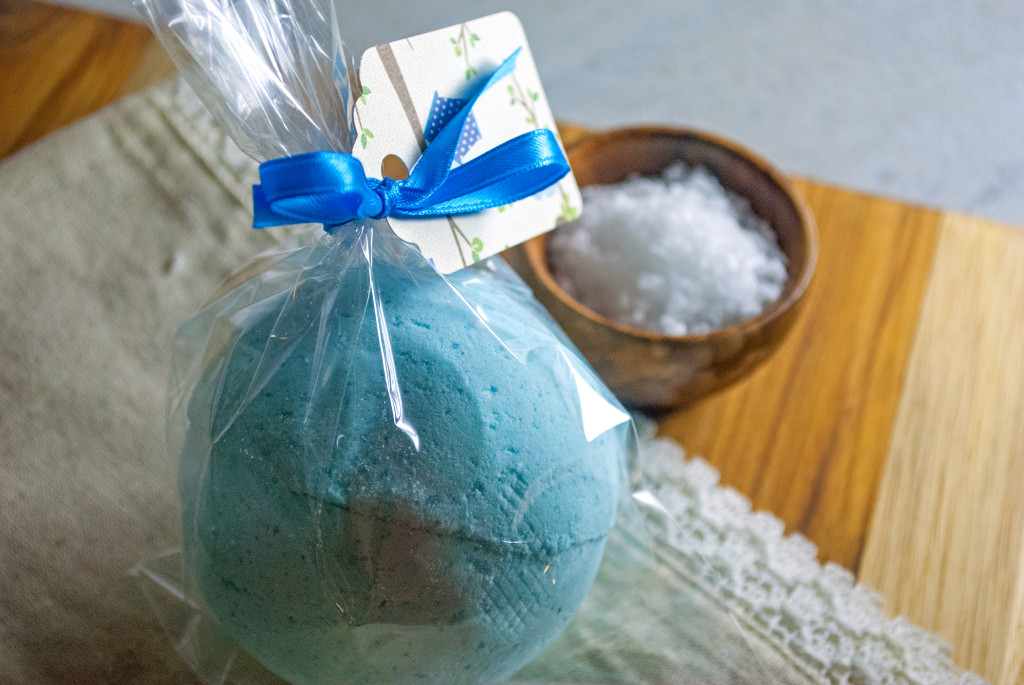
And even moms need a little spa day, now and then. So after the kiddos are down for bedtime, run yourself a nice, hot bath. Light some candles, put on some soothing music, and use a bath bomb– just for you. You don’t even need an occasion. It’s amazing how rejuvenated and refreshed you will feel, after even a small physical and mental break from the stresses of life.
You did it. And I’m just so proud of you.

Disclosure: This post may contain affiliate links, which just means that we get a few pennies if you purchase through our link. I never recommend products that I don't personally use and love. Thanks!

Thanks for sharing the amazing information with us and I love the Custom Boxes!
I’m so glad! Thank you for stopping by! — Emilie
I’ve done shower tabs with menthol and eucalyptus for stuffy nose nights that turned out swimmingly. So now I want to try actual bath bombs and am a bit curious which oil combinations work well or not so well? I’d hate to buy a ton of essential oils for no reason. Thanks!
Hi there Lou– great question. I used the scents linked in my post, above. They are not essential oils, but scents made specifically for soaps, bath bombs, etc. You can definitely use “real” essential oils, as well, but I found the ones I used to be just as beautifully scented at a fraction of the cost (a few dollars a bottle, with many scents available). I got several scent combinations I loved– sugar cookie and strawberry (“strawberries and cream”), the same with orange and sugar cookie, bamboo and amber (kind of a “spa” scent), rose and jasmine (one that Bath and body works would be jealous of!), cinnamon and honey . . . the list is endless, really. The scents are great on their own, as well. I hope this helps. I say start with the cheaper scents and then upgrade to more expensive ones if you find you want to go the medicinal route. Love the idea of menthol and eucalyptus for colds. I wonder if that would work with bath bombs. Great idea! 🙂 Thanks for stopping by. — Emilie
Is there anyway to dry them more quickly. I’m going on 24 hours and they still feel slightly soft or moistish. They held their shape just fine and haven’t crumbled. I think my humidity is just higher than most.
Anyway, my child care kids made these for Mother’s Day and I need to get them packaged. Can I bake at 175°? I think that’s the lowest my oven goes.
You can use a dehydrator if you need to– mine always dry nicely just sitting out. I sometimes let them out for a few days on an especially humid week. You could try the oven. I haven’t tried this but I don’t see why you couldn’t dry them out that way. Maybe check every few minutes to see how they’re doing. Let me know how it goes and thanks for stopping by! 🙂
Amanda yes you can put them in the oven. Heat at 175-200 for about 10 mins. or so then shut off and put your bombs in.
Thanks for your insights, Cheryl! Love the oven idea.
Hi. Can we replace Epson salt with another ingrédient or remove From recipe ? Is this affect the quantity of oil used ? Thank you
Hi there Isma,
I have never made a recipe without epsom salts, but I came up with this recipe through experimentation, so if you find an alternative feel free to share in case anyone else wants to alter the recipe. Thanks! — Emilie
Thank u so much i will try youre recipe but Without epsom salt and i will share it
Hope that it will be fine ?
My gut says you will need some sort of filler if you plan to leave out the epsom salts. I don’t think just the other ingredients would be enough. Just curious– why do you want to leave out the epsom salts? Thanks and let us know if you are successful, — Emilie
I really like to use extra fine pink Himalayan salt as a substitute for Epsom salt when making my rose gold petal bath bombs. Just a hint of color ❤️ ?
That sounds very pretty! Thank you for sharing! — Emilie
Can’t wait to try this recipe! I was looking for a cute end of the season cheer gift for our team, and stumbled upon your page! Approx how many larger bath bombs does one recipe make? Thank you!!
Hi there Nicole! Thanks for the kind words! I usually double the recipe and do 2 colors per bath bomb, and I get about 10 bath bombs from my double recipe, so I guess 5 for a single (more if they are smaller). Hope this helps! 🙂 Thanks for stopping by!
Thank you for this recipe! I can’t wait to try this xx
Thank you so much for the kind words, Laura! 🙂 You are more than welcome! <3
What is the purpose of the cornstarch? Does Lush use cornstarch in theirs? And, can n you substitute arrowroot powder for the cornstarch? Thank you for your post & I look forward to your reply!
Hi there MamaBear– a bath bomb, is essentially, an “explosion” between the citric acid and baking soda (similar to the volcano experiment with baking soda and vinegar). But in order for it to work properly, you don’t want the acid and soda to mix until they reach the tub. This is why we try to keep the mixture as dry as possible– to delay that “explosion” until your bathtime. The cornstarch keeps everything extra dry and helps the bath bomb to last longer and keep longer, without cracking from excess moisture. I am not familiar with arrowroot, so I’m afraid I can’t speak to its value as a substitute. Thanks for stopping by!
Love your recipe and thanks for the tip about using a squirt bottle for adding the water. I have read somewhere that the cornstarch is also what causes the bath bomb to float to the top 🙂
Aww thank you so much Nannette! 🙂 I’m just a housewife trying to save a little money on Christmas gifts, and it means a lot that you took the time to thank me. Thanks for stopping by. 🙂
Mamabear you do not have to use cornstarch if you don’t want to. I do however I have also used kaolin clay. You can pretty much use any powder as long as it is skin safe. I’ve seen recipes with goat’s milk powder etc.
Thanks for sharing your experience, Cheryl!
How long are they good for i like to make christmas presents and was wonderi g how early in the year i can make them
Hi there Kerrie– I personally have made them up to 3 months in advance. As long as they are sealed so that no moisture can get in, they should be fine. They may even last longer, but 3 months is the longest that I have tried ahead of time. Thanks for stopping by. 🙂
How many bombs does this recipe make..please
Great question, Cassie. Of course it depends on many factors, such as what size molds you are using, how tightly you are packing the molds, etc. Generally I double the recipe (so that I have one bowl of each color and can layer them for striped bombs) and get about 10 big bath bombs from it. So I’d say for a single about 5 bombs. Hope this helps! Thanks for stopping by.
I tried this and my beautiful bath bombs flattened while drying. I now have hockey pucks. Is it too much water. Though the mix was light and fluffy. formed beautifully, just flattened during drying.
Ahhhh yes. The flattening bath bomb. Tragically, yes. Too much water. The good news? These will still fizz and make a pretty cool bathtime. Next time, just do about 7-8 “squirts” of water from the spray bottle. Mix after each squirt and stop adding water as soon as the mixture holds together. It won’t be wet– just barely moist enough to hold together. It takes some trial and error to get it right, but once you get it, you’ve got it! 🙂 Let me know if you have anymore questions, and I’ll try to answer them! Thanks for stopping by. 🙂
If you remove one side of the metal mold then put back in so you know it has loosened then same on second side only this time leave one side on until it has had time to slighly harden then move to a towel with some parchement paper and in about 30 minutes remove the second side.. This came from many trials of my own. Make sure you fill to where when you push the two side together they do not actually close just slight ring around so to spealk
Oooh what a clever idea, Yvonne! I’ll have to give that a try! Thanks for sharing your tips!
Thank you Emilie for the recipie; is beautiful! I would like to ask you; I made already some orange bath bombs; my first one came out beautiful but when I touched it fall apart 🙂 the second one came out the same; so pretty; I was so happy because I thought finally I did it! but I checked it today and sadly is cracked 🙁 all around; could you give me a tip please how to do it or why is coming out like that?
Hi there Alex! So glad you enjoyed making the bath bombs. Yes I know exactly what happened (because this same thing happened to me when I first tried making them). You need a *squidge* more water. It’s kind of a guessing game until you figure out how much water you need and what the “right” consistency feels like.
If the bombs crumble right away like dust when they dry, you need more water. If they ooze out of shape and deform while drying, it was too much water. The good thing is that you can take your crumbled, dry bath bombs, and just re-spray and reform them. It really does take some trial and error getting the water exactly right– even one drop difference can change them. But once you learn how the bath bomb mixture should feel, you’ll get it right every time after that. 🙂 I don’t know how many bath bombs I deformed and ruined before I got it right– but after that I could tell by feeling if I needed more water or not, and now no more crumbling or cracked bath bombs. And at least you can still enjoy “fizzing” your mistakes. 🙂 Hope this helps!
Thanks for your recipe!
You’re so welcome, Denise! I hope you enjoy! 🙂 Thanks for stopping by. 🙂
You mentioned that lush cost about$6, how much do you think each on of these cost to make and I’m not sure if I missed it but how many does this recipe make ? Can I double the recipe? Kate
Yes– lush bath bombs range from around $6-12, depending on size, around where I live. It costs me about 30 cents to make each one of these (can cost a little more depending what scent you use), and yes I often double the recipe 🙂
Champagne Bath Bomb, Ladies Bath Bomb, Gift for her, Bride Gift, Wedding Gift, Lipgloss or Nail Varnish Inside!
Love that idea! 🙂
I love yours. I have no problem getting mine to turn out, but can’t seemed to learn how to make a multi colored one. Could let me know how you made the blue and white ones?
Thanks,
DE
Great question, Deborah! To make the multicolored bath bombs, I make 2 separate bowls of bath bomb mixture and just alternate the colors as I put them into the molds. Squeeze together as normal and unmold to dry. For the blue and white ones I tinted half the mixture blue, and left half plain white and alternated them. Hope this helps. Thanks for stopping by! 🙂
Would food coloring stain skin if I use that for the color?
I made these last night with my 3 year old and it was so much fun. We used some heart molds to give as Valentine’s Day presents. This morning, all of our hearts had flattened into pancakes. Any insight?
Hi there Paula. Great questions, and I’ll do my best to answer them. 🙂 I used food coloring (gel), and we didn’t have any problems with the color staining skin or the tub. I didn’t use tons of color, though– just enough to give the bombs kind of a pastel hue. AHHHHH the flattening bath bomb. I totally did the “flat as a pancake” thing the first few times I made these. It turned out that I had added a little too much water. I actually went back and revised the directions a little bit, to give extra direction on this. You want to add JUST enough water to get everything to stick together– the mixture will still seem pretty dry– I start out with about 8 squirts and add water in 1-2 squirt amounts just until it sticks together when you squeeze a handful. But it will still be pretty dry. When it holds a shape, it’s ready to mold. Too much water makes the finished bath bombs flatten out as they dry. It takes a few “trial runs” to get to where you know when the consistency is just right. But once you have it, you have it! And the mistakes still fizz and make a fun bath time (as my kids discovered!). 🙂 You were smart to start early and practice. I have a feeling by Valentine’s Day you’ll be a pro and have perfect bath bombs! I can’t wait to hear how it goes! 😀 Thanks for stopping by! 🙂
How fizzy are these? And do they just color the water or make it murky as well?
Great questions, Kat. They are pretty fizzy– have you ever used a bath bomb from Lush? They are exactly like that. The ones I used left the water with a nice scent (if you choose to use scent), and a nice softness. If you use color the water will be slightly colored. I hope this helps! 🙂 Thanks for stopping by.
I got my citric acid at a local Mennonite bulk food store #10 pounds for $25.00 so check around..and essential oils at hobby lobby and use your 40% coupon of 1 item!!!!
Great idea, Katrina! The cheapest I could find around here was that $15 one on amazon, but local Amish/Mennonite stores may have cheaper if those locations are available to you. Awesome!!! Thanks for sharing! And yessssss definitely use the 40% off coupon! 😀 Thanks for stopping by! 🙂
Could I use coconut oil, or almond oil, instead of baby?
Hmmm. That’s an interesting question, Jen. I have never tried it, but I don’t see why it wouldn’t work! If I were going to try that, I would make sure to melt the coconut oil a little bit just to make it more liquid, since I think the hardened kind would be hard to mix in. If you do decide to try it, let me know how it turns out! Now I’m curious. 🙂 Thanks for stopping by!
I used sweet almond oil and they turned out just fine!
That’s awesome, Michelle! Thanks for taking time to let me know! Now I’m gonna have to try it! 😀
Hi Michelle. Did you use the same amount as the baby oil?
Hi Emilie! I just wondered if you could tell me where you got the gel color you used in your bath bombs? I am going to make some for Christmas and I just love the colors you achieve.
Great question, Jill– I just used Wilton food gel colors (get ’em at any craft store, or even walmart!). Thanks so much for stopping by and for the interest! 🙂
Thank you! I got some lovely gel colors from amazon and they work amazingly well in the bath bombs.
I’m so glad! 😀 Sounds like you are a bath bomb making pro! <3
Pingback: Lemon Meringue Mousse – Cookies for England