Yum
I have been experiencing a muffin baking obsession, lately. I think it started when we listed our house for sale. It started with a completely innocent thought on my part: “I think I’ll bake a little something for the open house this weekend.”
And hours and hours of baking later, I had enough sweet treats to make an all-you-can-eat buffet for the prospective buyers, including about 4 different types of muffins. You see, a muffin is a puzzling and delicate thing. It is strong enough to stand up to the beating hollows of your lunch box, but delicate enough to be light and fluffy when you bite into it. It needs enough rise to puff up nicely, but not so much leavening that you get a chalky taste. And how about those amazing, bakery style domes? Have you ever successfully made those little beauties at home?
Well hold onto your hats, kiddos . . . because I’m about to show you what I have learned over a lifetime of muffin baking– how to get those perfectly domed tops, right in your own home oven. I am using a great little muffin recipe from Sally’s Baking Addiction (link credit below), but the basic principal can be applied to any muffin to get that killer “muffin top.” You know . . . the only MUFFIN TOP that is actually a good thing. 😉 And hey . . . maybe my baked goods buffet will bring someone back to see my house again. At least, I hope so.
What are we waiting for? Let’s do this!
Bakery Style Chocolate Chip Muffins
(Recipe originally from Sally’s Baking Addiction; steps and photos are my own take on the recipe)
Ingredients:
3 cups all purpose flour
4 tsp. baking powder
1/2 tsp. salt
1 cup white sugar
1 tsp. cinnamon
1/4 tsp. nutmeg
2 eggs
1 cup milk or buttermilk
1/2 cup oil
1 tsp. vanilla
1 1/2 cups mini chocolate chips, plus extra for garnishing, if desired
Directions:
Whisk together dry ingredients (flour, baking powder, salt, cinnamon, nutmeg, and sugar). In a separate bowl whisk together eggs, milk, oil, and vanilla. Microwave the wet ingredients for 20-30 seconds– just long enough to bring the mixture to room temperature. Mix the wet ingredients all at once to the dry ingredients, using a spatula to gently fold just until mixed (batter will not be completely smooth– there will still be lumps). Let the batter sit for 10-15 minutes while you preheat your oven to 425 degrees. When your oven is heated to 425, gently fold in chocolate chips and fill muffin cups almost to the top (maybe 1/8″ below the top). Sprinkle a few mini chocolate chips or some sparkling sugar on top of the muffins, if desired. Bake the muffins at 425 for 5 minutes, and then, WITHOUT opening the oven, change the temperature to 375 and bake for an additional 15-20 minutes, depending on what size muffins you are making (regular muffins take about 15, and jumbo muffins take about 20). Check the muffins for doneness at this point and bake a few more minutes, if necessary, until toothpick inserted into the center comes out clean. Finish cooling on a cooling rack.
Now, in pictures! 🙂

The secret to light as air, bakery style muffins is to avoid overmixing these delicate little beauties. Don’t just throw everything together and whirl it a few times in the ‘ole Kitchenaid. Nope. These little babies need finesse. Treat them with the same kid gloves as the ones you use when you visit with grouchy old Aunt Mildred. Be soft and sweet and oh-so-gentle.
Start by mixing your dry ingredients together with a whisk. Whisking the ingredients just helps the baking powder to get incorporated throughout the batter. That way you won’t have one larger than life muffin, and one teeny weeny scared little muffin. We want ’em even! 🙂

One thing that Sally from Sally’s Baking Addiction says on her website is that she always uses room temperature ingredients for muffins. I couldn’t agree more. I always say that “cold ingredients are the enemy of good baking.” Just think about it– when you go into a cold room, do you socialize and have a great time? No– you pull on your coat and withdraw back into it. No one likes to be cold, and muffins are no exception. If you want your muffins to rise nice and tall and proud . . . give ’em room temperature ingredients. 🙂 Let’s take off our coats and get this partay started!
A quick and easy way to get room temperature ingredients is to . . . let’s see. How can I put this?
Cheat.
Yes. If you’re like me, and you’re always doing a million things at once, and you constantly forget to take your ingredients out of the fridge to come to room temperature . . . then have no fear. There is hope for us. I whisked my milk, oil, eggs, and vanilla together in a separate bowl, and then I microwaved the wet ingredients for 20-30 seconds, just until everything is room temperature. Stir those babies well and add them, all at once, to the dry ingredients.

This part is where you make or break your light and fluffiness. Don’t use a mixer. Don’t use a whisk. Don’t pass Go. Don’t collect $200.
I prefer to use a spatula– mainly because it allows me to fold the ingredients and not stir them. Just fold and sweep around and through. Do it so gently it almost seems like you’re just shifting the batter, instead of mixing it. Don’t stir– FOLD. It should take you only about 15-17 “sweeps.” You’ll do 17 folds and think, “This isn’t mixed. I still see flour clumps in there.” Don’t worry. A few clumps are OK (no huge pockets of flour). Just let the lumps alone and let the batter sit. Let it sit and rest. Don’t even stir in the chocolate chips yet. Hey– stop! I see you reaching for that spatula. No more stirring! Trust me on this! Put your OCD to bed and leave the lumps in there. I’m lumpy and you still love me! Lumps are not always a bad thing. 😉
At this point, I preheat my oven to 425 degrees. It takes my oven about 10 minutes to get to this temperature, and I just let my batter hang out for 10 minutes and rest. It helps the rise. Sigh. I think the life lesson here is that we all need a nap in order to function. Yes. I’m sure that’s what it is. Sounds like sense to me.

After 10 minutes or so (give or take a toddler meltdown or two), I gently fold in my chocolate chips. Fold in the chips with about 2-3 folds. Don’t overmix. If the chips don’t seem like they’re super well mixed, you can kind of grab some chips for each muffin as you portion the batter. To get your muffins perfectly portioned, I highly recommend a cookie scoop (I use the blue one here for muffins). You can make either regular or jumbo sized muffins. I actually made some of each! 🙂 The scoop just helps all your muffins come out the same size, and it has the added bonus of making people think you spent a fortune at a high end bakery to get fancy treats for everyone. Aww– you’re such a sweetie. 🙂
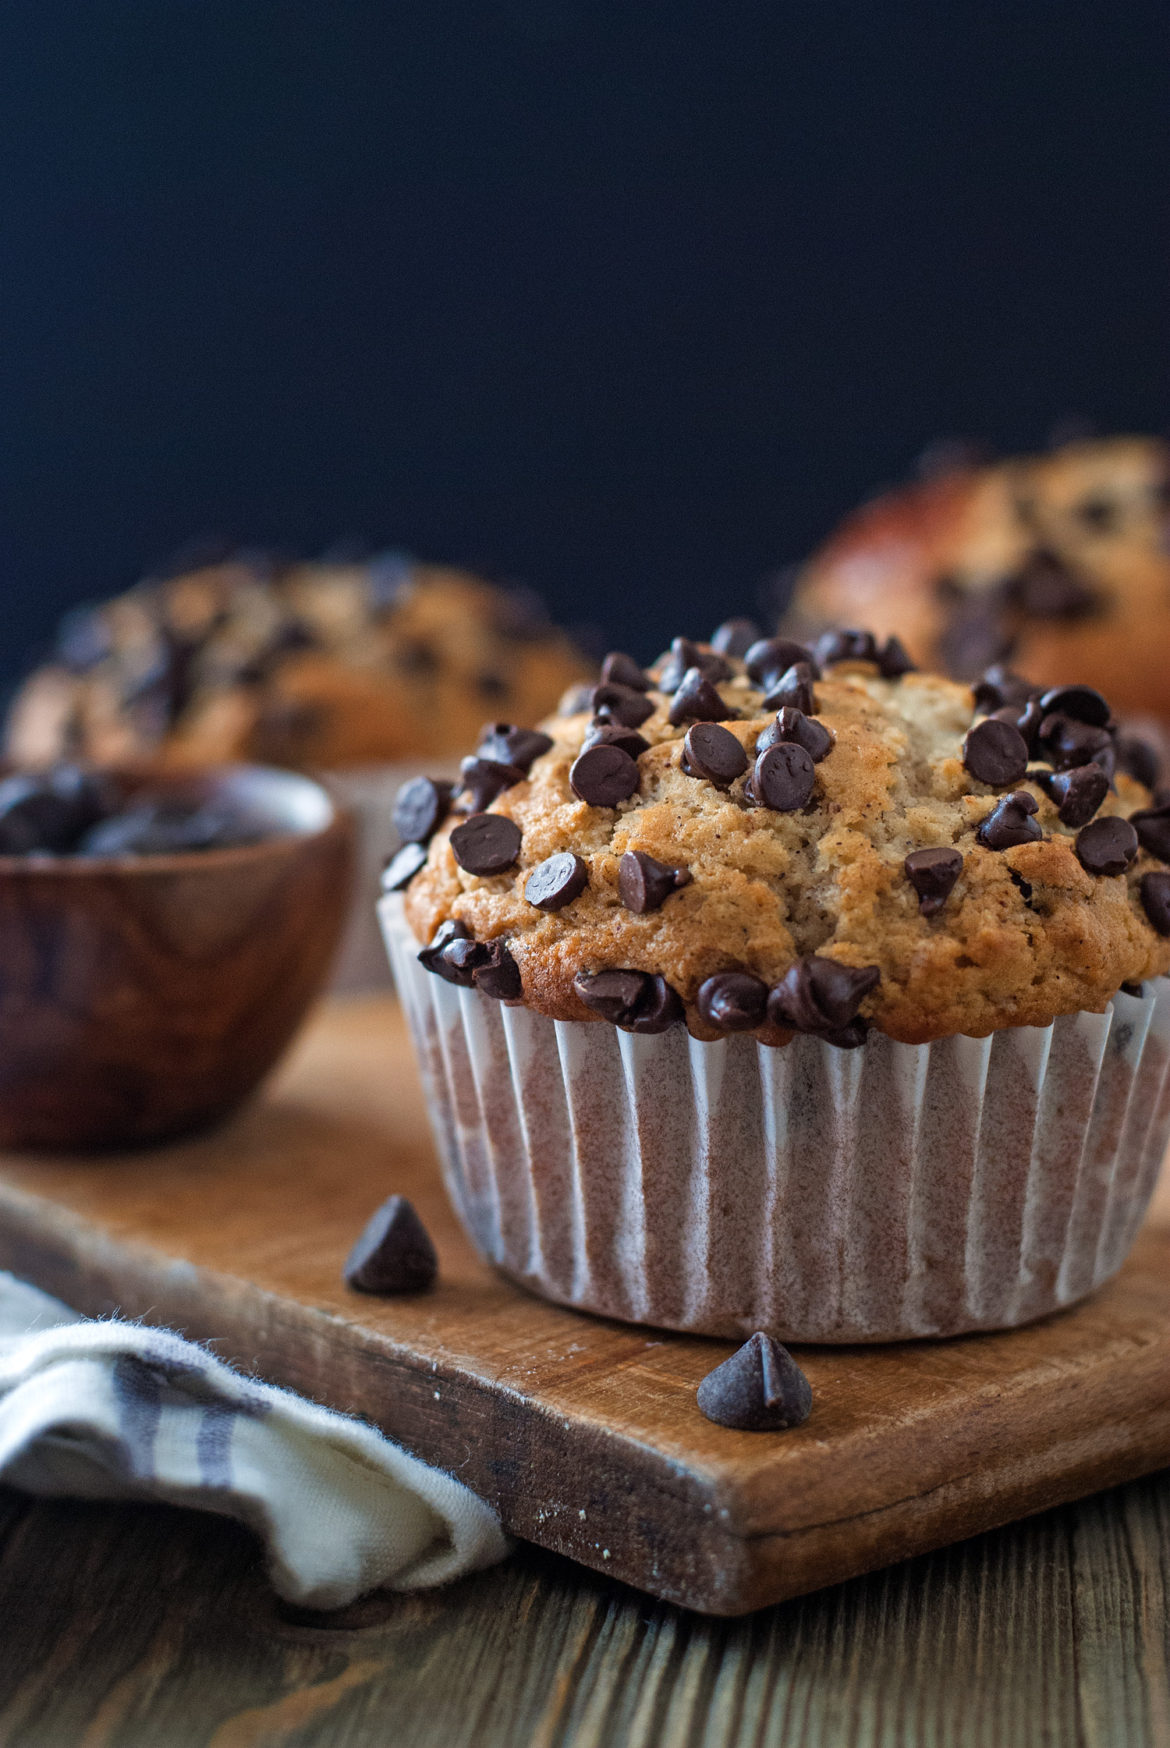
Speaking of bakery muffins, here’s a little secret. Did you ever gaze at those big, beautiful muffins inside the bakery case and wonder how in the world they get those gorgeous “mile high” domes? Don’t worry– because I’m going to tell you. To get mile high muffins, you need to give those babies a little puff of heat at the beginning and then, without opening the oven, turn down the heat to finish baking. That high heat at the beginning is why you can actually fill the muffin cups much fuller than you normally would. Usually, for cupcakes (that this trick does NOT work for, BTW), we fill the batter about 1/2-3/4 full. But for muffins, fill your muffin cups until the batter is about 1/8″ (about the size of a pea) from the top. Top the batter with turbinado sugar or mini chocolate chips. I did some of each, and I think I preferred the mini chips a touch better, but both were delicious. 🙂
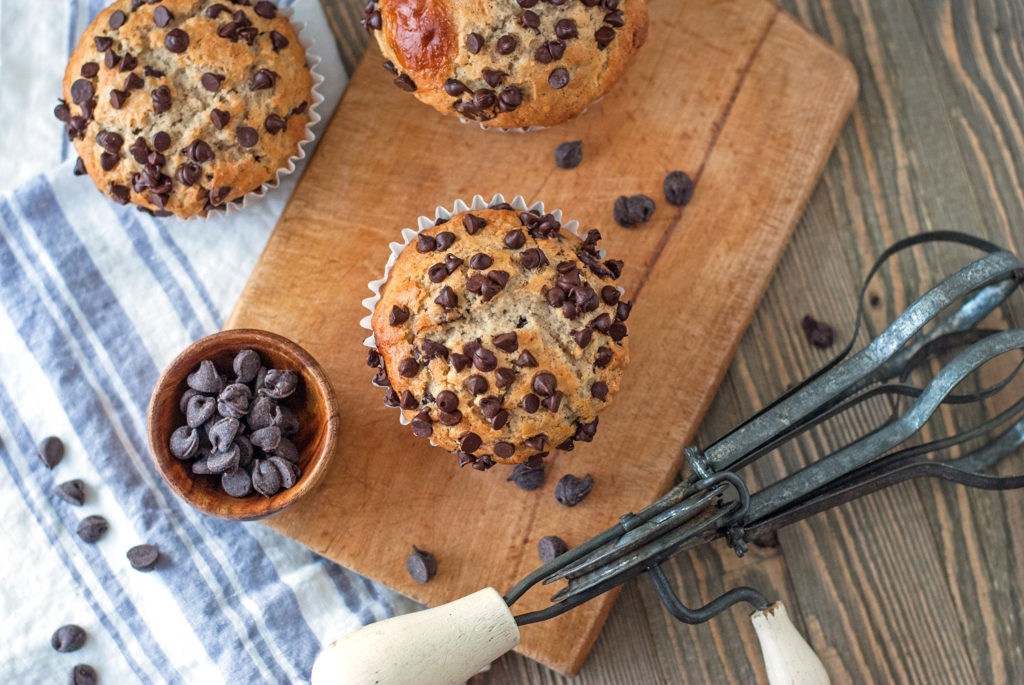
Put your muffins in the oven AT 425 degrees. Now listen carefully, because this is a little confusing the first time you do it. Bake the muffins at 425 for 5 minutes. Then . . . WITHOUT opening the oven, change the temperature to 375 degrees. I know you want to open the oven. DON’T DO IT. I’m telling you. Don’t. Just say no. If you open Pandora’s box (or the oven– OK. Be that way), your muffins will collapse in the middle and turn out like some funky doughnut wannabe. And we don’t want funky doughnut wannabes.
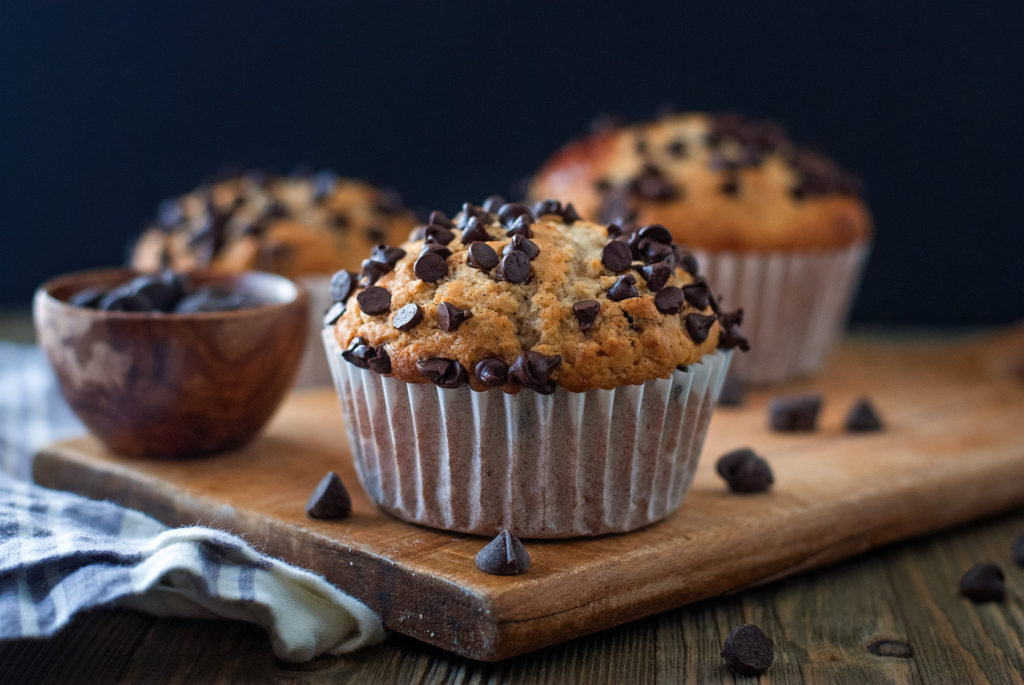
We want mile high, bakery domed GLORY!!! (*Star Spangled Banner begins playing softly in the distance . . .*)
Now, because you are such obedient children and always listen to Mommy (cough, cough and eyeroll), I know you didn’t open the oven. You resisted temptation. Good for you. Have a gold star.
What size muffins you choose to make (regular or jumbo), will determine how long your muffins need to enjoy that 375 degree spa day. My regular muffins took about 15 extra minutes, and my jumbo muffins took about 20 extra minutes. All ovens are a little different, of course, so keep an eye on your cute little muffins. When they start to look nice and golden brown, check them and see if they pass the toothpick test. And when they do . . .
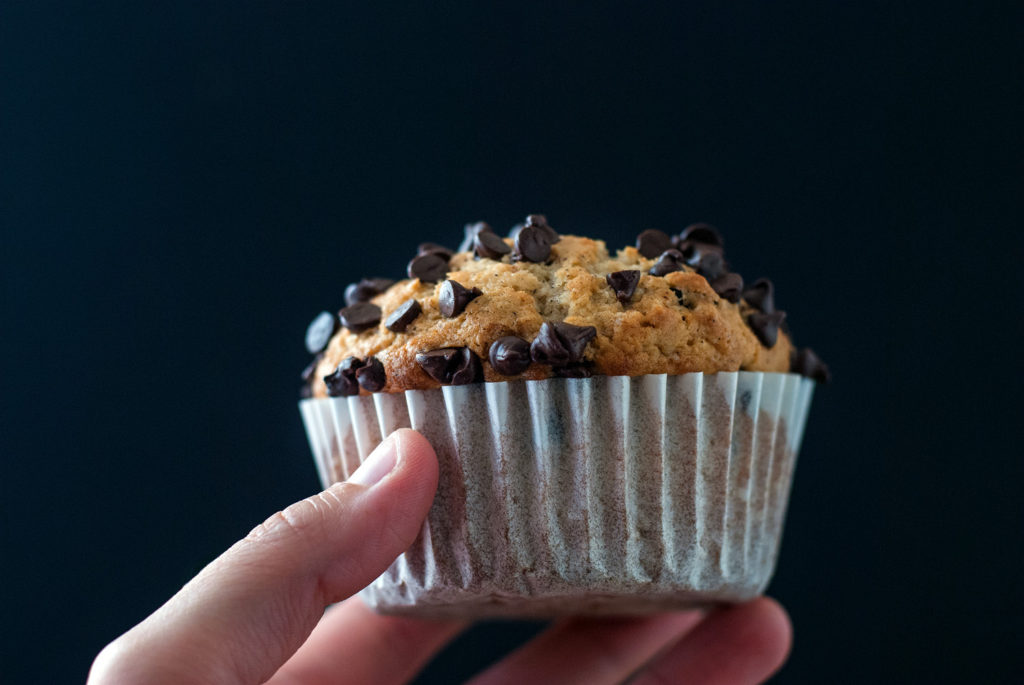
It’s muffin time, baby! Look at those gorgeous, mile high domes. Seriously. That looks like it came from Starbucks, and you MADE THAT IN YOUR OWN HOME OVEN. I hope you feel amazing.
Because you did it. And I’m just so proud of you.

Disclosure: This post may contain affiliate links, which just means that we get a few pennies if you purchase through our link. I never recommend products that I don't personally use and love. Thanks!





My boys both LOVE muffins, I cannot wait to try these.
Oooh me too! They have excellent taste. 🙂 Once you see those bakery style domes, you’ll never be content with average muffins again. haha. Hope you love ’em! 🙂