
Yum
A lot can change in a year. You can finish your freshman year of college in a year. Your baby can start to take its first, tentative steps in a year. You can get engaged in a year. And you can run a blog for a year.
Running a blog is a fun, exciting, and often thankless, difficult job. You spend hours testing recipes, staging the photos, taking and editing the photos, and then writing and creating and sharing the posts. You do all this for little or no money. And then one day you see you have a comment, and you’re ecstatic, so you pull it right up . . .
“Didn’t like this recipe. Will stick to my old one.”
Sigh. It’s a tough world out there, and most blogs do not survive past the first year. I can see why. But I am pleased and thankful to share that Cookies for England has finally turned 1 year old. That’s right . . . this little baby is taking its first steps. I don’t know where it will go or what it will do, but I do know it’s been quite a ride. And I couldn’t think of anything better for an out of this world birthday cake than my buddy Suchi Modi’s Triple Chocolate Mousse cake. Suchi is a talented food blogger, herself, over at Elegant Meraki. I first met Suchi when we interviewed her for the Meet the Neighbors series, here. I remember that she sent me a photo of this cake . . . this towering pillar of chocolate loveliness . . . and I literally sat there with my mouth open for a while before I realized I was gaping. I knew I had to make it– I just needed an excuse. So with the “birthday” of this blog, I figured we deserved a little fancy birthday cake. This fabulous dessert can be made ahead for a “WOW!” presentation (can even be frozen, which I have done . . . and yes, that nocturnal family member sneaking to the freezer at night is me ;), which makes it perfect for a busy holiday or get together. It has a lot of steps, but it isn’t hard. And the best part? It’s deliciously gluten free. Suchi . . . perhaps we should erect a temple of worship in your honor, because this is one of the most incredible desserts I’ve ever tasted!
What are we waiting for? Let’s do this!
Triple Chocolate Mousse Cake
(Slightly adapted from Elegant Meraki– used by permission)
Cake (1st layer) ingredients:
6 tbsp. butter
1 heaping cup semi-sweet chocolate chips
3/4 tsp. espresso powder
1 1/2 tsp. vanilla
4 eggs, separated
1/4 tsp. cream of tartar
1/3 cup white sugar
Chocolate Mousse (2nd layer) ingredients:
2 tbsp. cocoa powder
5 tbsp. hot water
1 heaping cup semi-sweet chocolate chips
1 1/2 cups cold whipping cream
1/2 cup powdered sugar
1 tsp. vanilla
White Chocolate Mousse (3rd layer) ingredients:
3/4 tsp. unflavored gelatin powder
1 tbsp. water
1 cup white chocolate chips
1 1/2 cups cold whipping cream, divided
1/2 cup powdered sugar
1 tsp. vanilla
Directions:
Preheat your oven to 325 degrees. Lightly spray a 9″ springform pan with cooking spray and line with parchment paper (the spray helps the parchment stick). Spray the parchment paper with cooking spray, as well, and set pan aside until ready to fill. To make your cake, carefully melt your butter, chocolate chips, and espresso powder together in the microwave, stirring in 30 second increments until melted (does not need to be warm). Whisk together egg yolks and vanilla and whisk egg mixture into melted chips. In a separate mixing bowl, use the whisk attachment of your mixer to whip egg whites, cream of tartar, and white sugar until mixture forms stiff peaks. Carefully fold egg whites into chocolate mixture and gently pour batter into prepared springform pan. Bake cake for 15-20 minutes, until toothpick inserted into the center comes out mostly clean (a few moist crumbs are OK, but no liquid batter). Remove cake from oven and allow to cool. Cake will shrink significantly as it cools.
While the cake is cooling, start your chocolate mousse. Whisk together cocoa and hot water. Melt chocolate chips in the microwave, stirring after each 30 second increment just until melted. Whisk melted chocolate into cocoa/water mixture. In a separate mixing bowl, use your whisk attachment to whisk cream, powdered sugar, and vanilla, until soft peaks form. Fold whipped cream into chocolate mixture and spread finished chocolate mousse evenly on top of cooled cake. Cover and chill for at least an hour before adding final layer.
To make final white chocolate mousse layer, sprinkle unflavored gelatin over water so it begins to soften (become like a gel instead of a powder). Heat white chocolate chips and 1/2 cup cream in the microwave just until chips are melted, stirring every 30 seconds. Stir in gelatin, until dissolved. In a separate mixing bowl, use the whisk attachment of your mixer to whisk remaining 1 cup of cream, powdered sugar, and vanilla until soft peaks form. Fold whipped cream into chocolate mixture and place final layer on top of chocolate layer. Cover and chill cake overnight, if possible, before removing the sides of the pan and serving.
Whew. This sounds insanely complicated, but it’s just a lot of steps. Don’t worry– I’ll go through every step with you. 🙂 And trust me . . . it’s “eyes roll back in your head” good, and totally worth it. Let’s take a look at the process in pictures.
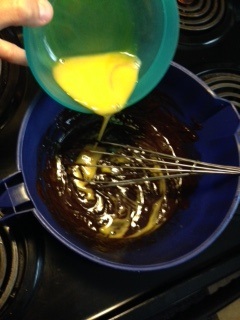
This cake seems very intimidating. And I’m not gonna’ lie . . . it has a lot of steps, and you have to read the directions carefully. But you can totally do this, and once you taste that first, incredible bite . . . you’ll be so glad you did! And don’t worry– this first part is almost all done in the microwave, anyway. 🙂 Start out by preheating your oven to 325 degrees. To make your cake, carefully melt your butter, chocolate chips, and espresso powder, together in the microwave, stirring in every 30 seconds until everything is nice and melted. You aren’t looking for the mixture to be hot– just for everything to be melted. In a separate bowl mix together your egg yolks and vanilla and whisk the egg mixture into your melted chips.
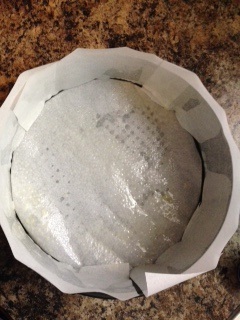
We don’t want our beautiful cake to stick, after we went to all the trouble of of making it, so let’s get our springform pan shakin’ and bakin.’ I like to use a 9″ springform pan and spray the naked (NAKED??? EEEEKKK!!!!) pan with cooking spray. Then I trace around the pan and cut out a circle of parchment paper. I use the circle for the bottom and plain rectangles of parchment for the sides. The nonstick spray helps it to stick (go figure), and then I give the parchment another spray, just to be sure.
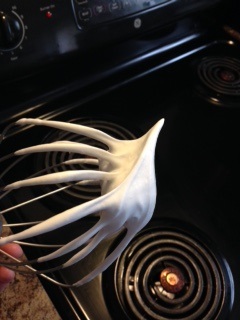
Next we want to whip our egg whites to stiff peaks. A word of caution about egg whites . . . those babies do NOT like oil . . . of any kind. Oil and egg whites are like feuding spouses– if they are anywhere near each other, it ain’t gonna’ be pretty. So make sure when you separate your eggs you don’t get even one drop of yolk into the whites, or they won’t whip for you. Yes, I actually messed up because I was in a hurry, and my toddler had scrambled eggs for lunch. Hehe. Be careful that your whisk and bowl are totally clean, too– because even a tiny bit of oil or egg yolk will ruin the whipping egg whites.
Everyone oil free? Goooooooood . . .
Place your white sugar, cream of tartar (this just helps to stabilize the egg whites), and egg whites into the bowl of your stand mixer. Use the whisk attachment to whip them until the mixture forms stiff peaks. This just means that when you remove the whisk from the bowl the white stuff will stand straight up (like your toddler’s hair in the morning), without bending over. Here is what the egg whites should look like at stiff peak stage.
Next use a spatula to fold the egg whites into your chocolate mixture. Folding just means that you come over here and fold all my laundry.
Kidding!! Well . . . sort of.
Folding in ingredients just means that you don’t stir them in a regular way– you kind of wrap the ingredients around and around each other– like you’re giving the recipe a comb-over. Around and around. This helps fragile ingredients (usually whipped cream or egg whites) from getting deflated.
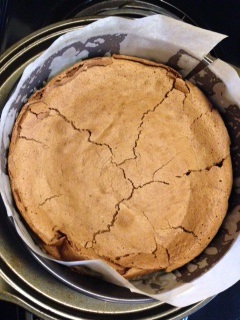
When your ingredients are completely mixed in, pour your cake batter into the waiting springform pan. Bake the cake at 325 for 15-20 minutes, or until a toothpick inserted into the center comes out clean, or just with a few moist crumbs. You shouldn’t see any liquid batter on there. Don’t worry if the cake cracks a little bit– we are going to be covering it with chocolate glory, shortly, and no one will ever know. The cake is huge, when it first comes out of the oven. Those egg whites really puff it up. You will think, “Did I use the right size pan? Nothing else is going to fit in here!” But don’t lose heart. As it cools, the cake will shrink down to just the right size. While our cake is cooling, let’s start on the Chocolate Mousse.
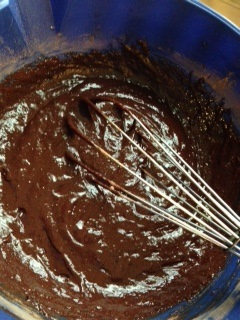
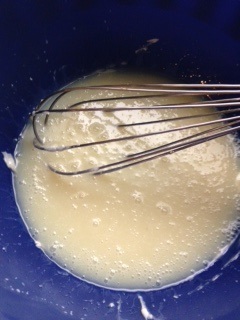
Start by whisking together your cocoa and hot water.

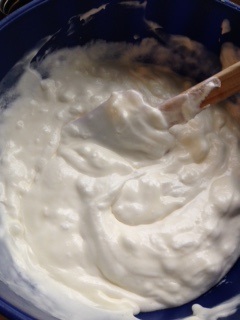
Melt the chocolate chips in the microwave, stirring after each 30 second increment, just until melted– it doesn’t have to be hot. Whisk the melted chocolate into your cocoa/water mixture. In a separate mixing bowl, use your whisk attachment to whisk the cream, powdered sugar, and vanilla, until soft peaks form. You are basically making homemade whipped cream, here . . . so definitely get the “bowl licking rights” to this one. UMMMM YUMMM YUMMMM.
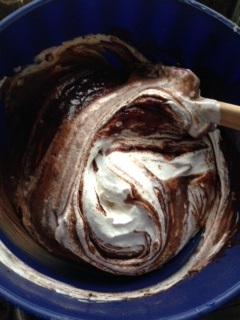
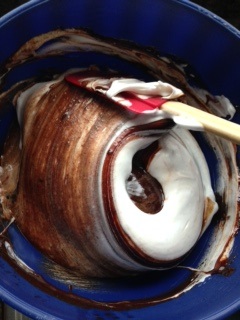
Here’s that folding trick, again (and yes, I still have tons of laundry if you’re in a folding mood!)– fold the whipped cream you just made into the cocoa/chocolate mixture. Keep going around and around, so you keep everything nice and light.
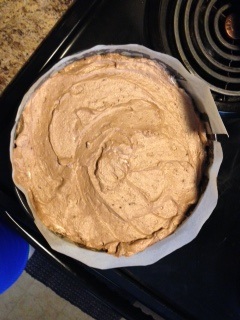
When your cake is cooled down, spread your chocolate mousse on top. Use your spatula to push the mousse all the way to the edge of the pan, and smooth the top. Cover this beauty with plastic wrap and refrigerate for about an hour before going on to the next step. (OK, OK– I cheated and only chilled it for 1/2 an hour, because I was in a hurry and this is chocolate bliss. But technically an hour is better. Don’t listen to me. I have a chocolate addiction.).
Toward the end of the chilling time, start on the white chocolate mousse. In a little bowl, sprinkle your unflavored gelatin over that squidge of water so it begins to soften (become like a gel instead of a powder). I didn’t show that step, but “softening” is important to unflavored gelatin so you don’t get grit in your final product. I usually let those two enjoy bonding for about 5 minutes.
Meanwhile, heat your white chocolate chips and 1/2 cup cream in the microwave just until chips are melted, stirring or whisking every 30 seconds. Next, stir your gelatin mixture, which by now looks like a big lump of rubber, into the warm cream mixture until dissolved. The gelatin just helps the more delicate white chocolate part to remain firm, instead of getting all sloppy on us like Grandma when you leave for summer camp. No meltdowns here, today!
In a separate mixing bowl, use the whisk attachment of your mixer to whisk remaining 1 cup of cream, powdered sugar, and vanilla until soft peaks form. Yep, you’re right– homemade whipped cream, again. Fold the whipped cream into white chocolate mixture and place your final layer on top of the chilled cake and chocolate layers. Cover and refrigerate the cake overnight, if possible, before removing the sides of the pan and serving.

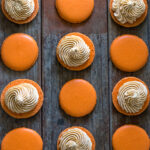
And when you’re finally ready to unveil the masterpiece . . . pop the sides off of that pan and carefully remove the parchment from the sides. Gaze at those gorgeous layers . . . that delicate beauty . . .

Bring it out to the table. Tell your family that everyone can have it– because this little baby is gluten free, believe it or not. They won’t believe you.

Freeze a few leftover pieces for a decadent treat at the end of a rough day. Tell yourself that your Mom always told you to finish what you start. And good kids always listen to their Moms. Hehe.
Because you did it. And I’m just so proud of you.

Disclosure: This post may contain affiliate links, which just means that we get a few pennies if you purchase through our link. I never recommend products that I don't personally use and love. Thanks!


Pingback: Valentine’s Day Dessert Recipes | The Adventure Bite