I can see your face scrunching up, now. A “Brotform?” What in the world is that?
What did the dressmaker bring to the dressmaker’s party? He “brought form,” of course. Sorry. That was weak.
Why did the child get excited when he saw his grandparents? He wanted to see what they “Brought for ‘im.” Haha! Sorry. That was even weaker. I’m very tired.
Moving along. What IS a brotform, really?
Well, that’s just a fancy schmancy name for a coiled cane basket. And it makes some really pretty artisan bread.
And here she is! These things can be a little pricey– they run around $40-$50. I snagged this one at a great sale at Williams Sonoma for $15. Usually you can’t even get a sniff of the air inside WS for that price. haha. I guess I got lucky.
Brotforms are amazing to make artisan type breads– crusty, crunchy crusts, with soft insides. They also create gorgeous loaves, because the bread has that beautiful caned pattern on it. This will be used to make a loaf of round crusty bread– called a Boule.
What are we waiting for? Let’s do this!
Boule for the Brotform
Ingredients:
2 cups warm water
2 tsp INSTANT yeast
2 tsp. salt
1/2 cup whole wheat flour
3 cups regular, all-purpose flour
Directions: Mix water, yeast, and whole wheat flour with the whisk. Add in salt and then white flour, little by little, until mixture is a soft dough. Place dough on floured silpat and knead until the dough has the consistency of an earlobe. Place in greased bowl and mist the top of the dough with cooking spray. Cover and allow to rise until doubled in size– about 1.5 hours. Punch down the dough and form into a round loaf. Place the “nice” side of the loaf down into the floured brotform and cover/rise again. Meanwhile, preheat your Dutch Oven and lid to 450 degrees. After 30 minutes, gently plop the dough from the brotform into the Dutch Oven. Be careful– the Dutchie is HOT! Don’t burn yourself. Bake, covered, for 30 minutes. Uncover the bread and bake 15 minutes more. Remove bread from oven and cool on a cooling rack. Bread will “crackle” when lightly pressed with a finger.
Now, let’s take a look at the process in pictures.
Begin by mixing your warm water, yeast, and whole wheat flour together. Whisk them into a nice floury liquid. Then, add your salt. Add the white flour little by little until your mixture becomes a squishy dough, at which point you want to drop it onto a floured silpat.
Cover it with flour and knead until you get a nice, soft dough about the consistency of an earlobe. For more about how to knead bread and what it should look like, check out my post here.
When your bread has been kneaded into a soft dough, place it in a greased bowl (not your brotform, yet), and mist the top with cooking spray. Cover and allow the dough to rise until doubled and puffy– about 1.5 hours.
While your dough is rising, go ahead and prep your brotform. This isn’t as hard as it sounds– basically, you just want to flour it well so the dough doesn’t stick. Since this was the first time I used this brotform, I lightly misted it with cooking spray so the flour would stick. After this first time, I shouldn’t need to do that. Also, after each time you use the brotform, use a dry brush to brush the flour out of it to clean it– don’t get it wet– the dry brush is fine.
Now, take some dry flour and put it in the brotform. It takes more than you would think– I probably used 1/2 cup of flour. Gently guide the flour around with your fingers until the brotform canes are really well coated.
There– nice and floured and coated! 🙂 You should still be able to see the canes, but there should be enough flour that the dough won’t stick. You can knock the brotform on the edge of the trashcan to get rid of the excess flour.
After your dough has doubled, go ahead and remove it and form it into a round loaf. Place the pretty side of the loaf down into your floured brotform– this is the part that will have the pretty rings on it after you’re finished baking the loaf.
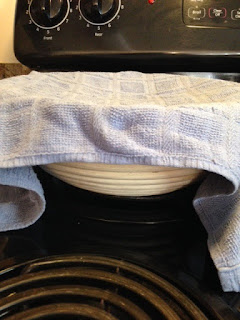
Cover the brotform and allow the dough to rise, again– it didn’t take as long this time– maybe 20 minutes to half an hour. You don’t want the bread to overproof– or rise too long. This dough needs to be strong enough to keep its shape, so don’t let it rise too long. A good trick to tell whether bread is reaching its “overproofing” stage is to gently poke it with your finger. If the poke springs right back out, quickly, then the bread has lots of yeast life. If the hole super slowly fills back in, it’s getting close to overproofing (the yeast doesn’t have the power to push the hole back out). If it doesn’t spring back at all, it’s probably overproofed. You want to stick it in the oven when it still has a good amount of “spring” left.

While the dough is rising the second time, go ahead and preheat your oven and Dutch Oven. Isn’t this gorgeous? This beautiful blue goddess was a gift from my hubby, and I fall in love with it all over again each time I use it. Go ahead and put the Dutch Oven (lid and all) into the regular oven and preheat to 450 degrees. Make sure that your Dutch Oven lid handle can take heats of this level (check manufacturer directions).
After 20-30 minutes, when your bread is ready, remove the Dutch Oven from the regular oven. Be CAREFUL!!!! This oven (and its lid and handle) are almost 500 degrees. This will burn you through a potholder. You need silicone potholders for this– you do NOT want to drop a burning hot pan on your feet because your hands were burned through the regular potholder when you tried to take it out of the oven.
PLEASE BE CAREFUL!!!!! I cannot stress this enough. Burns are no joke. Please, please, please be careful.
So, CAREFULLY remove your Dutch Oven and lid from the oven, using silicone baking mits. Gently plop your dough from the brotform to your HOT Dutch oven. Do NOT put the brotform into the oven. I kind of turned the dough upside down into my hand, and then I carefully placed it into the Dutch Oven. The dough will sizzle a little bit– that’s OK. Put the lid on the Dutchie, and place it all (lid and all), back in the oven. Bake for 30 minutes with the lid on.
Take the lid off, and bake for 15 minutes more. Be careful where you sit your lid to cool– the top of the oven is perfect (but back far enough that kids and pets won’t accidentally touch it). It takes a cast iron lid about 1/2 hour to cool. Please don’t place it on something that will melt or burn– the heat these things hold is unbelievable.

After 15 minutes of uncovered baking, take your loaf out of the oven. Use a pancake turner or spatula to gently move the bread from the Dutch Oven to a cooling rack. Be careful– the bread is really hot, too. Allow the lid, oven, and bread to cool for a while before you try to handle anything. I’d give them about 1/2 hour, minimum, so you don’t burn yourself. My son, as a toddler, accidentally pulled a put of burning soup down onto himself several years back. It was the scariest moment of my life. Thank God he was OK (after a harrowing ambulance trip to the local burn center and weeks of follow up), but I am permanently hyper-sensitive about possible burns. I don’t think I ate any food above lukewarm temperature for at least a year after that incident. Please be careful, everyone! I don’t want anyone to get hurt. Ever, ever, ever again.
Whew. So . . . anyway . . .
This is the bread when it’s finished. It’s so pretty– see the rings? You get more defined rings if you use less flour, but I am always afraid of the bread sticking, so I really flour it up well. I’m happy with this design, but you can try less flour if you want more defined rings. The bread smells great– and the neatest thing is that it “crackles” when you press on it. So cool. That’s how you know French breads are done correctly– they kind of sing and crackle at you (like a crazy old aunt). haha. When they start asking you if you’re married yet . . . then you should get worried.
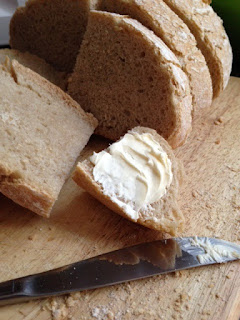
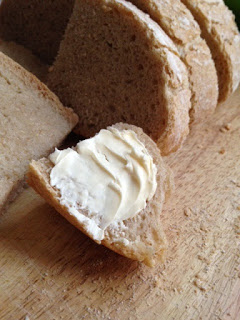
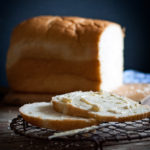
When the bread is cool, use an electric knife to cut it. This bread has a crunchy exterior and a soft, smooth interior crumb. This bread can take the punches– it is great for things that need tougher breads (think toasted sandwiches, like paninis). It is great for making your own croutons, as well (never tried this? It’s great– pick your own seasonings!). You can use it to sop up sauce or stew . . . and here’s the kicker . . . this can be used as a homemade BREAD BOWL!!! 😉 Fall is coming– make these for bread bowls and ladle steaming, homemade stew into them. Tear off chunks of the bread as you eat, and dip it into the stew.
You did it. And I’m just so proud of you.

Disclosure: This post may contain affiliate links, which just means that we get a few pennies if you purchase through our link. I never recommend products that I don't personally use and love. Thanks!










Do you have a printable version of this brotform recipe?
Hi there Maggie– no I’m sorry I just write it down with an old fashioned pen. I like the idea of printable recipes though– I’ll have to look into it. Thanks for stopping by! — Emilie
Pingback: Creamy Potato Soup – Cookies for England
Pingback: Creamy Potato Soup – Cookies for England