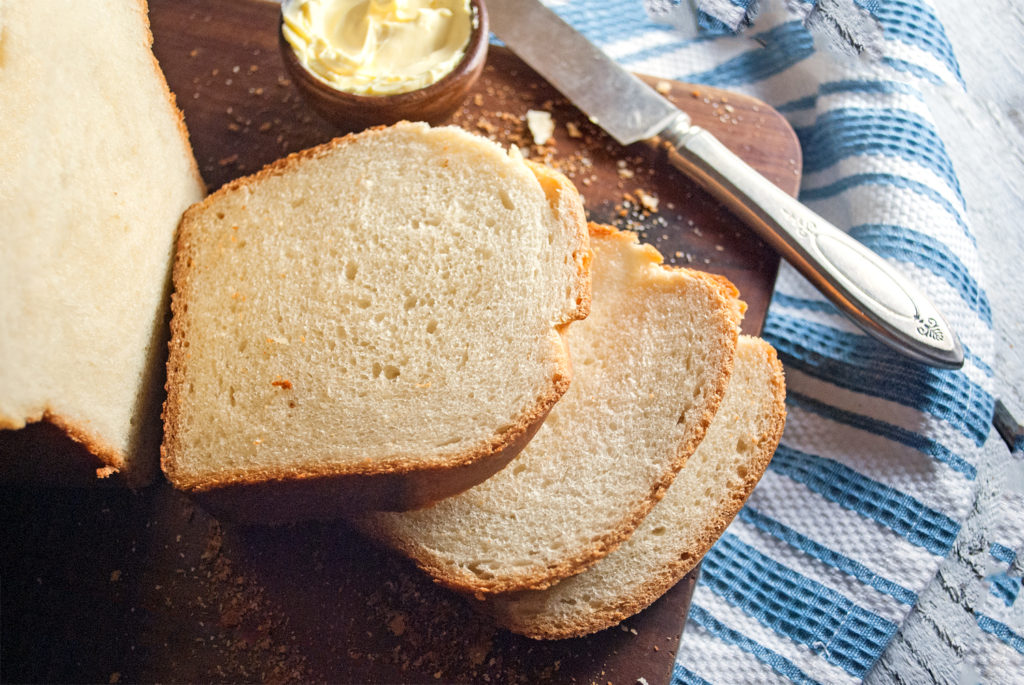
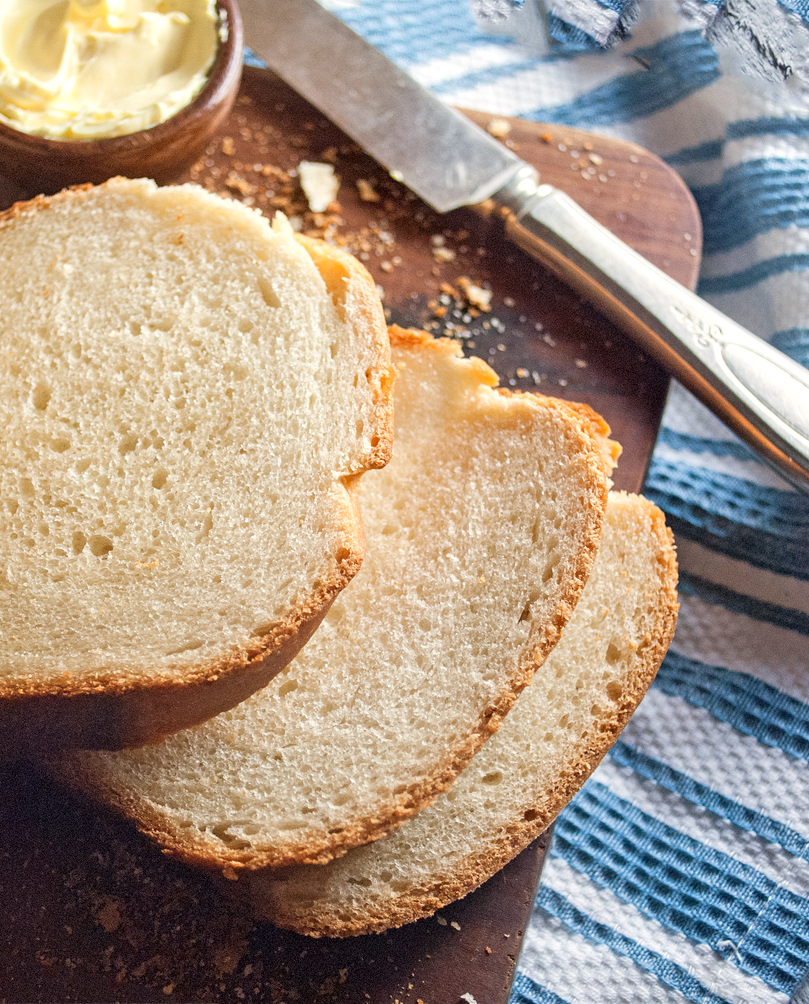
Bread is comfort. Absolutely nothing beats a slice of fresh bread, just out of the oven, with a puddle of melting butter in the middle. It’s bliss, I tell you. Bliss.
When I first started my baking journey, the object I most wanted to make was bread. Ironically, it was also the most difficult baking item I had ever tried. For all of its seeming simplicity, it certainly packed a lot of failures. I don’t know how many times I waited eagerly for hours, only to pull my finished loaves/bricks from the oven, and toss them into the trash in despair. Many times I gave up and declared that the frustration simply wasn’t worth it– I would NEVER try this stupid bread making thing again! But then . . . I would always come back and try again. And I would always fail. Again. I tried every type of yeast out there. I tried butter, margarine, oil, bread flour, regular flour, instant yeast, active dry yeast, rapid rise yeast . . . I tried machine kneading and hand kneading and not kneading, at all. I tried everything. EVERYTHING. And still it mocked me. People would say how “easy” certain bread recipes were, and I gave a wry, bitter chuckle. There was absolutely nothing “easy” about this devil loaf– this siren that lured me in with its charms and crashed me on the rocks each time I approached.
Finally, in a last ditch attempt, I bought myself several bags of flour, every type of ingredient I could think of, and a large piece of paper. I said, “I’m not leaving this kitchen until I get this right.” I baked bread, literally, that entire day. Each recipe I tweaked just a little bit– I would change one ingredient per batch, and I took notes about what I had done, and how the results turned out. I think I baked 20 loaves of bread that day. It was absolutely exhausting, but I learned so much.
When it was all over, I was left with many failures, but I also had my invaluable notes. I had scribbled about everything– from the way the bread tasted to the way it looked and the ease by which it was prepared.
I also learned a lot about the ingredients of bread, that day. All bread is basically made up of the same base ingredients: liquid, oil/fat of some type, yeast/leavener, and flour. It has been customized thousands of ways, but those are the baseline ingredients. And the more I experimented, the more I realized what each ingredient brought to the table. Bread made with milk was tender, but a little heavier than bread made with water. Using oil gave bread a longer shelf life and a tighter crumb, vs. bread made with butter, which was tender and flakey (like a croissant). Adding eggs gave a rich, heavy, almost dessert-like bread. Even changing the basic ratios of these ingredients changed the final product, completely.
Even though that enormous baking experiment was one of the most exhausting days I’ve ever had, it was probably one of the most useful things I have ever done. After that, I sat down, compared my notes, and developed my own recipe. I decided how I wanted my finished bread to look, and I literally created a blueprint for it, using the ingredients that I knew would work. The first time I tried my new recipe, I knew I had a winner. And I’ve never looked back. If practice makes perfect . . . I ought to be a pro by now. I have failed more times than I can count.
I guess what I’m saying is . . . don’t be discouraged if you don’t get it the first time. Or the second time. Or the third time. Bread just takes time to figure out. Eventually you kind of get used to the way it looks and feels (depending on the weather and humidity– yes– this actually does change it), and you adjust yourself automatically. But it takes practice and determination. Don’t give up. We very seldom buy bread anymore, these days. There is nothing better than a nice slab of homemade goodness to send in your hubby’s lunches, or a buttery soft roll to put on the table with your supper. And there’s nothing better than wrapping a freshly baked loaf, warm from the oven, and taking it to a friend. So keep trying. The end results are worth it.
Here is my bread recipe. I created it, from many, MANY failed attempts. I am happy to share, but please link back here if you do, so that my hard work isn’t stolen 😉 I always try to credit authors with their work, and I would appreciate it if you do the same, should you decide to pass it on. Thank you!
What are we waiting for? Let’s do this!
White Bread Recipe:
1 1/2 cups warm milk
1/4 cup sugar
3 tbsp. oil
2 tsp. yeast (I use instant)
1 1/2 tsp. salt
3-4 cups flour (depending on humidity).
Directions: Add warm milk, sugar, oil, and yeast together in a bowl. Whisk together and gradually whisk flour and salt into liquid to form a shaggy dough. Switch to a wooden spoon and add in enough flour to form a soft dough. Dump dough onto a floured silpat and knead 5-7 minutes until it has the feel and touch of a human earlobe (weird, but it works). Place in an oiled bowl and spray the top with cooking spray. Cover with a towel and let rise in a warm place about 1.5 hours. When dough has doubled in size, gently dump onto your silpat, again, and form into a loaf. Place into greased loaf pans and allow to crest about 1″ above your loaf pan. Preheat your oven to 375 while your bread is rising in the pan, so that when it is ready, you can just pop it in the oven without having to wait for preheating. Bake 10-12 minutes until golden, and then cover with foil and continue to bake until center temperature reaches 200 degrees. Invert on cooling racks and brush with melted butter, if desired.
You’ve probably read recipes like this before. Sometimes it sounds simple enough, but there is nothing more frustrating than waiting for hours, only to see your gorgeous loaf deflate in the oven and come out looking like an angry brick. I’m going to walk you through the steps, and, hopefully, save you the hours of frustration I found out the hard way.
Keep your chin up. You can do this. Let’s take a look at this, in pictures!
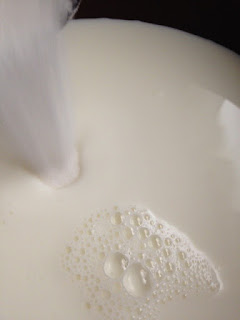
The first thing I do is add the sugar to the milk (still cold milk, at this point). Feel free to do this another way if you like, but this is what is easiest for me. Whisk it in, and warm it in the microwave.
For me, this cold milk out of the fridge, and the sugar, take exactly 1:45 to warm just right. Test your own microwave and see how long it takes for the milk to become nice and warm– not hot.
Next, when I am sure the milk isn’t too hot (just pleasantly warm, or it will kill your yeast), I add the oil and INSTANT yeast. Remember, there are several different types of yeast. You can read more about that
here. I use instant, which you can’t find at the grocery store– those are either going to be active dry or rapid rise (these are fine to use– but they take an extra step). I use SAF red yeast from King Arthur flour, which you can find
here
. Remember before we used the SAF gold for the
cinnamon rolls? Gold is for sweet breads, and red is for regular breads, like the plain white sandwich bread we are going to make, today.
Add a little bit of flour– maybe 1/2 cup or so. Notice we haven’t added the salt, yet. Salt and yeast don’t like each other very much– they’re like a pair of divorcees who are both attending their child’s wedding. They both need to be there, but unless there are plenty of other things there to distract them, things are going to get ugly.
Add a little flour before you add the salt. Your yeast will thank you. Once you have a little flour mixed in, go ahead and add the salt. Whisk everything together, and then gradually add little bits of flour until the dough becomes almost too stiff for your whisk.
This is what your dough should look like when it is almost too thick for the whisk. At this point, switch to a wooden spoon and continue mixing your flour in, a little at a time, until it is almost too stiff to stir.
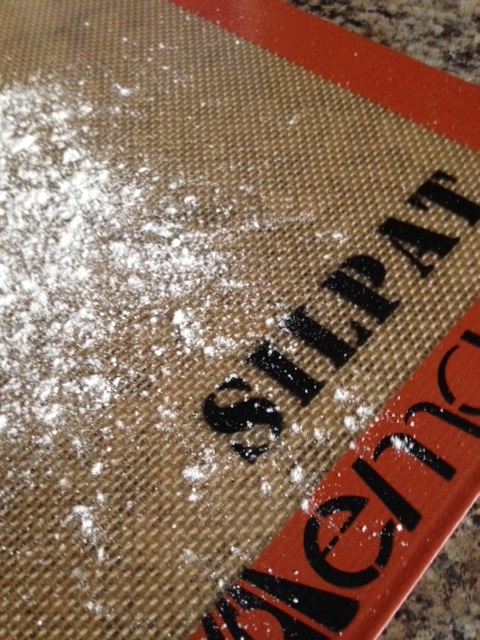
Here is our trusty Silpat, again. Flour that baby up and get ready to roll!
Er, knead. Basically use your spoon to scrape the stiff-ish dough onto the floured silpat. It will be kind of messy. I always wear an apron. Sprinkle flour over the top of the blob and begin to knead.
Kneading sounds more complicated than it is. Basically, you’re just rolling and squishing the dough to work the flour in. As you work, continue to lightly flour your silpat– you don’t need tons of flour– just enough to keep it from sticking. I kind of use the heels of my hands to squish the bread away from me, and then gather it up and roll it back into a ball toward me, again. Keep repeating this and flouring lightly until the dough becomes nice and soft, and not really sticky anymore.

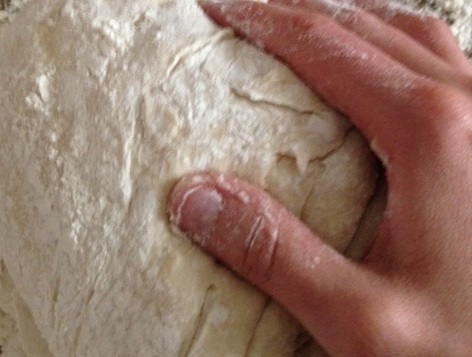
This is what your finished dough should look like. See how it’s nice and smooth? When dough is ready, it should feel like a human earlobe– that’s a weird comparison, but that’s exactly what it feels like– soft and supple. If you poke your finger into it, the dough should spring right back out when you remove your finger. If the hole stays in the bread, then you should knead a few more minutes.
When your dough looks and feels like this, it’s ready to rise. Place your dough in a greased bowl (I mist with cooking spray, but you can feel free to oil or butter the bowl if that is your preference), and then mist the top with cooking spray, again. I used butter flavored spray so you could see it better.
If you chose to oil the bowl, just turn the dough once so that everything is nice and slick. That keeps the dough from sticking to your bowl as it rises.
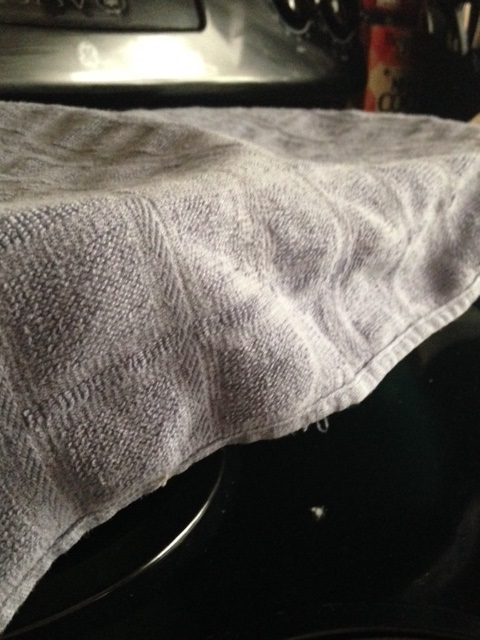
Cover with a clean towel and allow to rise in a warm place until doubled in size. This takes about an hour and a half in my kitchen. In the winter, when it’s really chilly, I preheat the oven for a few minutes, turn it off, and then let the bread rise in there. The winter also tends to be very dry, so I usually dampen the towel before placing over the dough, before rising, in colder months. Experiment and find out what works best for you.
Let me show you a neat secret. Are you ready? Look carefully at those pans. What is the difference? Look very hard . . . and you can see that the pan on the right is a teensy bit smaller than the pan on the left.
OK . . . so why are you telling me this?
I hope this doesn’t seem off color, because I don’t mean it to be . . . but the best way I can describe this is by using this example: the pan on the right is the push up bra of the bread baking world.
That’s right. What is a push up bra for, anyway? It’s for taking what you have, giving it a little extra “oomph,” and making sure that what you have looks its best. That’s what the pan on the right does for loaves of bread. It is an 8.5×4.5 inch pan.
OK. I’m still confused. Don’t be . . . the standard sized loaf pan is 9×5. This pan is used for everything from bread to meatloaf. But eventually I learned that most bread recipes, though they don’t specify pan size, are actually designed to fit an 8.5×4.5″ pan, not a 9×5 pan.
I still don’t see what a measly 1 inch difference will make to my bread.
Oh, so said I, my friend. And I learned the hard way what a difference that teensy weensy inch could make. If your recipe calls for 3-4 cups of flour, rest assured– it wants an 8.5×4.5″ pan. If it calls for 6-7 cups, then you can use the larger 9×5.
The first time I discovered this truth, I was baffled. Do they even make 8.5×4.5″ pans? Actually, yes. I found them immediately at Walmart, and I have used them every few days, ever since I bought them. Get yourself a few of these little treasures. They will turn your bread from dismal 2″ high loaves that “didn’t” rise (actually, they did rise– just side to side, instead of up) into glorious loaves that flaunt their golden crowns for all the world to see. I have even found these smaller pans at Dollar Tree. They weren’t super good quality, but if you’re just experimenting, that’s a great place to start without spending an arm and a leg. (Side note: Interesting fact– did you know that the phrase “costs an arm and a leg” came from the days when portrait painters used to charge more per added limb they had to paint into your portrait? If you chose a full body portrait, rather than a side view, you’d be paying a premium for the “arm and leg” that you requested, extra. Now you know).

I can’t wait for you to try this smaller pan and see what a difference it makes, “squishing” your assets ever upward. Haha. Here is our dough after an hour and a half. See how beautiful and puffy it is? At the beginning, it was a tiny blob in the bottom of the bowl. Now it’s almost to the top.
Carefully push down on your dough, deflating it. Scoop gently onto your silpat– no need to flour it, this time.
Now I’m going to show you how to form a loaf. If you already have a way to do this, knock yourself out. This is how it’s easiest for me. First, use your (clean) hands to squish the dough down flat.
Take the left side and fold over the center, pressing down to seal.
Press the right side over and push it down to seal. It should kind of look like a big cannoli.
Starting at the top, roll your “cannoli” tightly down toward yourself, in a log shape.
Tuck in the ends so that your finished loaf looks pretty.
Place your finished loaf in the pan and press it down with your hand to make sure it touches all the sides. Remember– this is an 8.5×4.5″ pan, not a standard 9×5 loaf pan.
Cover your loaves with a towel, again, and turn your oven to 375. Why am I preheating the oven before my bread is ready to go in????
I’m all for saving electricity/money also, but I find that, with yeast dough, even 5 minutes too long on the rising time can cause the entire loaf to over-proof and collapse into a disgusting brick the second you place it in the oven. It’s much better to have your oven ready at a moment’s notice so you can pop that bread in the second it’s ready without having to wait 5-6 minutes for the oven to preheat.
How do you know when a loaf is ready to go in the oven? Well, the rule of “thumb,” literally, is that it’s ready to go in the oven when it’s 1″ above the lip of the pan. This is roughly the distance to your knuckle on your thumb– eye it up, and if it has reached this height, it’s ready. Don’t worry– it will grow a lot more in the oven and give you that beautiful golden crown you’ve always wanted.
This is very important . . . slash the loaves before they go in the oven. For quite a while, even after I had gotten very good at making bread, my loaves would come out, tasting lovely, but having a huge air bubble/hole in the center. This was very frustrating, since I couldn’t figure out what I was doing wrong. Basically, your yeast “burps” the bread into rising. At this point, though, we want the bread to bake– not rise too much more. Slashing the loaves helps those gas bubbles to escape into the oven (creating amazing, fresh bread smell), rather than creating a cavern in your loaf.
To slash, take a very sharp knife (dull will tear and deflate your bread) and ever-so-gently skim the surface of the bread, in a diagonal. I usually put 3-4 slashes per loaf, just before popping the loaf into the oven. Make sure your knife is almost as sharp as a razor blade before you attempt this.
Here is my loaf, with 4 slashes, ready to go into the oven. I usually make 2 loaves at a time, and if you do this, be sure to switch sides of the oven halfway through baking to ensure even browning.
When I first place the loaves in the oven, I don’t cover them with foil. This first part of baking is where the loaves take on the color you want. When they get to be the shade of golden brown you’re looking for, that’s when to cover them to finish baking. I usually allow them to bake for 20 minutes on this “browning” stage, switching sides of the oven halfway through.
This is just the color I want my loaf to have. It has been in the oven for 20 minutes, and halfway through the baking time, I switched the loaves to opposite sides, to promote even browning. But it’s not finished baking yet!!! DON’T TAKE IT OUT OF THE OVEN YET!! If you were to pull this bread out, now, it would be raw and gooey in the center. Yuck.
Cover each loaf with foil (this keeps them from burning on top and preserves that golden brown color) and place back in the oven for another 20 minutes.
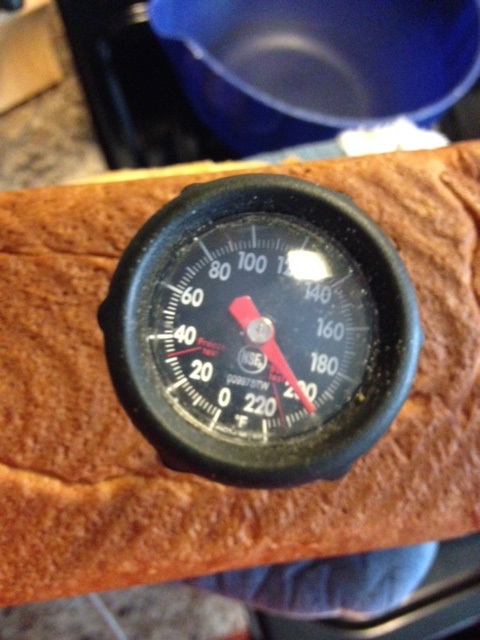
The way to tell if your baby is done is to take the little one’s temperature. Haha. I’m serious. You can stick your thermometer into the top of the loaf, but I don’t like to make a hole, especially when I’m giving it away, so I flip the loaf over onto a hot pad and hold it in place while I take its temperature. When it reaches an internal temperature of 200 degrees, it’s perfect. If it’s not quite 200, cover with foil again and give it another 5-10 minutes.
*Make sure you check the temperature of each loaf, separately, rather than assuming they will be the same. Ovens tend to have hot spots (another reason I rotate pans), so one loaf may be completely finished, while the other needs another 10 minutes.
When the internal temperature of each loaf reaches 200 degrees, carefully place the loaves, out of their pans, onto a cooling rack. Use hot pads so you don’t burn yourself. I’d hate to have that on my conscience. Be careful! 🙂

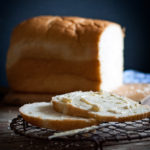
See how gorgeous that loaf turned out? If you like, brush the finished (and still hot) loaf with melted butter. The loaf will kind of drink the butter in, creating an amazingly tender, delicious, golden crust. You can cut into the bread now, if you want, but it’s better if you let it cool a bit. It will continue baking in the center for a while after you take it out. I usually allow the bread to finish “counter baking” and become just nice and warm– not piping hot– before I dig in.
When you do cut it, an electric knife works great. You just haven’t lived until you have a warm slab of homemade bread with butter or jam. Try making French toast or a sandwich with homemade bread– it will knock your socks off. And whatever you don’t eat in a day or two, slice and freeze for a quick toasted treat in the morning.
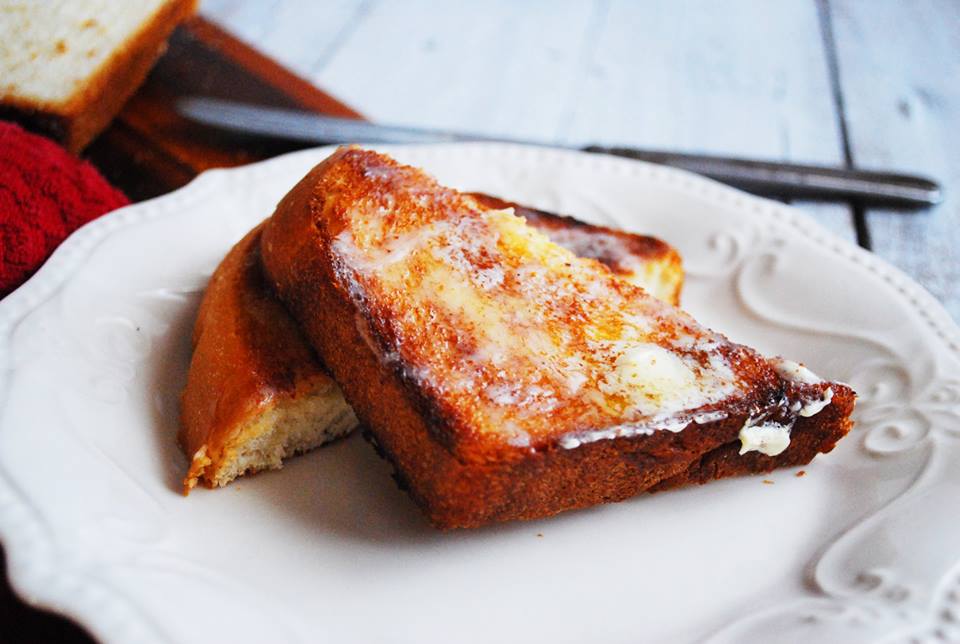
Somehow, warm, buttery toast just tastes better, when you’ve made it, yourself.
You did it. And I’m just so proud of you.

Disclosure: This post may contain affiliate links, which just means that we get a few pennies if you purchase through our link. I never recommend products that I don't personally use and love. Thanks!


Pingback: Creamy Potato Soup – Cookies for England
Pingback: Homemade Krispy Kreme Doughnuts – Cookies for England
Pingback: Cinnamon Crunch Bagels – Cookies for England
Pingback: Delicious Homemade Doughnuts – Cookies for England
Pingback: Crazy for Raisin Bread – Cookies for England
Pingback: Easy Parmesan Chicken – Cookies for England
Pingback: How to Bake Artisan Bread using a Brotform – Cookies for England