
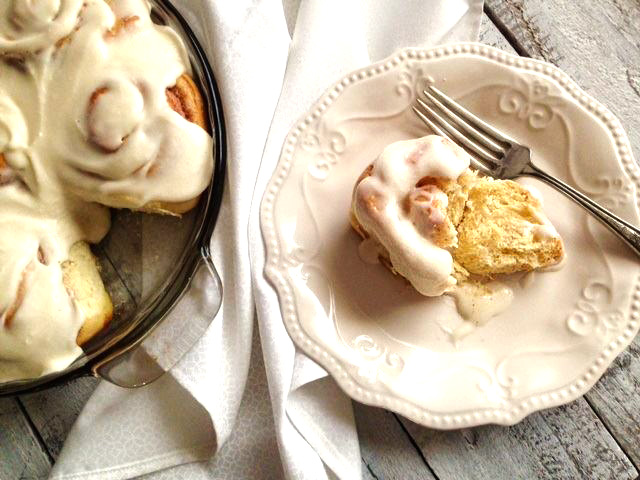
Picture this scenario: It’s Christmas morning. Your eyes scrape open to the sound of your kids screaming “WAKE UP EVERYONE!!!! IT’S CHRISTMAS!!!!!!” Yawn. Didn’t you just go to bed an hour ago, after spending half the night assembling the Barbie Dream House? The house is full of relatives clamoring downstairs in their Pajamas and bathrobes, oohing and aahhhing at the beautiful tree. Then . . . the magic happens. You effortlessly whisk a gorgeous tray of cinnamon rolls, oozing with butter and sugar and cinnamon, from the kitchen. The icing drips seductively down the sides, melting into a delicious glaze that sends intoxicating aromas throughout the house. Yes. You did this. You did this on just a few hours of sleep. No need to tell everyone how easy it was. Let them be impressed. You deserve it.
Sound too good to be true? It ISN’T!!! This recipe is one of my all-time favorites. Its versatility is astounding. You can whip these up fresh, or even freeze the dough for later when you need a quick breakfast. You can assemble the rolls and put them in the fridge for the next morning. You can make a double batch, freeze the second, and serve it whenever you want, just as tasty as when it was fresh.
What are we waiting for? Let’s do this!
Ooey Gooey Cinnamon Rolls
(adapted from Taste of Home)
Roll Ingredients:
1 yellow cake mix
2 1/2 cups warm water
2 packages active dry yeast (or 4 1/2 tsp. instant yeast)
5-6 cups flour
Icing Ingredients:
6 tbsp. softened (room temp) butter
3 cups powdered sugar
1 1/2 tsp. vanilla extract
2-3 tbsp. milk
Directions:
Place cake mix, warm water, and INSTANT yeast (more on this later) in a mixing bowl. Mix well. Add flour gradually until it is almost too stiff to mix. Swap out your beater for the dough hook and gradually add enough flour to form a soft dough. Place dough in greased bowl, grease the top, and cover. Allow to rise until doubled in size– roughly 1-1 1/2 hours. Punch dough down and divide into 2 dough balls. Roll each dough ball out into a rectangle roughly 18×12 inches in size. Cover the layer with butter, sugar, and cinnamon. Roll up the log and pinch the ends closed. Divide each log into 16 pieces and place in greased baking pans (I generally do 2 8″ rounds with each dough log). Cover and allow to rise 20-30 minutes more until puffy and almost doubled. Preheat the oven to 375 while the rolls are having their second rise, and then pop them into the preheated oven when they look almost doubled (waiting to preheat the oven may cause them to over-rise– you want it ready and hot so you can put them in at any time). Bake for roughly 20-25 minutes, until golden brown. Rotate pans halfway through baking to ensure even browning.
Icing: Allow butter to come to room temperature. Slowly mix butter and powdered sugar in your stand mixer until you have what looks like large crumbs. Add in vanilla and milk. Beat well, until lumps are gone. Store icing in the refrigerator until you are ready to use. Warming the rolls and adding the icing on top creates an amazing, sticky glaze. Yum!
Another beautiful thing about this recipe is that you can swap out cake mixes based on your flavor preference or the holidays. Try a lemon cake mix, and sprinkle a few fresh blueberries in the center of the rolls. Add a little lemon juice to the icing and you have Lemon Blueberry rolls with lemon glaze. Try a strawberry cake mix for Valentine’s day, and smear a little cream cheese and fresh strawberries in the center for an unbelievable breakfast for your Sweetheart. Try Red Velvet and pistachio for Christmas– or just stick to the regular, reliable favorite: amazingly moist cinnamon rolls, dripping with sweet, sticky glaze. It’s hard to resist them any way you choose. 🙂 Here’s a breakdown of how to do it.

First– the cake mix. Really, any yellow cake mix will work. I like the Pillsbury traditional yellow– mainly because it’s 98 cents a box. But even beyond that, I find that it’s very tasty and holds up well, where some of the more expensive mixes seem a little more fragile– maybe they are more buttery. I don’t know. But this is the one I use. Feel free to experiment and see which one you like best.

Add the warm water, and then the yeast. Yeast is a strange animal. Do take note of what kind you buy at the store. The three basic kinds are (1) Rapid Rise, (2) Active Dry, and (3) Instant. Generally, the types you find at the grocery store are Rapid Rise and Active Dry. I personally prefer instant. The reason for this is that instant can be added directly to a recipe, without “proofing” the yeast first. You can take it right out of the freezer, cold, and not have to worry about it being dead– you just add directly to your recipe, and you’re ready to go. Both rapid rise and active dry yeasts require proofing– that is, before you add them to a recipe, you have to allow them to kind of “grow” and heat up in a cup of warm liquid and some kind of sugar. They’re the ultimate “I’m not a morning person” of the baking world. They eventually get to work, but they need a gentle wake up and something sweet to snack on before they are ready to crawl out of bed and do your bidding. Instant yeast is the obnoxious early bird that looks forward to Mondays and jumps out of the freezer singing. Annoying in real life . . . great in yeast dough. 😉
I like to use SAF Gold instant yeast for sweet dough recipes, such as this cinnamon roll one. I get mine here. Use SAF red for other, less sweet yeast doughs, such as bread or dinner rolls. Once you use instant yeast, you’ll never go back.

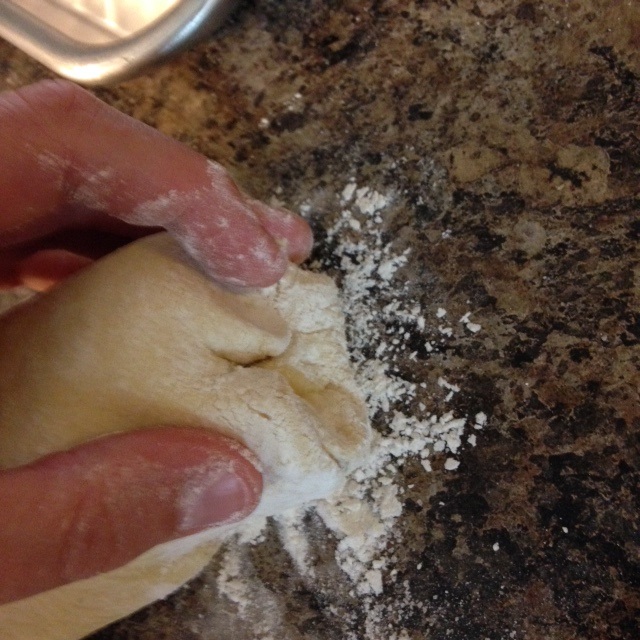
Begin to mix your cake mix, water, yeast, and little bits of flour. Use the regular beater until the dough starts to look like this– kind of shaggy and almost stiff enough that the mixer starts to knock, but not quite that far. At this point, switch over to the dough hook and add your flour, little by little, until you get a dough that is still soft, but not so sticky.

See how sticky this dough is? It is absolutely clinging and stretching/sticking to my (clean!) fingers. Did everyone wash your hands? haha. Add a little more flour a bit at a time until the dough becomes less sticky. You may have to kind of flip the dough over so that the flour reaches the bottom, also, and doesn’t all get ground into the top of the dough, only.

This dough is just about there. See how it is still soft, but not sticking to the sides of the bowl anymore? That’s what you want. When you touch it, it should be soft and kind of sticky, but it shouldn’t cling to you like a crazy ex girlfriend.

When your dough is no longer super sticky, scrape it off of the dough hook (it shouldn’t stick to your fingers– if it does, shift the dough around and add a bit more flour) and place it into a greased (I just use cooking spray) plastic bowl. Mist the top with cooking spray and cover with a towel.
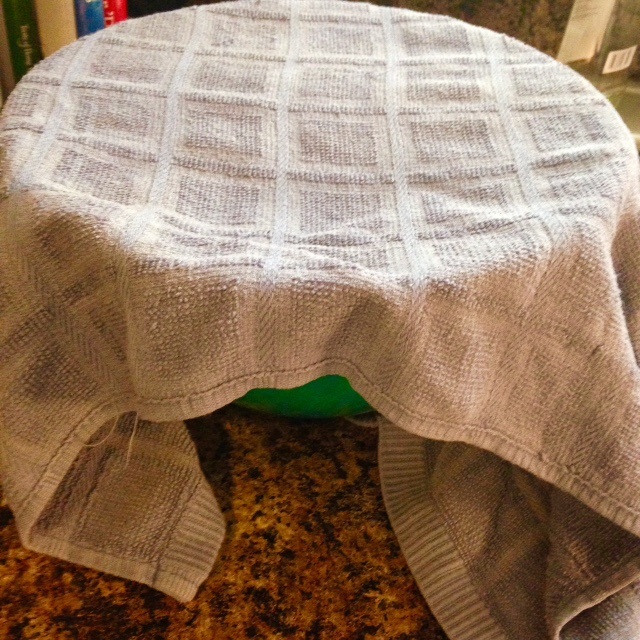
Place in a warm place and allow to rise until doubled and puffy– about an hour to an hour and a half. This doesn’t have to be a super warm place, but definitely not cold. If I’m making these in the summer, I just let the dough rise on the back of my stove (burners off, obviously). The heat of the house in summer is enough to help it puff up nicely. If it’s winter, and my house is colder, sometimes I preheat the oven for a few minutes and then turn it off. It makes it nice and warm for the dough to rise inside. Experiment and see what works best for you.

Wow! Look at that rise! If you go up a few photos, compare this to the little blob of dough in the same bowl. It was a shy, tiny baby, and now it’s all grown up! You should feel so proud.
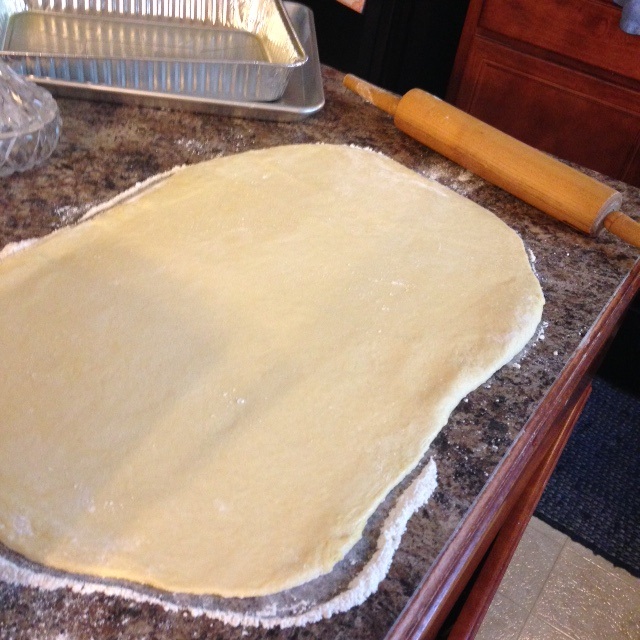
Now you’re ready to ROLL! haha. Gently deflate that puffed up adolescent (is there any other kind? haha). Dump it out onto a (clean!) and floured surface. It helps to kind of form it into a rectangle shaped lump before you begin to roll. Use a little flour to keep things from sticking, but don’t overdo it. Roll your rectangle to roughly 1 foot by 1.5 feet.

I told you . . . I’m all about saving time. I have to. It’s a survival mechanism. I know you parents understand. The traditional way of making cinnamon rolls says to melt butter, allow to cool a bit, and then gently brush over the dough and sprinkle with your toppings. I dislike this method for several reasons: (1) if you’re in a rush, it’s tempting to start spreading the melted butter right out of the microwave, kind of killing your yeast because of the molten hot topping you’re lathering on there. (2), melting butter takes an extra step, and more often than not I get too much and have to decide whether to try to slop it on there or throw it away– neither of which I like to do. (3) It takes twice as long to clean up when your rolls are dripping gooey juice each time you pick one up to place in your pan. Yuck. I like CLEAN fingers and spaces! Goodbye goop, and hello time saving, less cleanup method!
I can already hear some of you butter purists cringing, but I use good, old-fashioned Country Crock spread. Yep. That’s right. I get the back of a spoon and place a blob of butter every few inches on my rolled out dough. It’s ready to spread immediately. I use the back of my spoon to gently spread it– and that saves me another dish to wash, too, because I use the spoon for both things. The spread is thick, so it doesn’t ooze everywhere later on, and it tastes just as good as the real thing. So don’t tell the butter police that I am merely a low-down commoner. Eh . . . we do what works around here.

After you spread your margarine with the back of the spoon, sprinkle generously with white sugar, and then with cinnamon. There are really no measurements here, because it’s a matter of personal preference and taste. I just kind of sprinkle it until it looks like it covers the butter. You don’t want piles on there, but you do want enough to cover thoroughly. When you finish topping the dough, roll it up by pushing it away from you. Sorry this picture is blurry. Do you know how incredibly difficult it is to take pictures with hands covered with flour? Good thing I love you.
When you finish rolling the dough, kind of pinch the dough together at the seam, and also fold the ends in on themselves. This keeps all the “guts and glory” inside.

When I first started making cinnamon rolls, I just kind of hacked away at my finished log, and I got all different sizes and shapes of rolls. Some of them would be cowering, tiny and afraid, in the pan, while other, overachieving taller ones, towered over them. It wasn’t pretty. It tasted good, but looked horrible. This is an easy way to avoid cinnamon roll envy. Each log makes a nice 16 pieces. Using the dull end of a knife (you don’t want to cut yet– just mark), divide the dough in half. This makes 2 halves. Then mark half of each of those halves. Now you have 4 equal pieces. Divide in halves again and again until you have 16 equal pieces. All you have to do is divide in half and do it again and again– so you don’t have to try to eyeball 16 equal portions. Hope that makes sense.

When you have your 16 sections divided (remember, each log makes 16, so if you made a full recipe, with a full cake mix, you’ll have 32 pieces, total), you’ll have a nice 8″ round (8 rolls) and 2 13x9s (12 each). Just making half a recipe (half a cake mix) makes 2 nice 8″ rounds. Half a recipe is what I usually do for our little family, and then I have one extra round to pop in the freezer for later.
Carefully cut on your pre-marked lines (a serrated knife works best) and place your rolls in a greased pan. If you want to freeze the dough for later, here’s where you do it. When you’re ready to bake, get them out of the freezer 5-6 hours before you need them to bake, and let them sit, covered, at room temp on the counter. Then bake as normal when they are puffy.
If you are baking right away (what I usually do), just space them evenly in greased pan of choice, and cover with that same towel (saves laundry and time!) that you used to cover the initial dough. Preheat your oven to 375. Even though the rolls aren’t going in the oven, yet, you want to preheat your oven early. A big mistake made by many novice bakers is letting dough overproof– or rise too long. This can happen easily when you say “This dough is perfect! Let me preheat my oven now!” Somewhere between perfect and the 6 minutes it takes the oven to preheat, your dough gives up and destroys itself. Put it on suicide watch and don’t let that happen! Let the oven be good and hot so you can pop those suckers in at a moment’s notice!
I generally let these rolls rise for 15-20 minutes. I check them frequently. If it’s a hot day, they rise much more quickly. In the winter, it takes them a bit longer. You can tell they’re ready when the sides of the rolls are barely touching. They will rise even more in the oven, so you don’t want them super puffy, or they’ll overflow their little pan when they get in there. Again, this is with instant yeast, which rises much more quickly. If you are using another kind of yeast, it will take about 35-40 minutes to get the rolls nice and puffy.
Bake at 375 for 10-12 minutes, and then rotate your pans. Rotating the pans helps them to get browned more evenly, instead of the back ones being burned while the front ones look pale and undercooked. It takes these rolls roughly 20-25 minutes in my oven (rotating halfway through), but each oven is different, so keep an eye on them. When they look nice and toasty, take them out and slide a butter knife along the side. If they are pale, put in for a few more minutes. If the sides are golden, they’re done.

And that’s all there is to it! Now your biggest dilemma is whether to eat them now, or save them for later. I think you should try them. It’s all in the name of science, after all, right? If you want icing on them, follow my recipe up there way at the beginning with the recipe part, and you can either place icing directly on a single roll when it’s hot (it will drip down the sides into a seductive glaze), or you can wait until the pan cools and ice the whole thing. I tend to do it this way for church breakfasts or when I need the rolls to be ready for the next day. That way I don’t have to mess with icing individual rolls. It’s really up to you. Why don’t you try both and see? Try them now. Pour a big glass of milk and try it both ways. Again . . . all in the name of science. Science always was my favorite subject. Hehe.
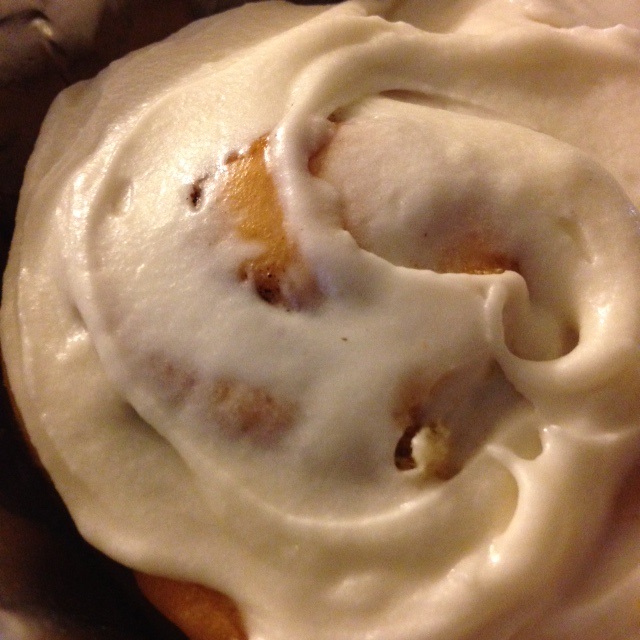
Swirl the glaze a little bit. Sing a little opera. No one will care.

These are the beautiful things in life. Take one and savor it with a steaming mug of coffee. With all you have to do, you deserve to take a moment for yourself, once in a while.
Because you did it. And I’m just so proud of you.

Disclosure: This post may contain affiliate links, which just means that we get a few pennies if you purchase through our link. I never recommend products that I don't personally use and love. Thanks!


Pingback: Hot Cross Buns – Cookies for England
Pingback: Sinful French Silk Pie – Cookies for England
Pingback: Hot Cross Buns – Cookies for England
Pingback: Homemade Bread Bowls – Cookies for England
It is a cold, dreary day here in PA and I thought it a good day to try the rolls. With my instant yeast at hand and a positive attitude I followed your instructions and guess what? I have ooey, gooey cinnamon rolls sitting on my kitchen counter!!!!!!! They are wonderful! One quick question – you keep your instant yeast in the freezer correct? How long does it stay good?
If no one has told you today, you deserve a star. 😉
Thanks a million
Sharon, that just gives me a huge grin on my face! YIPEEE!!!!! I’m so glad they turned out so well for you! 🙂 I think YOU deserve the star! Way to go! Doesn’t it feel great to conquer something that has frustrated you for so long? That’s the way I felt, the first time I pulled those gorgeous beauties from the oven, after so many failed and frustrated attempts– like the heavens opened so the angels could sing and dump paper heart confetti on my head. Haha.
I do keep my instant yeast in the freezer– I use a small Rubbermaid type container (airtight). I’ve kept mine for as long as a year before I used it up, but word on the street is that it can last up to five years. Sheesh. I’ve never been able to keep it around that long, because I use it up 🙂 But it keeps a LOOOOONNNGGGG time, if in an airtight container in the freezer. I just love how you can add it right to the recipe, from the freezer, no thawing or proofing required. Here’s to many, many happy years of making perfect cinnamon rolls. I’ll never tell your secret 😉 You deserve all the envious stares of your fellow bakers. 😉
I have baked MANY things in my kitchen but I have always failed with cinnamon rolls. My rolls have turned out hard as hockey pucks, burnt on the the bottom beyond edible and heavy enough to use as fishing sinkers. So finding this recipe has given me hope to try again. Your pictures and step by step guide may just be what I have needed all along. I admit the instant yeast is new to me but even “old dogs” can learn new tricks. Thanks again. I will let you know how they turn out.
I totally feel your pain there! For years my cinnamon rolls were little scorched hockey pucks, too– the instant yeast really does make a difference! The first time I used instant yeast my bread rose so high that it lopped over the side of the dish! Now I have nice, puffy cinnamon rolls. I usually use SAF gold yeast for sweet breads (like these) and SAF red yeast for everything else (like bread). Please keep me posted! I hope they turn out great! If you’re still having trouble, hit me up via email and I’ll try to help in any way I can! 🙂
Pingback: Homemade Loaf Bread – Cookies for England
You are too kind! 🙂 Thanks for taking time to read and comment!
We've had the privilege of having these rolls made warm and fresh straight from Miss Emilie herself! My family, young and old, declared them a favorite and became a frequent request. Since I am often "baking impaired," I've served many of Miss Emilie's bakery blessings (all made by Miss Emilie herself) to both family and guests which are always a hit! Her specialty cookies traveled halfway across the country (hand-carried) to be delivered to my aunt on her 75th birthday. My personal favorite treat by Miss Emilie is her specialty Gluten-Free Pumpkin Chocolate Chip bread… better than even the regular version in my opinion. Yum to all things Miss Emilie!!