
Yum
Hot Cross Buns have long been an Easter tradition in my family. We always had these sweet, slightly spicy little buns nestled into a basket on the holiday table. Tradition says that in the old days (NO, my childhood is not the “old days,” smarty pants. Think more like 2 centuries ago) bakers used to save the first hot cross bun of the Easter season, and hang it from a string in the bakery for the entire rest of the year. If the bun survived an entire year without getting moldy (ewwww), then the baker was supposed to have good luck that year. Yeahhh . . . I’m pretty sure it would be better luck not to hang a moldy, smelly, rock-hard piece of bread from your ceiling to drop onto customers. But that’s just my opinion. Those were the “good old days,” after all. 😉
What are we waiting for? Let’s do this!
Hot Cross Buns
(My Mom’s recipe)
Ingredients:
4 1/2 tsp. instant SAF Gold yeast (or 2 packages active dry yeast)
1 cup warm milk
1/4 cup warm water
1/2 cup white sugar
1/4 cup shortening (I use Crisco butter flavored shortening)
2 eggs, beaten
2 tsp. salt
1 tsp. cinnamon
1/4 tsp. allspice
4-5 cups all purpose flour
1 cup raisins, optional
Icing Ingredients:
4 tbsp. softened butter
1 tsp. vanilla
2-3 tbsp. milk
2 cups powdered sugar
Directions:
Beat together your warm milk, warm water, and eggs. Heat mixture in the microwave just until warm. Place liquid into the bowl of your stand mixer and mix in instant yeast, sugar, shortening, salt, cinnamon, allspice, and 1 cup of the flour. (*Note: I mix instant yeast directly into the mixture, but if you are using the packets of active dry yeast you will need to add a 5 minute proofing step before adding your yeast to the mixture). Add in raisins and mix. Switch to your dough hook and slowly add in the flour until you have a soft, slightly sticky dough (dough should not be dry, and you may not need to add all the flour). Place your dough into a greased bowl, mist the top with cooking spray, and allow dough to rise, covered, for 1-1.5 hours, until dough is doubled in size. When dough has doubled, gently punch it down and divide into 16 dough balls (it helps to butter your hands when rolling the dough balls so that your hands don’t stick to the dough). Place into 2 greased 9″ round cake pans and cover for the second rise (about 30-40 minutes). Toward the end of the baking time preheat your oven to 350 degrees and then bake the rolls, once they are nice and puffy, for 15-20 minutes until golden brown. Turn out finished rolls onto cooling racks and make an icing “cross” on each roll, once they have cooled. (Just beat all ingredients together to make icing, adding milk slowly until icing is your desired consistency. You may not need to use all of the milk).
Now, in pictures! 🙂
The key to a good yeast bread is a warm, moist environment for the yeast to thrive. You can give your dough the equivalent of a Monday morning shot of espresso by warming up your water, milk, and eggs before you start. You know how I always say that my words to live by are “Cold ingredients are the enemy of good cookies”? Well, the same is true for bread. Make sure that you ingredients are not chilled, or your bread will take forever and a day to rise. And “ain’t nobody got time for dat!”
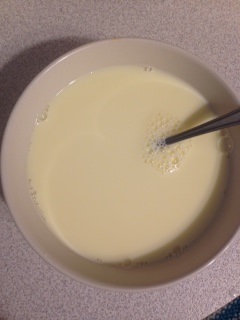
I beat my eggs in a bowl, then add in the water and milk, and microwave it all for about 45 seconds. Each microwave is different, so if you’re not sure how long yours will take, start with 30 seconds, stir, and see what the temperature is like. You want this mixture to be slightly warm, but definitely not hot.
Place your warm liquid into the bowl of your stand mixer and mix in your instant yeast, sugar, shortening, salt, cinnamon, allspice, and 1 cup of the flour. If you have never used instant yeast before, then you definitely SHOULD! Unlike the yeast packets that you get at the grocery store, which require a “proofing” step (usually allowing the yeast to foam on top of warm milk or water for 5-10 minutes before baking), instant yeasts can be added directly to the recipe. I keep my instant yeast in a freezer-safe container in the (obviously) freezer, and it keeps for years, ready to be added merrily as a measured ingredient into any yeast dough at a moment’s notice. For sweet breads, such as these Hot Cross Buns or Homemade Cinnamon Rolls, I use SAF Gold instant yeast
. For regular bread (such as Homemade White Bread), I use SAF Red instant yeast
. The gold kind of yeast just does better with higher sugar content, because it uses less water. Just remember that, as desserts are the “gold standard,” they need Gold yeast. It’s meant to be.
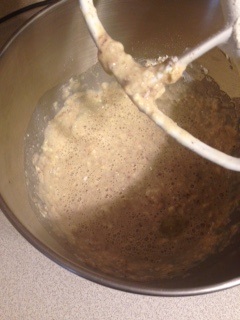
After you whirl all this magic together, gradually add in your flour until you have a super soft dough that is *almost* too thick to stir with the mixer blade. If you’re using a kitchenaid mixer (the absolute best mixer, in my humble opinion), then at this point switch to your dough hook. The dough hook is that magic little tool that makes getting this mixer worth it, even if you don’t use it for anything else (which is silly, because I use it for EVERYTHING. Well, except folding laundry. Tragically, I can’t use my kitchenaid mixer for that). This little machine kneads the dough for you while YOU fold laundry (again. le sigh), do dishes, or even (shhhh) watch Netflix. (“Yes of course honey I’m busy! I’m . . . making bread!” *changes channel*). hehe.
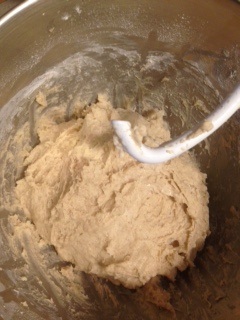
If you’re adding in your raisins, go ahead and add them in now, and then add the flour little by little until you have a soft, somewhat sticky dough. You might not need to use all the flour, and that’s OK. Stop adding flour when your dough is hefty enough not to ooze, and sticky enough *just* to stick to the bowl but still pull away in a clump when you remove it from the bowl.
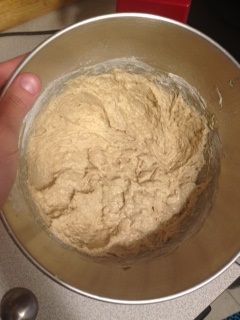
I made one batch with raisins, and one without. So no . . . you’re not going blind. No raisins in this one. 😉
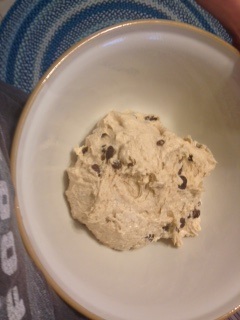
And here are the raisins! 😀 Put the lump of sticky, soft dough into a greased bowl (I have the vintage version of this classic by Mason Cash). The cool thing about Mason Cash is that it was THE bowl back in the day. You’d never see an English kitchen without one. You can actually see it all over the place in Downton Abbey if you watch the kitchen scenes. So awesome. Mason Cash knew what they were doing. The bowl is perfect for “bread risin’ ” and everything in between. I use it for everything. Well, except for folding laundry. This again, is a tragedy. Someone needs to invent a “laundry folder” that is not also known as “MOMMMM!!!!”
After you put the dough into your greased pan, mist the top with cooking spray and cover the bowl with a kitchen towel.
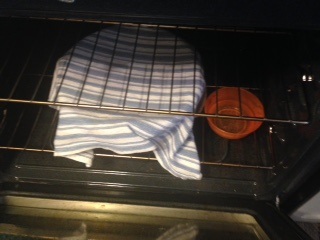
A little trick to help your dough rise better is to place a small bowl of hot, steaming water into the oven with your rising dough (with the oven off, obviously). The steam creates a homemade proofing box when you close the oven door, creating the warm, humid environment that yeast bread loves.

When the dough has doubled in size, divide your dough into 16 pieces (this works best by dividing in half over and over, to keep the pieces the same size). Place dough balls into two 9″ round cake pans which have been greased with cooking spray. Cover the pans and allow them to rise one more time for 30-40 minutes, until the dough is nice and puffy.

Toward the end of the rise time, preheat your oven to 350 degrees. That way, your oven will be nice and hot when the rolls are ready to shake and bake. 😉 Bake the rolls for about 15-20 minutes until they are golden brown and are no longer doughy in the center. I find that if you’re having trouble telling when your rolls are done, it helps to use a glass pie plate to bake them in, and then you can just look underneath to see if the rolls are lightly brown on the bottom. If you want the rolls to have a glazed, shiny appearance, you can also brush them with egg wash (1 egg beaten with about 1 tsp. of water) right before baking.

When your rolls are finished baking, turn them out of the pans onto cooling racks and work on your DEEEELICIOUS glaze. Basically, just use your mixer to whisk together your softened butter, powdered sugar, and vanilla. Slowly drizzle in the milk, a little at a time, until the glaze is the consistency that you want. I advise adding the milk slowly, because even a few drops of liquid can change icing consistency, and even the types of milk you use (like skim, whole, etc) will change the consistency. Remember– slow and steady wins the race. You may not need all the milk– just add it slowly and stop adding liquid when your icing is the consistency that you want. This is your recipe. YOU’RE the boss. Yep. Do what you want. I give you permission. 😉

When the rolls are completely cool, use a cheapie cupcake decorating set (I have this $6 one here, and I use it again and again) to draw a cross overtop of each roll. Keep a little extra icing on hand for dipping. Trust me. 😉
Beautiful rolls with a beautiful story . . . the cross symbolizing deep faith and renewal for so many people, myself included. Easter represents new life– new hope– new beginnings. And perhaps, even if you don’t hang a Hot Cross bun from a string in your kitchen for the entire year (haha), this sweet and spicy little treat will remind you that life is beautiful, and that it is worth living. And that is a truth worth celebrating all year round.
You did it. And I’m just so proud of you.

Disclosure: This post may contain affiliate links, which just means that we get a few pennies if you purchase through our link. I never recommend products that I don't personally use and love. Thanks!