Yum
When I think of Texas, I immediately smile. Texas isn’t like other states– it doesn’t “sit quietly” and do the things that well mannered states are supposed to do. If Texas were invited to a garden party with the other states, it would end up swinging from the rafters, hooting with laughter, while Rhode Island and Michigan turned their heads away in embarrassment. But Texas wouldn’t care. Who knows– it might even convince California to join it up there– CA us a free spirit, after all. Maybe New Mexico, too.
If Texas were a car, I think it would be an old, dusty truck, with its windows permanently down. The driver would have a cigarette and an old, weathered hat. He would definitely have a case of beer in the back.
If Texas were a friend, he would be your favorite. He would get on your nerves, sometimes, and he would be a little too full of himself, sometimes, but at the end of the day, he would always have your back. He would be the one who sat down beside you after you just lost your job . . . and just sit there. Saying nothing. But . . . saying nothing together. Texas is just that kind– that kind of thing that you just don’t forget, after you’ve met it.
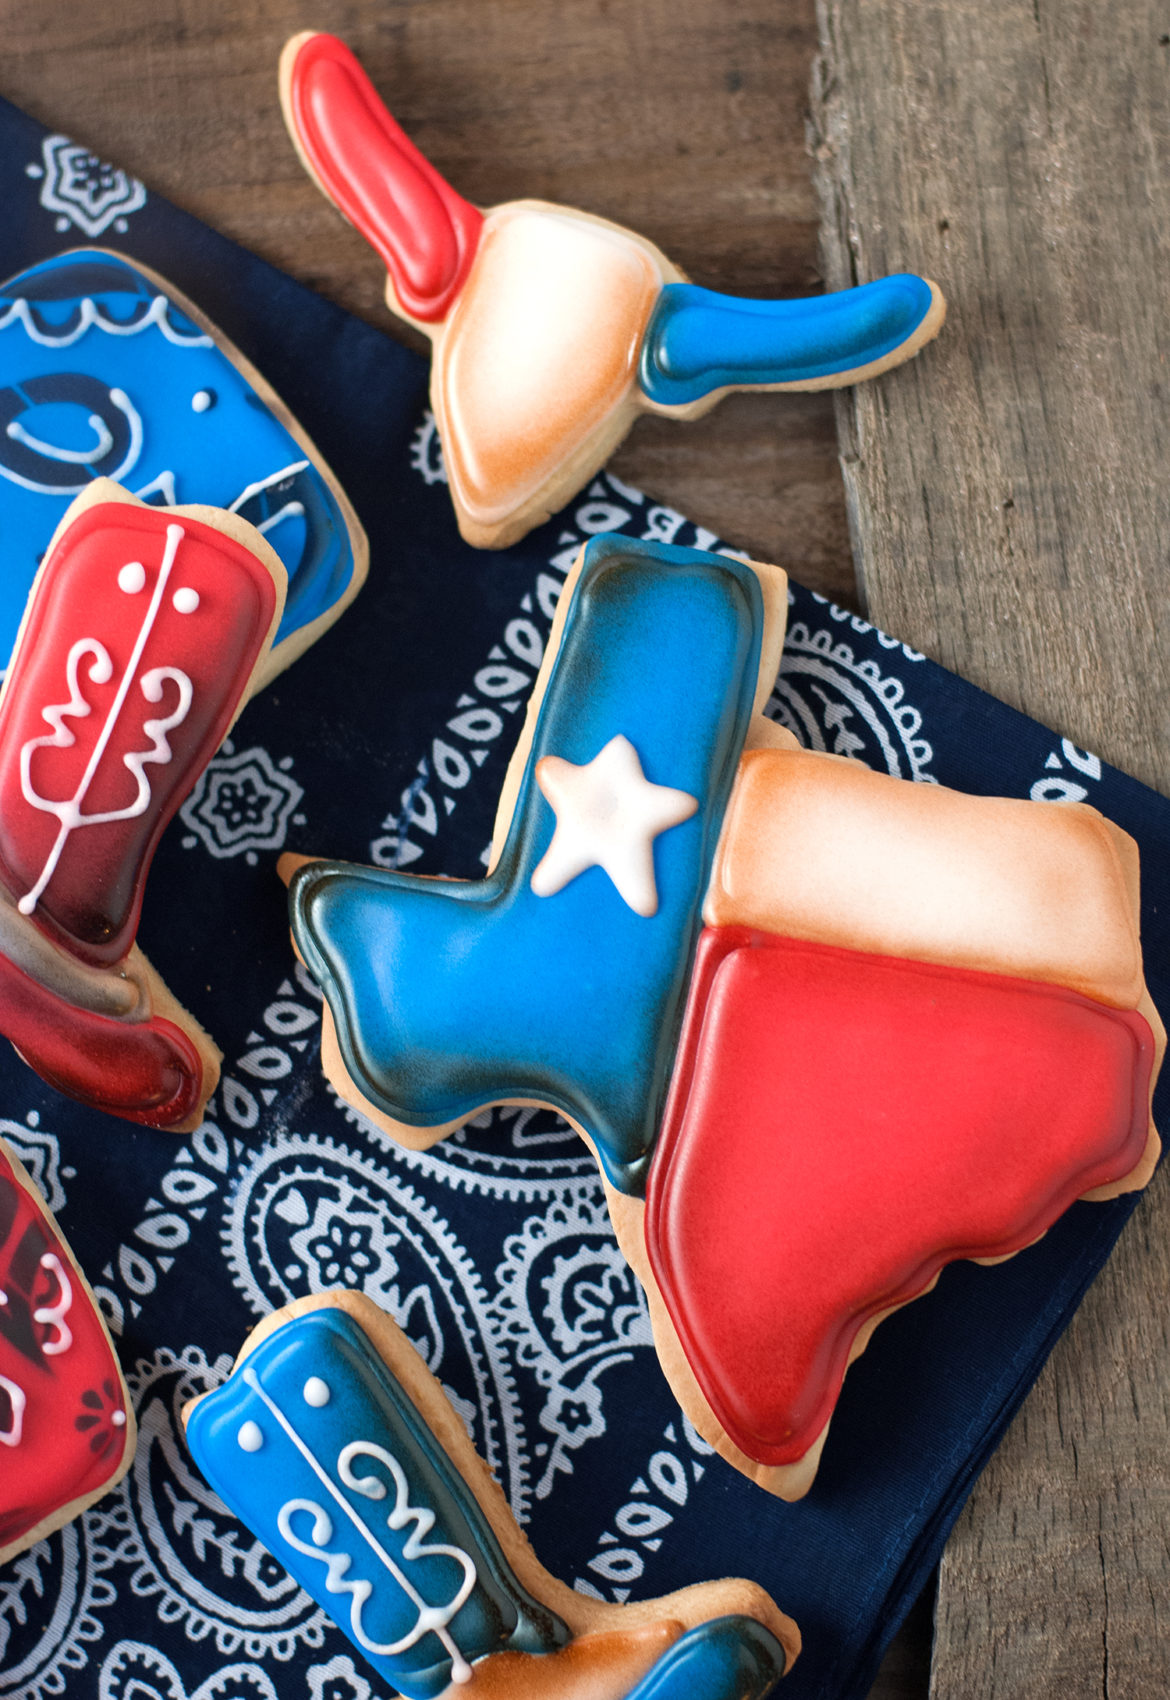
And if Texas were cookies, I like to think they’d look something like this. So what are we waiting for? Let’s do this!
Texas Pride Cookies
(Base recipe adapted from Sweet Sugarbelle)
Ingredients:
1 1/2 cups powdered sugar
2 sticks (1 cup) butter or margarine, room temperature
2 tsp. extract of your choice (I tend to use vanilla or almond)
1 egg (room temperature)
2 tsp. baking powder
1/2 tsp. salt
3(ish) cups flour
Directions:
Cream powdered sugar and butter until light and fluffy. Add extract and egg; beat well. Sprinkle baking powder and salt over mixture; mix well. Add flour, a little at a time, until it forms a stiff dough that does not stick to your fingers. Place on a floured surface and allow to rest for 15-20 minutes. Roll out dough to 1/4 inch thickness. Cut out shapes and “peel” dough scraps (more on this here). Bake at 375 for roughly 15 minutes until set and bottoms of cookies are lightly golden. Allow to cool on a baking rack before decorating with royal icing (more on how to make this here).
Now, in pictures! ?

This tutorial is basically to show you how to decorate these cookies– I’m sure that after all these cookie baking tutorials you’re all experts by now, so go to the head of the class . . . we will skip the beginner lessons on how to bake cookies and mix up royal icing. If you’re new here, I have included the links to those basic techniques in my directions for the recipe, above. Now, for the fun part– the decorating! 🙂
My favorite tip to use in cooking decorating is Wilton tip #3– you can pick this icing tip up for about 99 cents at Michaels or Hobby Lobby. You will also need a few couplers (get those here), and some decorating bags (cheapies work just fine, here
). Go ahead and abandon the “a ziploc bag with the end cut off works just as well” thought. Oh no. Please don’t do that to yourself. You deserve OH so much better. I always recycle the throwaway bags, because they actually never get the icing on them (more on how to fill bags incredibly easily and NEVER wash them out again, here).
You’re going to need 15 second icing colors in red, white, and blue. Start by doing “all your blues.” (I’ve got the blues . . . .!!!!) I am doing longhorns, bandanas, boots, and of course . . . the state of Texas, itself. Start by outlining all the blue sections, on all of the cookies. Then go back and fill in all the blue, starting with the first cookies you outlined. Going through the entire batch, this way, ensures that your icing will have a chance to dry a little, in between, so your cookies don’t run. Remember . . . “these colors don’t run.” 😉
Let the cookies sit for 20 minutes or so, and then do the same process (outlining everything, filling everything) with the red.

When I’m doing white icing alongside color, I like to wait at least an hour or two before I start adding the white. White icing tends to bleed, and giving the colors an extra few hours to dry makes sure that you don’t end up with “Pink Texas” cookies. *Shudder*
Once your colors have dried, go ahead and outline the white sections and add your stars. Just “draw” the star on with icing, the same way you would draw with a pencil. Then fill in the holes. The icing will heal itself and become smooth.

See? I told you. Let these cookies dry for at least several hours, or overnight, if possible. We want them to be nice and dry for the next step– their glamour moment with the airbrush.

“These cookies are proud of their TRUE beauty! They have NOT been airbrushed!” Yeah . . . well, they have. Sorry, but airbrushing is airbrushing because, let’s face it . . . it makes flaws go away. And airbrushing does the same for cookies. A cookie airbrush will run you about $125 (the one I have is here), and they aren’t for everyone. I debated for a long time whether to invest the money and get one, but let me say . . . I think my airbrush machine is my very favorite tool in my decorating arsenal. If you get one, know that you will have to truly “learn” your machine, as all airbrush systems are a little different. And, at some point, you will need to know how to take it apart and clean it really well, because the color can get dried up inside and keep it from working, if you don’t clean it well enough (Yes. This applies to when you have everything set up, and suddenly your toddler pulls the tablecloth down, with all the dishes set for supper. Life happens). It horrifies me when people tell me that “I couldn’t get my airbrush to work, so I just threw it out.” GAHHHH. Never throw out an airbrush! Nine times out of ten, a simple take-apart cleaning will get it running again, good as new. Hey– send me your broken airbrushes. I will fix them and resell them and save for my kids’ college. 😉 Seriously. Don’t throw them out. They can almost always be saved.
We are giving that sweet little airbrush a workout, today. I loaded it with dark brown airbrush color (not the same thing as the little teardrops of food coloring from the grocery store– you can get a starter set of airbrush colors here) and gently airbrushed the “seams” of the cookie. Airbrush color works best lightly, over several layers, rather than globbed on heavily in one spot. If you put the color on too fast or too heavily, it will cause bubbles in the icing. Just go slow and easy. Do all the cookies and then come back and give them a second coat, if you need to. The distress is for the cookie– not for you. 🙂

I also added some brown distressing to the front edges and bottoms of my dusty boots. Wait until the airbrush color completely dries (it doesn’t take long– give it 20 minutes, to be safe), and then add some sweet little details in white, with a #1 tip. You can add a little star to the spur, too, if you want.

We’ve worked our way through Texas and boots . . . now for longhorns! No Texas cookie set is complete without some longhorns. The colors have dried now, so we are going to give these sweet little guys some airbrushing too. Just like we did for the Texas cookies, I gently airbrushed some brown on the edges and bottom of the cookies. I’ll show you in a second, here . . .

Perfect. I can almost hear the Sons of the Pioneers crooning “Tumbling Tumbleweeds” as we speak . . .

Now how in the world did you get those adorable bandanas???? I demand to know!
Sure. You definitely need an airbrush for this technique. In fact, airbrushing through stencils over dried cookies is one of the quickest ways to get gorgeous cookies in like . . . a few seconds. People will “Oooohh” and “Aaaahhhh” over your mad decorating skills, but in reality, the cookies took just a few seconds and a few passes of your airbrush, and voila . . . you had a masterpiece. The stencil I used for these bandanas is the paisley stencil from The Cookie Countess (here). She has tons of cute stencils, and they are only about 5 bucks each . . . so prepare to get lost in the patterns, for a while.
I stenciled this paisley in black over my red and blue squares. As I said before, do several lighter coats of color, rather than globbing all the color on at once. If you want it darker, wait until the first layer dries, and then go back and add another light layer of mist.

I usually just tell the fam to leave my cookies alone while they dry, but this time I couldn’t resist making a personalized sign. 😉
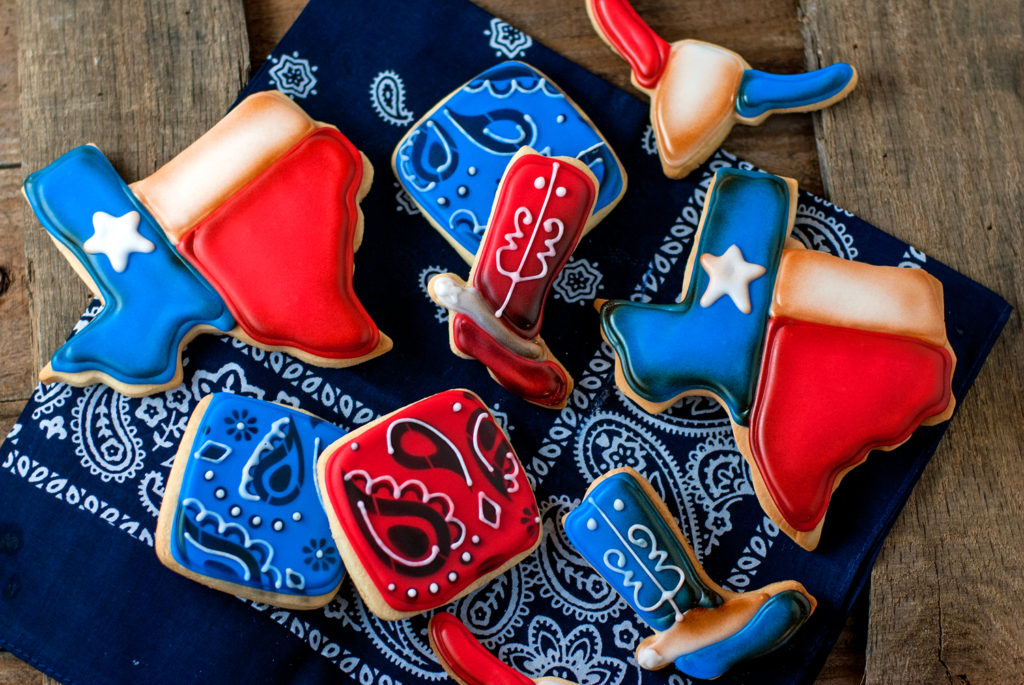
When the airbrushing has dried, add some outlining details in white (I used Wilton tip #1) to the boots and bandanas. Just be creative and have fun– there is no right or wrong way to do this. I traced some of the patterns on the bandanas and added a few dots to make the pattern pop. The boots I did each one differently– just channel your inner fashion designer and make ’em PURDY.
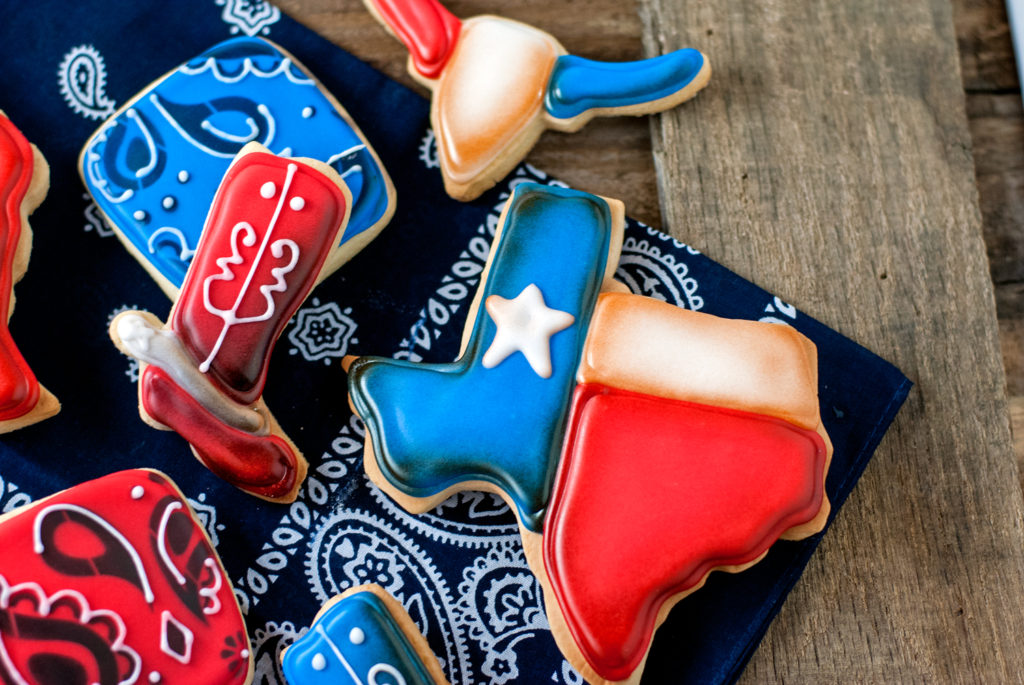
You know, these may just be my favorite sugar cookies I’ve ever made. And someday I will make it to Texas, and I will buy myself a “Gen-YOO-wine” pair of cowboy boots. And I will sit in a dusty truck with the windows down, and I will say “Y’all” over and over to myself, until it sounds natural. And maybe I’ll have a cookie– who knows. But it will be amazing.
Because you did it. And I’m just so proud of you.

Disclosure: This post may contain affiliate links, which just means that we get a few pennies if you purchase through our link. I never recommend products that I don't personally use and love. Thanks!
