


It was a magical evening. There was a chill in the air as a gorgeous, dark brunette swept into the room on the arm of a sharp young man with startling green eyes. They were the perfect pair– the chemistry was almost tangible. They made the perfect couple, waltzing the night away in perfect harmony.
OK. I may be over-romanticizing this a bit. But the love affair between chocolate and mint is as beautiful and classic as Romeo and Juliet (technically, Romeo and Juliet both died, at the end of the story, but I digress). This recipe is the brain child born of a bumper crop of mint in my garden, and a cold, rainy day when my toddler and I needed a project. Sometimes, the best ideas spring from a mom’s last ditch attempt to keep little hands occupied in a positive activity for at least 5 minutes. So give this recipe a try (with or without toddlers). It’s a fun new activity, and it will make you proud to see that dashing, minty duo smiling back at you, when you’re finished.
What are we waiting for? Let’s do this!
Peppermint Patties with Fresh Mint
Ingredients:
1/3 cup corn syrup
Several bunches fresh mint, with stems attached
1/2 tsp. peppermint extract (optional)
5 tbsp. softened butter
pinch salt
2 cups powdered sugar, plus more for dusting
Chocolate Coating:
1.5 cups chocolate chips
1 tbsp. oil
Directions:
Boil mint in corn syrup until mint is wilted and has dulled in color (about 2 minutes of boiling). Remove mint stems from syrup and discard. Allow syrup to cool to room temperature before using. When syrup is cool, beat syrup, softened butter, peppermint extract (if you want your candies to be a little more minty), and pinch of salt until combined and fluffy. Add powdered sugar and slowly mix until combined (mixture will be very thick). Place dough on powdered-sugar dusted silpat and knead until dough is no longer sticky. Roll out and cut desired shapes from of the mint dough with small cookie cutters. Refrigerate shapes until they are firm (freezer works, too, if you are in a hurry). When circles are completely chilled, melt your chocolate and oil on low heat in a small saucepan. Dip centers in chocolate and allow them to dry, in the refrigerator, over a cooling rack. If you wish to garnish the candies, sprinkle them with crushed candy cane or chopped Andes mints before they dry.
Now, in pictures! 🙂

Like I said, this recipe was born out of desperation to keep my toddler busy on a rainy day. We decided to make something fun and Christmasy, and we also had a bumper crop of mint in my indoor herb garden, so . . . a star was born 😉
I am using about 5 good size stems of mint, but you can use more or less, to taste. If you don’t have fresh mint, don’t worry– just increase your mint extract to 3/4 tsp. in the final recipe, instead of 1/2. I will say, though, that using the fresh mint really gave these candies a pop of freshness that you don’t normally get in your typical Peppermint Patty. So if you have access to fresh mint, use it– it’s really tasty!
Bring your corn syrup and mint stems to a boil, covering your pan while heating to help wilt the mint leaves more quickly. Bring the mixture to a rolling boil (the bubbles cannot be stirred away). (“Rolling, rolling, rolling . . . keep those mint leaves rolling . . .”)
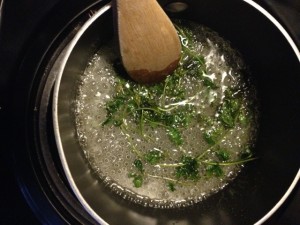
Boil the syrup and mint for about 2 minutes, until the mint is very wilted and has lost some of its green color. That just means that the leaves are releasing their oils, which translates into mint-infused syrup for you! Yay. When the mixture boils for 2 minutes, remove the stems from the syrup, allowing them to drip a little to save all the syrup that you can, and discard. Allow the minty syrup to cool to room temperature before using. It will turn right back into its old self– thick and syrupy, but with just a “hint of mint.”
When the syrup has cooled and thickened (this takes about 1/2 hour), it’s time to make some mints! 🙂
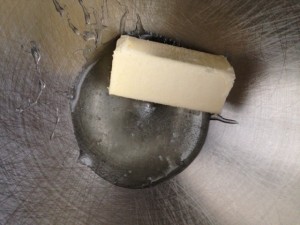
Place your syrup, softened butter, and a pinch of salt in the bowl of your mixer. Start slowly so you don’t get a nice sugary shower, and begin to mix your ingredients. Increase the speed as they combine, until they are all nice and fluffy and mixed. (“I’m not fat,” the lady said . . . “I’m nice and fluffy.”)
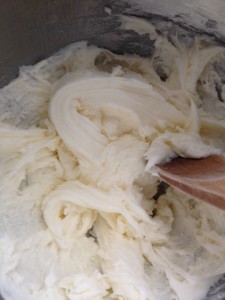
Gradually add in your powdered sugar, mixing slowly to avoid a powdered sugar avalanche. When you get all of your powdered sugar in there, the dough will be very thick– almost like sugar cookie dough.
Dust a silpat with powdered sugar and scrape your dough onto the sugared surface. We are basically going to be “kneading” this dough, exactly like we would knead bread dough, except we are using powdered sugar, rather than flour. This is like the bread that Willy Wonka would make, if he were a baker– all sweets, with sugar instead of flour. Haha. Sorry. That’s weird. But this is seriously almost like “candy bread.”
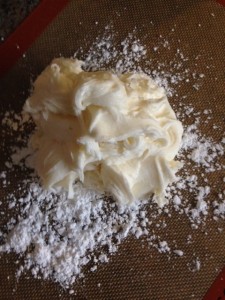
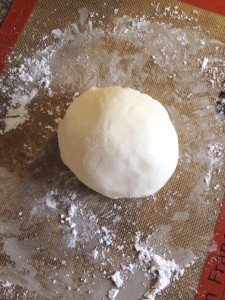
Anyway, keep gradually adding powdered sugar and knead until you have a dough ball that is nice and smooth and no longer sticky, at all. It looks like a snowball! How adorable! Now this kind of snowball fight I could get behind.
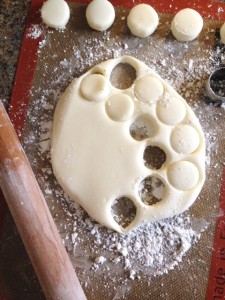
Roll out your dough (dusting with powdered sugar to keep from sticking) and use a small circle cutter (also dusted with sugar) to cut out some round shapes. Place the shapes on a silpat, and then lift the silpat to a cookie sheet.
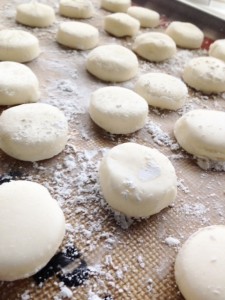
Place your cookie sheet in the refrigerator (or freezer, if you’re in a hurry) and allow the mint discs to chill for about an hour, until they are nice and firm. You want them to be cold, since you will be dipping them in warm chocolate. We don’t want them to melt during their baptism 😉
After the mint discs have chilled, thoroughly, start your chocolate coating. We are basically making a homemade “candy melt” mixture– chocolate and a little oil, which is essentially what candy melts are. Heat your chocolate and oil over low heat until the chips are completely melted.

For this next part, you have to be careful and work quickly. The mint discs are basically chilled butter balls. Who are you calling a butterball?? First the fluffy comment, and now this. Ha.
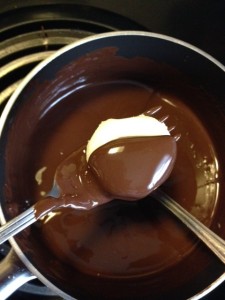
You have to work quickly. If you take too long coating the mint discs, they will melt a little and become misshapen. The way I found that worked best was to use my spoon to place a blob of chocolate on the fork (to coat the bottom of the candy), and then twist a mint disc on the fork, so that the bottom got evenly covered without actually dipping it in. Spoon chocolate over the mint disc to cover it and allow the excess to drip through the fork tines.
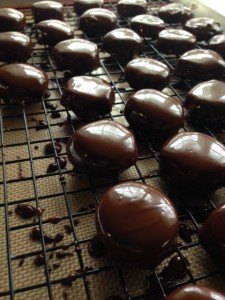
Use the spoon to slide the finished peppermint patty off the fork and onto the drying rack over a silpat-lined baking sheet. This setup will make cleanup a snap. When you have coated all of your mint centers with chocolate, place the cookie sheet in the refrigerator until the chocolate has cooled and hardened.
You know, this project was pretty easy, wasn’t it? By my calculations, there is just one more thing to do . . .

Munch. Munch. Sorry . . . what did you say? I couldn’t hear. I was chewing. Mmmmmm.
Have one for yourself. You deserve it.
Because you did it. And I’m just so proud of you.

Disclosure: This post may contain affiliate links, which just means that we get a few pennies if you purchase through our link. I never recommend products that I don't personally use and love. Thanks!


I made these last year for Christmas with Pink coloring and Wintergreen flavoring, and Green coloring with Peppermint flavoring. Put a dip in the center of them and when they dried I filled it with melted chocolate. My famiy went crazy for them. Made them again at Easter in pastel colors with fruit flavoring and drizzled white chocolate on them and they were awesome. Have fun with trying different flavors!
What a cute idea! I’m so glad you loved them and even changed them up for the different holidays! Thank you for taking time to comment 🙂 — Emilie
Pingback: Peppermint – How to ID and Enjoy | Curious By Nature
Pingback: Mint: Growing, Cooking, Using, Healing - Life Is Just Ducky