
When I think about classic desserts, my mind drifts back to the 1950s. To me, in my “Leave it to Beaver” education on this time period, everyone went around eating desserts and drinking coffee and driving in a car that was about as big as a current Manhattan apartment. Those were the days . . .
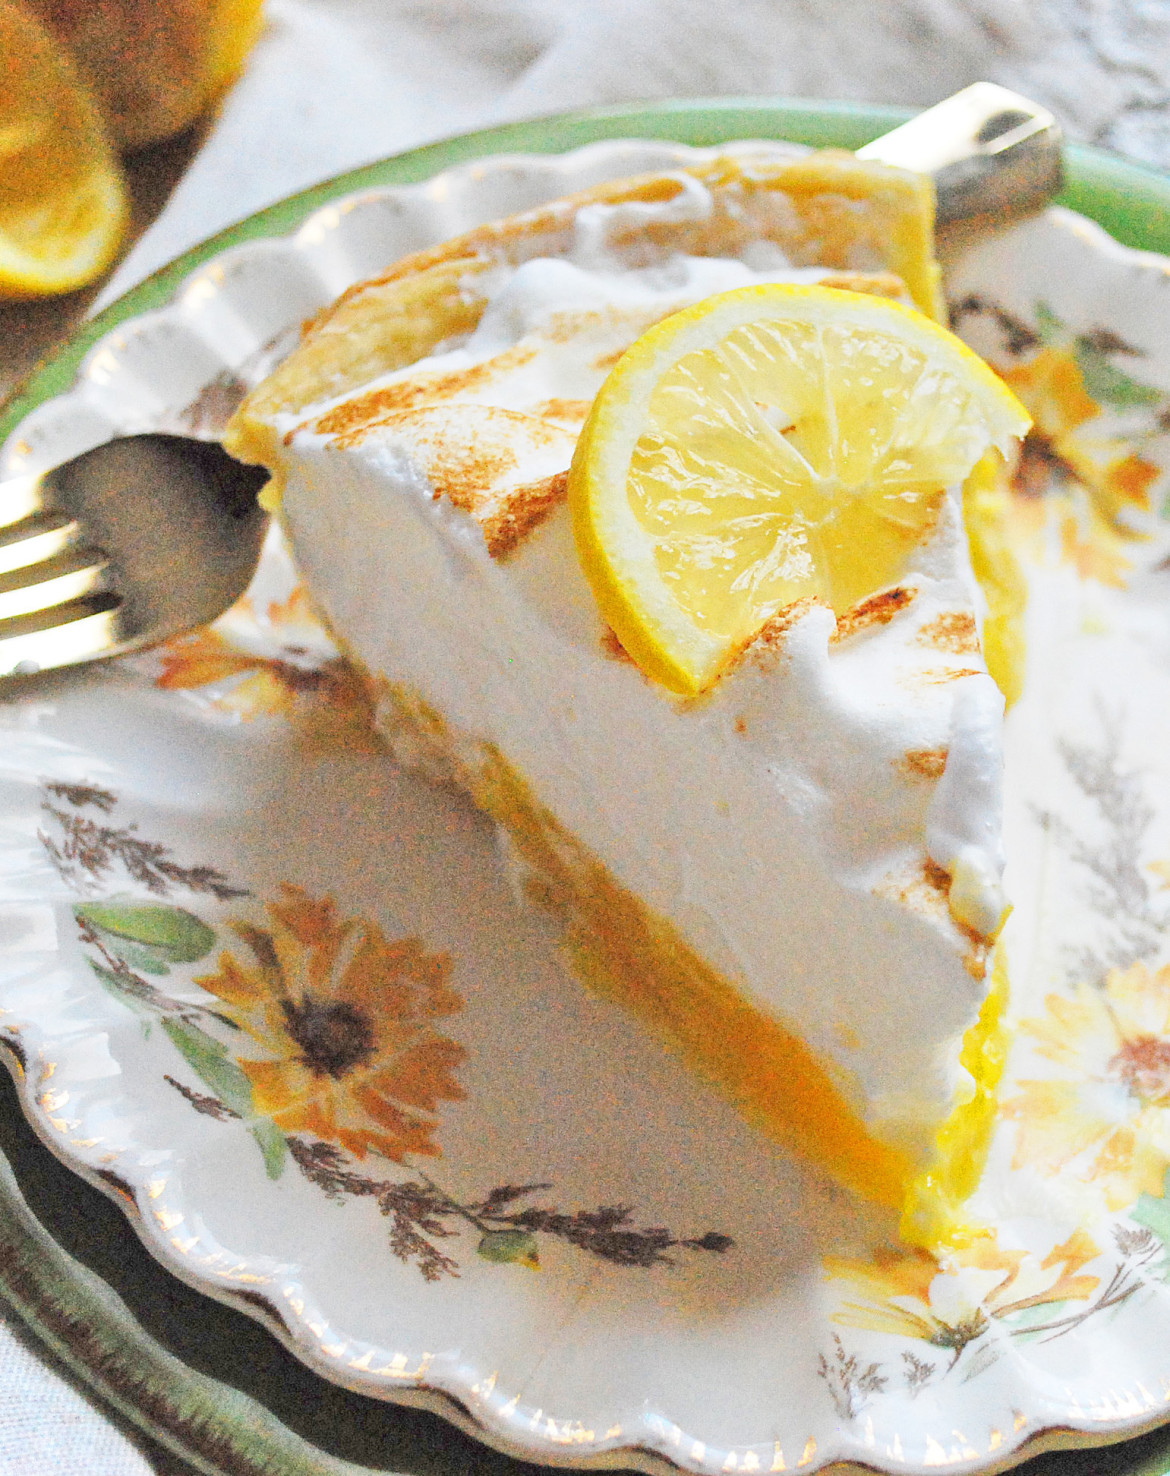
And when I think of classy, old-fashioned desserts, my mind goes right to Lemon Meringue Pie. As classy as a Grandmother with her pearls and gloves, this dessert makes you stop and look– in a good way. I like to think of our Grandmothers and great Grandmothers making this timeless dessert and enjoying it on a warm summer evening on the front porch, rocking in their chairs and visiting with family. So take a step back in time, to when life was simpler, and people were less stressed. Close your eyes and have a bite of this classic pie. And, just for a moment, let all the worry and stress go. Because it really is that good.
What are we waiting for? Let’s do this!
Lemon Meringue Pie
(adapted from Betty Lessard)
Ingredients:
1 1/2 cups sugar
1/2 tsp. salt
1 1/2 cups water
3 lemons– both juice and zest
4 egg yolks
2 tbsp. butter or margarine
1/2 cup cornstarch, mixed with enough water to make it a liquid
Meringue Ingredients:
6 egg whites (I used the 4 whites from eggs, above, and 6 tbsp. extra egg whites from a carton)
1/2 cup sugar
3/4 tsp. cream of tartar
Meringue Additive:
2 tbsp. white sugar
1 tbsp. cornstarch
1/2 cup cold water
Directions:
It helps to get everything set up before you start this pie, since the steps go quickly, and you can’t wait too long between each step. Start by blind baking your crust (more on this in a minute). When the crust is baked, set it aside so that it will be ready when your lemon filling is ready to pour into it. Separate your eggs into yolks and whites (be careful not to get even a drop of yolk in with the whites, or your meringue won’t whip) and place them into separate bowls. Place your egg whites, 1/2 cup sugar, and cream of tartar into the bowl of your stand mixer, fitted with the whisk attachment, but don’t turn it on yet. Having the meringue ready to whip will make it easy to turn it on when you’re ready, and time is short. Preheat your oven to 350 degrees.
Now, to start the cooking! 🙂 In a large saucepan, bring your sugar, salt, water, lemon juice and lemon zest to a boil. Meanwhile, in another pan, start your cornstarch additive cooking. We want the additive to be thickened and clear just about the time we start whipping the meringue.
When the lemon mixture boils, start your meringue whipping on medium speed. Mix enough water with your cornstarch to make a milky liquid and add it to your boiling lemon water. Whisk the mixture to combine; it will thicken considerably. Turn down the heat to low and add in the butter so it can start melting into the lemon mixture. Meanwhile, whisk your yolks with a fork and stir about 1/2 cup of the hot lemon mixture into the yolks, in their separate bowl (this helps to temper the yolks and raise their temperature so you don’t get scrambled eggs when you add the yolks to your lemon mixture). Slowly, whisking the entire time, add your egg yolks to the lemon mixture. Pour your hot lemon/egg yolk gel into the prepared pie shell. The meringue should be almost ready; when it forms stiff peaks, add in your thickened meringue additive. When the meringue is whipped, Turn off the mixer and scoop the meringue onto the hot pie filling, making sure you spread meringue all the way to the edges and partway over the crust so that the lemon is completely sealed inside the meringue and pie shell. Place the pie into a 350 degree oven and bake for roughly 15 minutes, until the meringue is golden brown and set (you may have to rotate pie halfway through baking time to ensure even browning). Allow pie to cool for 1 hour at room temperature before tenting loosely with foil (no plastic wrap or meringue will “weep”), and resting for at least 3 hours before cutting.
Whew. This is a lot of steps, but they aren’t complicated. Take courage! I’m going to do every step with you. Let’s take a look at the process in pictures.
To start with, let’s get everything set up before we “officially” begin. There’s a French saying, “Mise en place,” which means, basically, “Everything in place.” It’s a great concept– get everything set up and ready to go, and then you can work quickly and well. So, first, we are going to knock out a few prep jobs, and then we can get to the fun part– eating pie! 😀 Don’t worry. I’ll walk you through every step 🙂
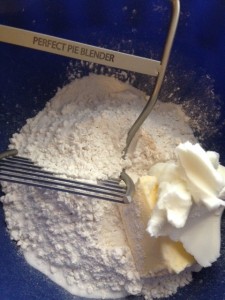
Start by making yourself a single pie crust. There are many recipes for pie crust, or you can feel free to buy a pie crust. I am making a simple basic crust with 1 1/2 cups all purpose flour, 1/2 tsp. salt, 1/4 cup butter and 1/4 cup shortening. Just cut your butter and shortening into the flour using a pastry cutter (I love the perfect pie pastry blender here) until the mixture resembles coarse crumbs.
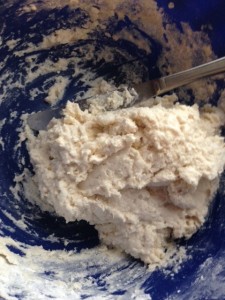
Stir in just enough icewater (the colder water keeps it from getting too warm) to allow the dough to come together into a ball when you stir it with a butter knife. Try to handle the dough as little as possible so that it stays cold and doesn’t get warmed up from your hands. The colder your dough, the more tender and flaky it will be in the finished pie.

Now here’s a little trick for rolling out perfect pie crusts (which I ALWAYS struggled with). See this handy dandy little plastic bag? Yep. Spend 5 bucks, and you can now roll your pie crusts the perfect thickness, perfectly round, and even transport them to your pie plate perfectly . . . every time. It’s just . . . perfect. Get one of these amazing little gadgets here.
.
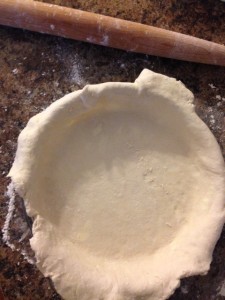
If you don’t have a crust bag (although personally I think it will be the best $5 you ever spend), you can definitely still roll your crust out on a lightly floured surface. A little trick to avoid tearing your pie crust is to gently roll the crust up around the rolling pin. Move your rolled up crust over to the pie plate and gently unroll it overtop of the plate. That way, your crust is perfectly placed, but you don’t have to worry about tearing it when you move it from the rolling area to the pie plate. You’re so smart. Look at that beautiful crust!
Now, we are going to “blind bake” a crust. What kind of bake??? I don’t think I can bake with my eyes closed! I’m hyperventilating!
Relax. No one is going blind 😉 Blind baking a crust just means, basically, that we’re going to bake a naked crust, with nothing in it.
*Shrieks* Naked!! First blind and now naked!!! Get me some clothes NOW!!!!!
Haha.
Anyway, when you’re doing some kind of pie that has a filling that doesn’t need to be baked (like lemon meringue and many chocolate or cream pies), you need to bake the crust, first– otherwise your crust would be raw because the filling is already cooked when you place it into the pie shell. But you can’t just bake a naked pie crust, because the crust will slither down the sides and create a huge mess.
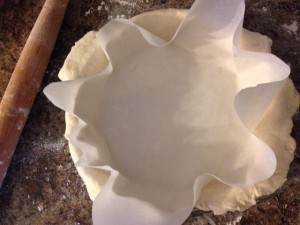
So . . . (drum roll . . .) let me show you how to bake a naked crust without the crust slipping down into a melted puddle of despair. To begin with, cut yourself a nice piece of parchment paper. Don’t use wax paper– we want oven safe paper. Press the parchment into the crust so that it is tight against the bottom and sides, as much as possible.
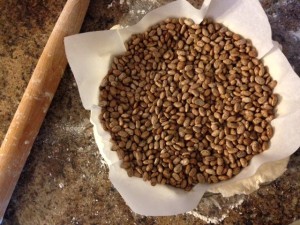
To keep the parchment up tight against the sides (and keep the crust from sliding out of place before it bakes, completely), we need to fill the parchment “bag” we made with dry beans or rice. I am using 2 lbs. of pinto beans for this 9″ deep pie plate. Any kind of dried beans will work, or you can use pie weights, if you have them. Beans can be used as weights again and again, hundreds of times, so no need to throw them out after you use them. It’s hard to keep a good bean down 😉 Professional bakeries actually reuse the same beans over and over, until they disintegrate into dust, and then they get new ones.
Bake the crust “full ‘o beans” for 20 minutes at 350 degrees. I’ll show you the next crust step in a minute.
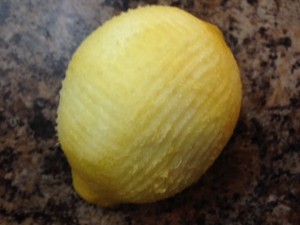
Meanwhile, let’s get the rest of our stuff together, here. Zest yourself 3 lemons– we just want to get the yellow part. Don’t go super deep to the white pith, because it tastes bitter.
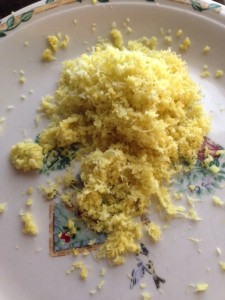
Isn’t that pretty? It’s so . . . zesty. Ha.
While you’re thinking of it, go ahead and get your 6 egg whites (I’m using the 4 whites from my yolks and 2 egg whites’ worth of boxed egg white mixture from a carton), 1/2 cup sugar, and 3/4 tsp. cream of tartar into the mixing bowl of your Kitchenaid mixer. Get the whisk attachment ready. You aren’t going to start whisking them, yet, but get them ready to go so that, when things get really going, later, you won’t have to stop and prepare this– it will be ready to start whipping right up for you 🙂
Save the yolks from your separated eggs in a separate bowl– don’t let any yolk get into the whites, or they won’t whip into the glorious, voluminous billows that make the dreamy meringue.
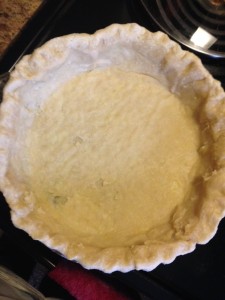
At this point, the crust full of beans should have baked for 20 minutes. Gently lift the entire piece of parchment out and dump the beans into a bowl to cool down. The crust looks like this, now.
Take a fork and prick the bottom of the crust all over. You are so mean! First you put that poor little crust, naked, out there, and then you make it blind, and then you stuff it full of beans, and now you’re PIERCING it????
Well, don’t worry. We will make it up to Crusty when we stuff him full of amazing, lemony goodness and pillows of soft, creamy meringue. I’m pretty sure we will make him the most popular person in town.
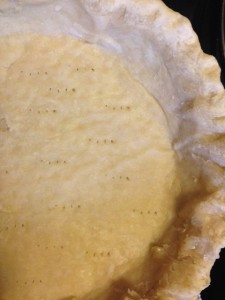
The fork pricks keep the bottom of the crust from bubbling up when we bake it for another 20 minutes, NAKED!!!!! Haha. Quickly– stick him back into the oven (with no parchment and no beans). He’s cold without any clothes on. Give him 20 more minutes at 350. To recap, 20 minutes stuffed with beans, 20 minutes pierced and naked. Got it? Good. You’re so smart. I love it.
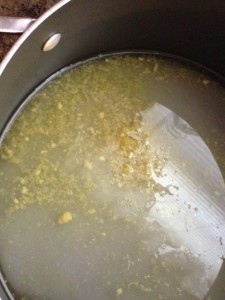
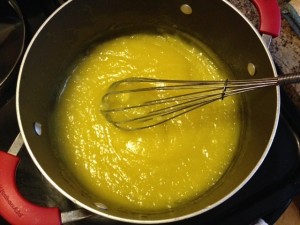
Now, we have all our prep work done, so let’s get cooking! In a large saucepan, heat your sugar, salt, water, lemon juice, and lemon zest. Bring the mixture to a boil, stirring to make sure that everything is dissolved and gorgeous. If you want, you can add a teeny bit of yellow food coloring to make your pie nice and sunny delightful, but it’s totally optional to do this step (*Reaches for yellow gel and innocently looks around the room*).
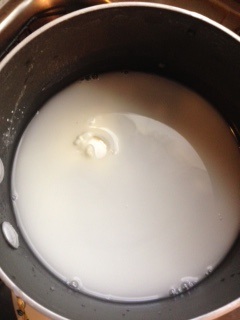
I also like to start the meringue additive cooking in a smaller saucepan, at the same time I start the lemon mixture. Whisk the cornstarch pan, occasionally, to make sure that nothing is sticking. We want this to be nice and clear and thick right about the time the meringue is finished whipping. Adding this to the finished meringue just helps to keep the meringue from “weeping.” But if you like those sweet little sugar drops on your lemon meringue pie, then by all means leave this step out 😉
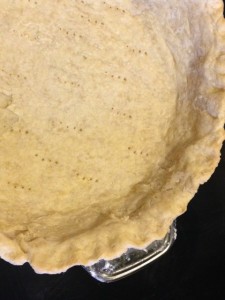
By now, your beautiful crust is done. Pull it out of the oven and set it aside. We will fill it with lemony goodness shortly.
When your mixture comes to a boil, several things need to happen, so be ready for it. First, start your meringues whipping. The key is to try to get the lemon and the meringue to be ready as close to the same time as possible, because we want the meringue to go onto the filling while the filling is still nice and hot.
While the meringue starts whipping, put your 2 tbsp. butter into the boiling lemon mixture so it can start to melt. Take your 1/2 cup cornstarch and mix it with just enough water to dissolve it into a milky substance. It takes about 1/3-1/2 cup of water to get all that cornstarch dissolved. It won’t feel like the cornstarch wants to dissolve– it will seem like it just wants to turn to cement and not mix with the water, but keep stirring, and it will. Mix the milky cornstarch mixture into the hot water and whisk until the mixture gets nice and thick (maybe 1 minute).
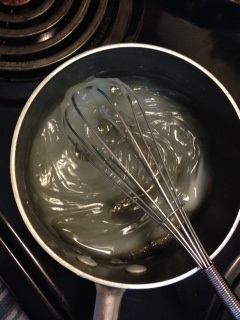
By now your meringue additive should be nice and clear and thick, too. You can turn the heat off underneath this pan– we can let it cool slightly while the meringue is whipping, so that it will be warm, but not hot, when we add it to the stiffened egg whites.
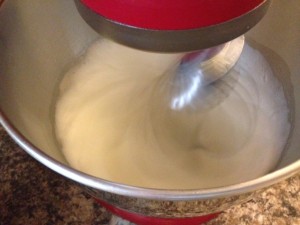
Meringues are whipping nicely. Good job. Good thing you had all this stuff set up, beforehand. You’re so smart 😉
Now, let’s temper our egg yolks. Tempering just means that we will kind of “accustom” our eggs to the higher temperature of the lemon mixture, before we add them in– like walking slowly into the pool instead of just jumping in. The shock value is less. If we just threw the eggs into the hot liquid without tempering them, first, we would end up with scrambled egg pie, instead of lemon. Bleck.
After you have stirred about 1/2 cup of hot liquid into the yolks, very slowly pour the yolks into the hot liquid, whisking constantly. Turn off the heat, cause this lemon part is done, baby!
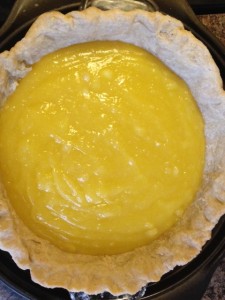
Keep your lemon on the stove (with heat turned off) until your meringue is just about ready. Then, pour the lemon into the prepared crust and smooth it.
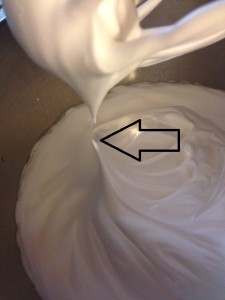
Your meringue is ready when it forms stiff peaks. This just means that when you take the beaters out of the mixture, the mixture will stand straight up like I have shown you with the arrow marker, above. Yay! Pour in the warm, thickened meringue additive and give it another few spins to make everything nice and mixed in. Hooray! Our meringue is ready!
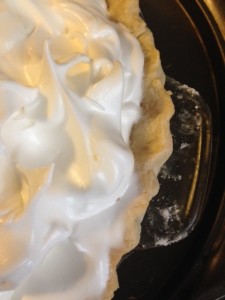
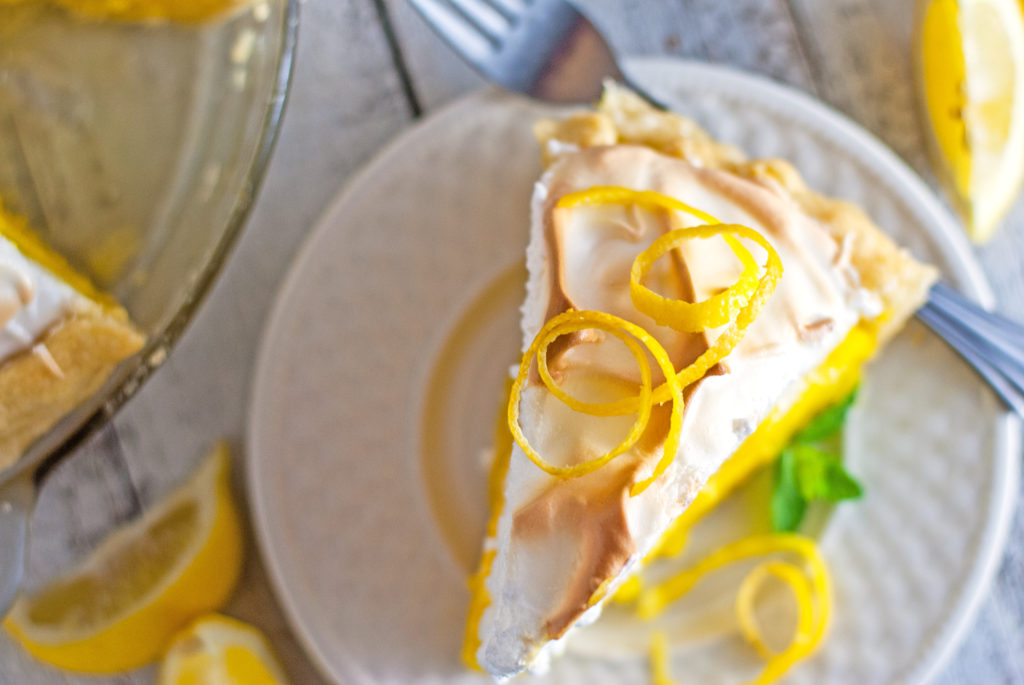
Smooth the meringue over the top of the lemon filling (which should still be nice and hot). Make sure that you push the meringue all the way to the sides. It should kind of go up onto the crust, a little bit, to make sure that the lemon is completely sealed in. Meringue shrinks a little when it cooks, and we want it to cover the lemon, completely. So, like an old lady putting on lipstick . . . go outside the lines a little bit. That way, you’ll be sure to hit everything you can’t see 😉
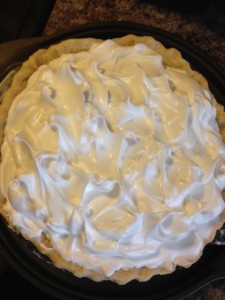
As far as decorating the meringue, you can either leave it plain, or you can do the traditional design I have done here. This “design” is so easy . . . just take a small spatula or butter knife and lay it, flat, on the meringue, and then pull it up quickly, so the meringue pulls up in a nice little point and takes a bow. Do this pouncing move all over the crust until it’s covered with cute little soft points. Put your pie right into your preheated 350 degree oven. You preheated this ahead of time, too? You are just too smart for your own good. I tell you . . . some people are so smart, it’s disgusting.
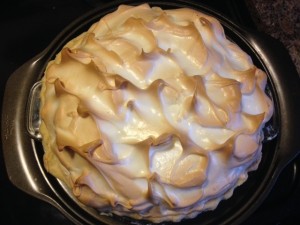
It took my pie about 15 minutes, at 350, to get nice and golden brown. I turned the pie around halfway through baking to make sure that it got equally browned on both sides, instead of burned on one side and underdone on the other. But each oven is different, so keep the oven light on and keep an eye on it. Meringue has a tendency to go from golden brown to scorched black in just a few minutes, so watch carefully, rotate if necessary, and pull the pie when it looks done. We don’t want our sweet little peaks turning into charcoal towers.
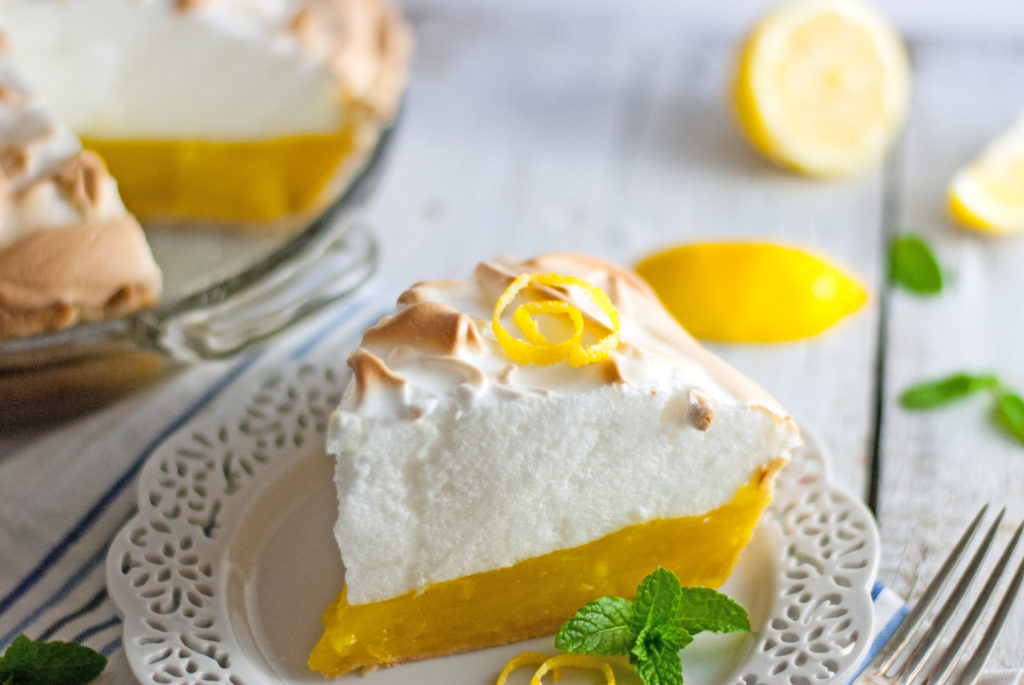
And then, the hardest part is over. You made a pie out of fruit you squeezed with your own hands. You created meringue and whipped it like a boss. You learned how to bake a crust, practically blind. You served up a dessert that channeled your inner Great Grandma and brought your company back to a time when life was simpler and sweeter . . . and the pie was even better.
You did it. And I’m just so proud of you.

Disclosure: This post may contain affiliate links, which just means that we get a few pennies if you purchase through our link. I never recommend products that I don't personally use and love. Thanks!


Pingback: Sinful French Silk Pie – Cookies for England
Pingback: Lemon Meringue Mousse – Cookies for England