There are few classics more nostalgic than Chocolate Cream Pie. This classic recipe might have been the one your grandma pulled out of the refrigerator on Sunday after a nice family dinner. Many variations have been invented since– people have tried to “fancy” it up. But the original, though simple, is still the most perfect dessert, in my opinion. It’s a classic for a reason.
What are we waiting for? Let’s do this!
Chocolate Cream Pie
Ingredients:
1 blind baked pie crust (homemadeor bought)
2 boxes (3.13 oz. each) boxes My-T-Fine Chocolate Pudding
3 3/4 cups whole milk
2 cups heavy cream
2 tsp. vanilla extract
1/2 cup powdered sugar
Chocolate Curls for garnishing, optional
Directions:
Start by blind baking your pie crust. Roll out your crust and fit it into a 9.5″ deep pie plate. Prick 10-12 times with a fork over the sides and bottom of the crust (to prevent bubbles). Place a piece of parchment paper into the crust and fill the parchment with dry beans or pie weights (you can reuse the beans and bake them many times– it won’t hurt them). Bake the filled crust at 375 for 20 minutes, or until the edges of the crust are turning slightly golden brown. Remove the parchment and pie weights and bake for another 10-15 minutes, until the crust is lightly golden brown all over. Remove crust from the oven and allow to cool.
To make your pie filling, whisk together your milk and chocolate pudding together in a medium saucepan. Heat, whisking frequently, until mixture bubbles steadily in the center. Remove from heat and let cool for 5 minutes before pouring into prepared (and baked/cooled) pie shell. Cover with plastic wrap placed onto the pudding surface (to prevent the forming of a skin) and refrigerate until completely cool.
To make whipped cream topping, combine heavy cream, vanilla, and powdered sugar in the bowl of your stand mixer. Use the whisk attachment to whip mixture to desired consistency. Top cooled pudding layer with whipped cream and adorn with chocolate curls, if desired. Chill completely before serving.
Now, in pictures! 🙂
When I first started baking, I was terribly intimidated by making my own pie crust. I could never get it to turn out right, and more than once I threw away a dough ball with tears of angry frustration in my eyes. Cooking that is frustrating is not fun. We want baking to be fun– a stress relieving activity. Hey. If you’re going to be stressed you can do taxes. Baking is about stress relief. Oh– and cookies. Ok they are the same thing.
My advice is this: practice making your pie crust, but if producing a grandma worthy pie is taking all the fun out of your holiday baking, just (shhhh!!!) buy a refrigerated pie crust. Seriously. I won’t look down on you, your pie will be amazing, and you’ll enjoy the experience. Don’t beat yourself up.
HOWEVER. If you are ready to grab the bull by the horns and make your own pie crust, my advice is this: less water, more refrigeration. I made the mistake early on of thinking that my pie dough should be kind of a play dough consistency, and I kept adding more water and more water . . . and then I added more flour and more flour to keep it from being sticky when I rolled it out . . . and it was ruined. Your dough should be more like moist crumbs. When you pull it together and wrap everything tightly in plastic wrap before letting it NETFLIX N’ CHILL in the fridge, somehow it all comes together. Less water, more chill. Netflix is optional.
Once your pie crust is chilled, carefully roll it out. Take your time. You can’t rush this, or it will tear. Take a deep breath and just go slowly. Think deep thoughts. I can honestly feel the “chill” rolling down my mind to my fingers when I make this. Use a little flour underneath as you roll, rotating your pie crust every few rolls so that nothing sticks to your countertop when you’re finished and try to pick that sucker up. Trust me– the crust will try to hold onto that countertop with the tenacity of a car salesman clinging to you as you peruse the lot. You won’t be able to shake it unless you gently (and lightly) flour as you go.
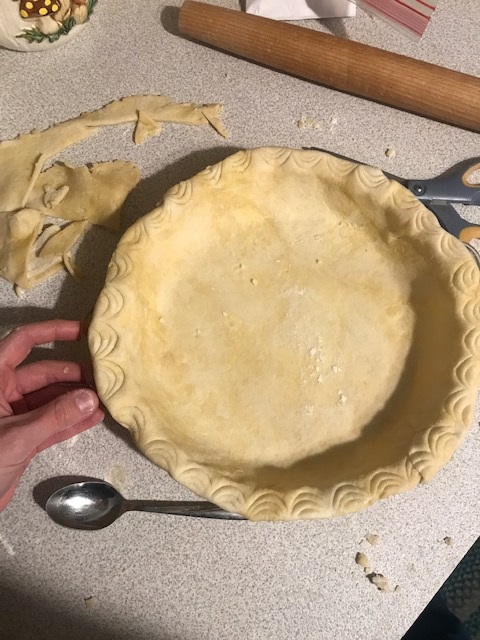
Roll the finished crust around your rolling pin and gently unroll it over your pie plate. Gently press the crust against your pie plate and cut off the excess edge with scissors, leaving yourself about 1″ “grace border” around the top just in case you mess up. You want a little wiggle room to patch any mistakes. I use a spoon to make a little round decorative pattern around the edge, but you can also do the classic crimp if you prefer. Prick the crust (don’t prick the decorative crimped part on top– just the sides and bottom) with a fork 10 or so times. This just keeps the crust from getting ugly bubbles in it while it bakes with no filling inside.
Fill your prepared pie crust with a piece of parchment paper, and then fill the parchment paper with dried beans, such as pinto beans. I have actually been using the same tired pinto beans for years– they keep getting baked for me and never complaining. Professional bakeries use the same “blind baking” beans hundreds of times until they finally turn to dust (the beans, not the bakers). A bag of pinto beans. Who knew that would be a worthy, years-long baking investment!
After about 20 minutes of baking the “bean filled” pie at 375, the edges of the top should start to look golden brown. Take your parchment and pie weights out of the crust and dump them into a heat safe bowl to cool down and bake for you another day. Meanwhile, keep baking the empty pie crust for another 10-15 minutes, just until the bottom gets a little kiss of golden brown suntan as well. When the crust is lightly golden brown all over, take it out of the oven and let it cool down.
You just baked a pie crust BLIND. You magician, you.
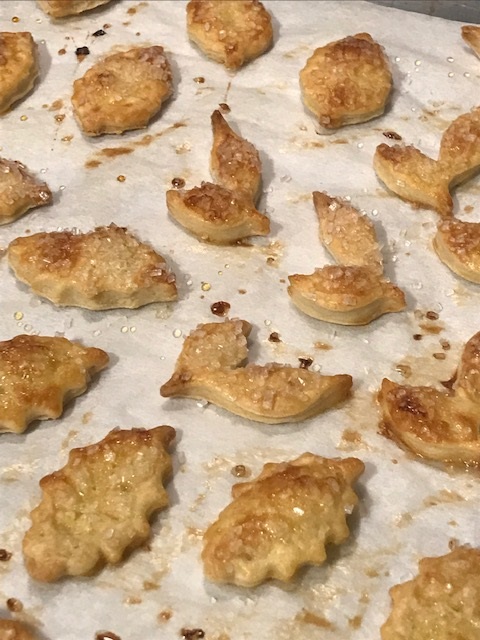
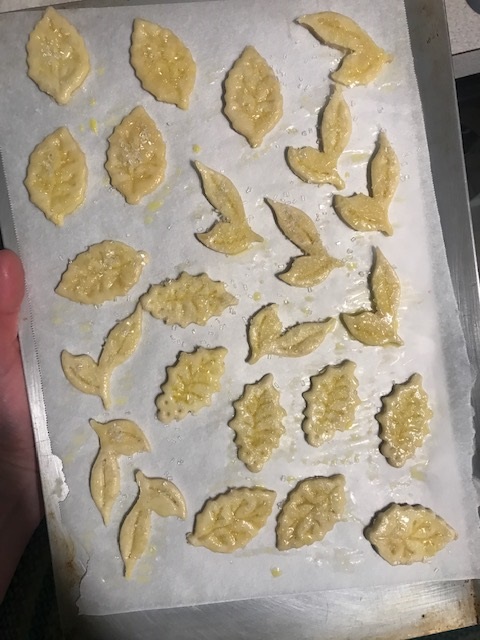
I also made a few cute leaf shapes with leftover pie crust dough, brushed them with egg wash and coarse sanding sugar, and baked those on some parchment paper. They made an adorable little garnish for the finished pie. Why not. You worked for that crust. Use it ALLLLL.

While your pie crust is cooling, let’s get shaking on the filling. The beautiful thing about this pie is that it is really deceptively simple to make. It is a little time consuming to let all the layers be prepared separately, but this pie is a showstopping holiday dessert, even if you are a novice in the pie baking department. Whipped cream covers a multitude of sins. Literally. hehe. You should have seen all the ruined desserts I have glamorized with whipped cream “concealer” over the years. 😉
I am using classic My-T-Fine chocolate pudding for this, because that is kind of the gold standard of what Grandma uses. But you can feel free to substitute any chocolate pudding that you like, being sure to follow the directions specific to your brand’s instruction sheet. For this variety of pudding, place 2 boxes of My-T-Fine chocolate pudding mix into a large saucepan and add 3 3/4 cups of whole milk. Heat the mixture, whisking frequently, until it starts to thicken. When the mixture gets thick, whisk it constantly so that you don’t risk burning it. When the pudding has thick bubbles coming up in the center of the pan, it’s ready. Take it off the heat and let it sit for 5 minutes, giving it a whisk or two during the cooling process so that the pudding doesn’t form a skin.

When your pudding has cooled slightly for 5 minutes, pour it into your blind baked and cooled pie shell. You baked that crust (LIKE A BOSS!!) ahead of time and now it’s all ready. I like working with bosses. They are awesome. They make pie more quickly than others. This is another reason I like them.

Put a piece of plastic wrap right onto the pudding part of your pie. This plastic coating will help the pudding avoid forming a skin while it cools (trust me– you don’t want a layer of rubber when you bite into the finished product. Ewww). Let the pie cool completely in the fridge for several hours. You need it to be chilled before you add the whipped cream so that you don’t melt that gorgeous white froth on top. Don’t be a hothead. Cool your pie. Your whipped cream will thank you.

Ok. So you can’t put your whipped cream on the warm pudding layer yet. HOWEVER. You are a brilliant boss who works ahead so that you can have pie sooner. You are just smart that way. You are pretty much the smartest person who ever lived. So let’s get this whipped cream going so that it’s ready when we are ready.
You’re so smart. Have I mentioned how much I love working with you?

Using the whisk attachment of your stand mixer, mix your heavy cream, vanilla, and powdered sugar until you get beautiful, billowy clouds of, well . . . whipped cream. Don’t overbeat this or you will get butter. Don’t ask me how I know this.
When your pudding layer is cool, slather that gorgeous whipped cream on top. You can style it if you want to. Add a few chocolate curls to make it pretty enough to go to prom.

See that? I told you. Irresistible.
Um . . . may I have another piece?
You did it. And I’m just so proud of you.

Disclosure: This post may contain affiliate links, which just means that we get a few pennies if you purchase through our link. I never recommend products that I don't personally use and love. Thanks!