I bake. A lot. But that doesn’t mean that I know it all, or that I never make mistakes. You’d fall down and die laughing if you could see some of the horrors that I have created. In fact, I would say the three recipes that I personally have found most intimidating to master are French Macarons, Fluffy Buttermilk Biscuits, and Classic Pie Crust.
Pie Crust intimidated me into the dust for ages. I would try again and again, only to hurl my creation into the trash in despair, and then do the walk of shame (again) to go buy store-made pie crust. No, there’s nothing wrong with bought pie crust. And in a time crunch I still grab the ‘ole Pillsbury box from the refrigerator case at Walmart. But KNOWING HOW to make pie crust is a skill that every baker should learn, if only so that you can look yourself in the mirror, smile with self respect, and whisper, “You did it. You climbed Everest. You made the most buttery, flaky crust in the world with your own two hands. What’s next– becoming pope over lunch?”
Yeah. It’s just that awesome. So conquer your crust fluting fears, and let’s conquer this baby, once and for all!
What are we waiting for? Let’s do this!
Perfect Pie Crust
Adapted from Classic Crisco recipe
Ingredients:
2 cups all purpose flour
3/4 tsp. salt
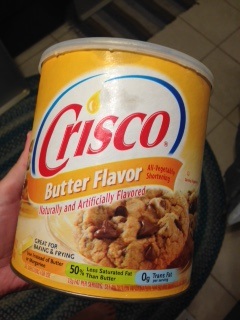
3/4 cup butter flavored Crisco, chilled (I keep this in the fridge all the time)
3/4 tsp. white vinegar
8-10 tbsp. icewater
Directions:
Whisk together flour and salt. Cut in chilled Crisco with a pastry cutter or fork and use a fork to toss in white vinegar. Make a well in the side of the pastry crumbs and pour in 8 tbsp. of icewater. Use the fork to lightly toss the water into the crumbs, and then switch to a butter knife. “Cut” through the crumbs to mix, rather than stirring. It keeps the crust more tender because you aren’t overmixing. Add a few more tbsp. of icewater if you need, to hold the mixture together. It won’t be “dough,” but more like moist crumbs that just stick together. Wrap the dough ball in plastic wrap tightly, pressing together as you wrap. Chill in the refrigerator for at least an hour, or until completely cold. Cut dough in half and roll each crust out on a silpat
before decorating and using crust, if desired.
Now, in pictures!
One of the reasons I struggled so much to get perfect, flaky pie crust in the beginning of my woefully long and heartbreaking pie crust saga was because I didn’t have the correct tools. I was mystified when some recipes called for an “all butter crust” (which had awesome flavor but no flakiness), shortening crust (amazingly flaky but zero flavor, similar to biscuits), or a combo of the two that left me throwing out ingredients left and right in a flurry of frustration. Then I’d do the walk of shame again to buy a pie crust, and all the joy and beauty of taking a fresh, home-baked pie out of the oven was wasted on me. All I could see was a gigantic neon sign over my head that said “FAILURE.” Once, when I took a beautiful Apple Pie to a get together, one guest was swooning over it. “Did you make this pie?” I said that I did. “Crust too?” I explained I had used a store-bought crust. His face fell. “Oh. I was really impressed there for a second,” he said. ERG. I vowed to learn this skill if it killed me.
The perfect compromise between buttery flavor and light, flaky layers is butter flavored Crisco. Just trust me on this. And not only butter flavored Crisco, but CHILLED butter flavored Crisco. That’s another thing I was doing wrong at the beginning– using room temperature ingredients. I now keep my can of Crisco in the fridge at all times, so that I can just whip it out anytime I need to make pie crust, buttermilk biscuits, whatever I want. It’s chilled and ready to go.
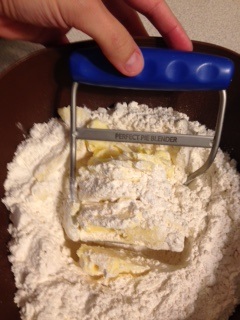
The next tool that changed my “pie crust makin’ game” was the Perfect Pie Blender. I actually found that this pastry cutter
(which has a straight edge on the bottom as opposed to the classic curved blades which make it hard to get the bottom and sides of the bowl) changed my baking game about 110% for the better. Suddenly, scones, biscuits, pie crust . . . they were so much easier. I give this tool often as a gift to foodie friends. It’s one of the tools I reach for most often in my kitchen.
So anyway, pie crust. Whisk together your all purpose flour and salt. Then cut in your (chilled) shortening with this pastry cutter. Use the motion like a horse pawing the ground. In a few “cuts,” your shortening pieces will be about the size of small peas. That’s what you want.
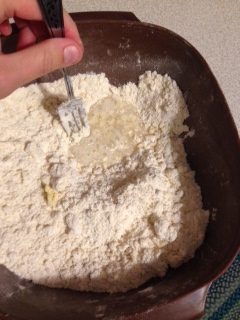
Use a fork to toss in your white vinegar. You won’t really see this, but it will add even more flakiness to your finished crust.
NOW. Another secret to good pie crust. You need all your ingredients to be COLD. Cold pockets of fat (in our case, shortening) will puff up during baking and make light, flaky baked goods. A crust made with room temperature ingredients will turn out heavy and greasy, because the fat melted (since it was warm to start with) instead of expanding and puffing up during the baking process.
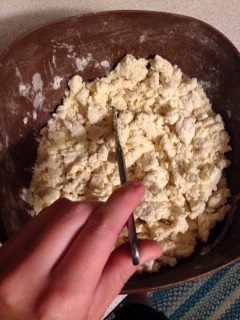
When I make pie crust, I sit out a bowl of icewater before I begin. That way when I’m ready to use the water, it’s nice and chilly. Once you have cut in your chilled shortening, make a little “well” in a corner of the bowl and pour in 8 tbsp. of water. Use the fork to gently toss the mixture. You aren’t “stirring,” but rather just kind of tossing like a salad. Just a few times. Don’t overmix.
Here’s another secret to light and tender pie crust– don’t overmix. When Grandma told you “don’t handle the dough too much,” her wisdom was 2-fold. Overstirring the dough works the gluten, which in turn makes the crust tough. Also, using your hands on the dough too much warms up the fat, leading to heavy, greasy crust instead of light and flaky crust.
A good way to mix in the liquid without overstirring is to use a butter knife and “cut through” the crumbs. Yeah. That sounds weird. But it really works. Just draw your knife through the mixture several times, then rotate the bowl and cut through the dough again. Sometimes I have to add another tablespoon or two of water to get the mixture to come together, but not too much. If you add too much water, you’ll need to add extra flour to roll it, which will make your crust tough. Yeah. Don’t ask me how I know this. :/
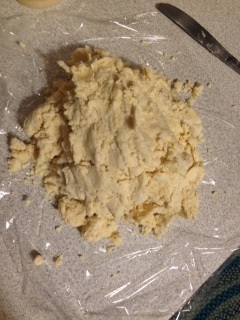
See this? That’s another thing I used to do terribly wrong, at first. I was expecting my pie dough to look smooth and, well, “doughy,” like store-bought crust. Nope. All you want is for the crumbs to stick together. When you have cut through your dough several times and it looks mixed, use your hands (the only time you want to touch the dough) to gently press it together into a ball. If it won’t hold, remove the dough ball that does hold to plastic wrap and then add a squidge more water to the rest, and add it to the rest of the dough. All you want is kind of a crumbly, moist mixture that holds together. It doesn’t look like dough at all. Yet.
Wrap the whole ‘shebang in plastic wrap in a tight ball and place in the fridge for at least an hour. If you know you’ll need a crust, you can make it the day before and let it chill in the refrigerator overnight. You can even freeze these crusts and defrost them in the fridge. But the bottom line is that the dough ball has to chill thoroughly. That’s the magic step I used to miss.
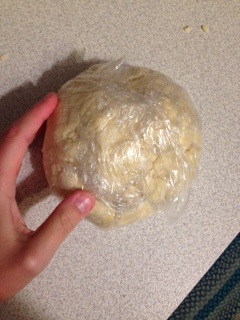
Swaddle your little dough ball and give it a bottle. Kidding. Put it in the fridge for at least an hour or two, until it’s completely chilled all the way through.
In my “preschool pie” days, I had so much trouble rolling out dough. Now I realize this is because I didn’t chill my dough properly– just immediately started rolling it out. *However* during this time I found this cheapie pie crust bag tool to be extremely helpful– just lightly flour the bag, roll out your dough, and voila. And I still use this pastry bag sometimes. It’s an excellent tool for learning pie crust technique. Eventually, I just found that I become confident enough that I didn’t need it. But if you’re just starting out, this pie crust bag is an excellent set of “training wheels” while you’re learning. 😉

These days, I just use my trusty silpat and a French rolling pin
(longer, and no handles means you can cover the entire crust without stopping to realign. There’s a reason pastry chefs use this kind of rolling pin. Much easier). Someone once told me that good pie crust can’t be rushed. And I think that’s true. When I rush, I find that my crust tears and fragments. When I force myself to breathe, slow down, think deep thoughts . . . slowly rotating and rolling out the dough, adding a smidge more flour as necessary, it always turns out so much better.
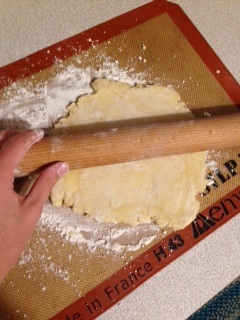
You don’t want tons of flour– just enough to keep everything from sticking. That’s another reason the silpat comes in handy– nothing sticks to it, so you don’t need as much flour. Roll the dough slowly, adding a pinch of flour as necessary to keep your rolling pin from sticking. Then gently use your fingers to get under the dough and rotate it, adding a little flour underneath if you need to, just to keep from sticking. Keep rotating and rolling, slowly and without rushing. Trust me. You can do this.
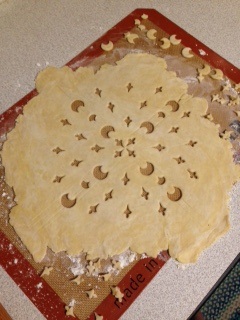
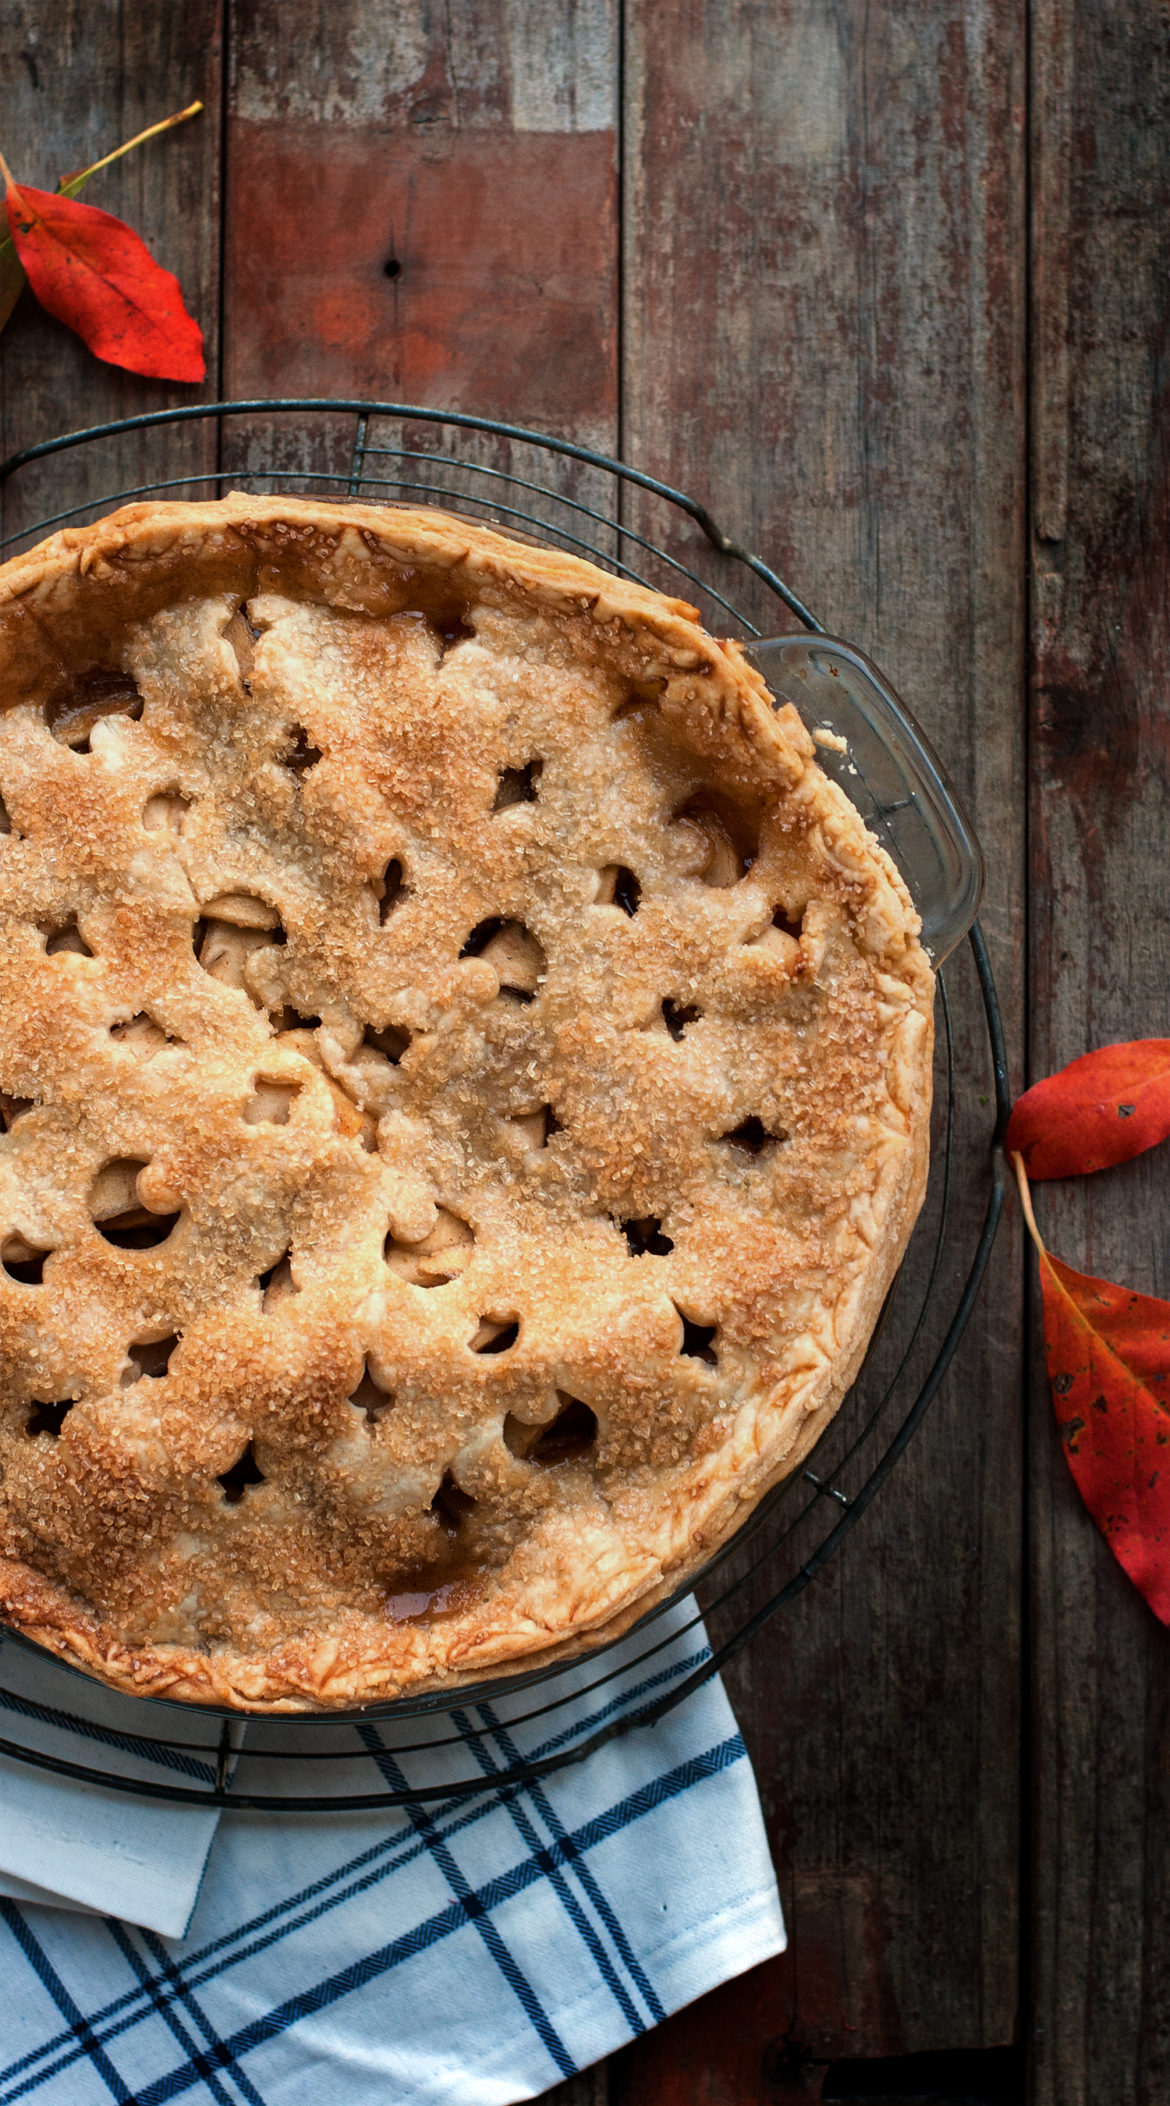
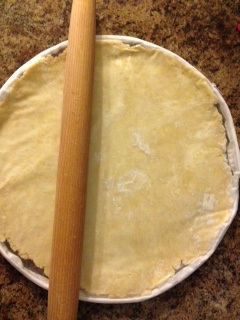
Another cool thing about the silpat is that it’s just about the same height as my deep pie plate, so when I get about as tall as the silpat, I know my crust is the right size. At that point you can use some mini cookie cutters
, or some 3-D crust cutters
, and design your crust. An intricate design holds better if you stick it on a cookie sheet in the freezer for 10 minutes or so, first, just to solidify the design (just lift the entire silpat
up and onto the cookie sheet. So easy. You’re welcome.).

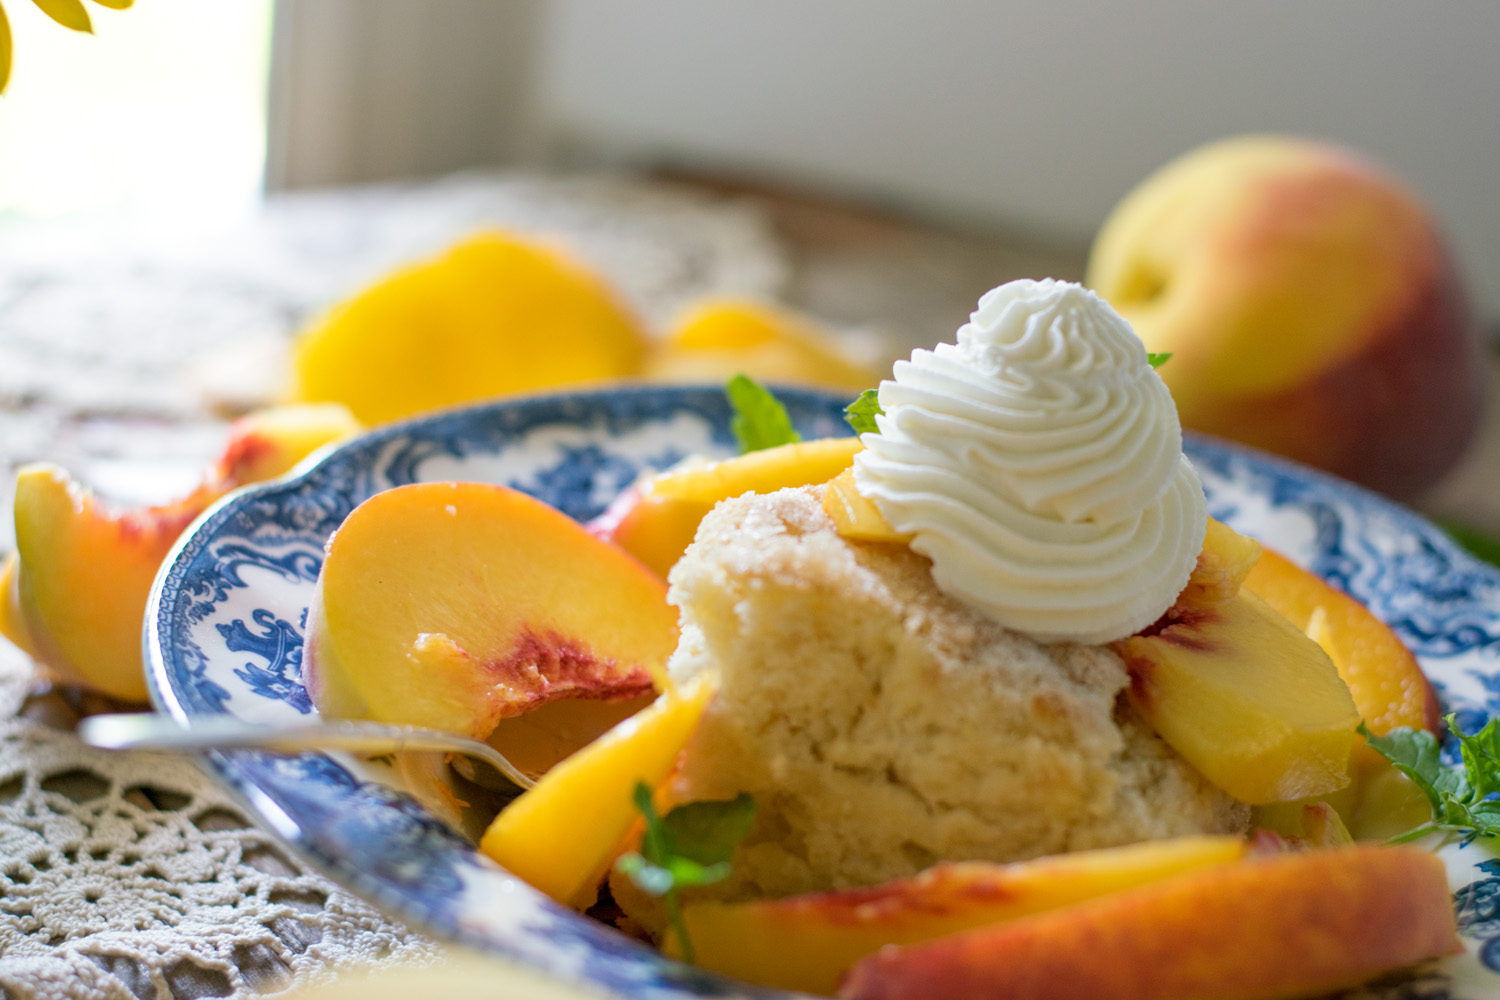
Assemble your pie (wrapping the dough carefully around your rolling pin and “unrolling” over the pie plate works well for bottom crust), fill it, and top with your pastry design. I like to brush my top crust with milk and sprinkle with turbinado sugar, for a little glitter and crunch.

Generally I bake pies (over a cookie sheet. Trust me on this) for 1 hour at 350 degrees. There are many schools of thought on this– 425 for 10 minutes, then lowering the temperature, or maybe all high temperature. Whatever works for you. I always do 350 for an hour, for the most part, depending on the pie.

During this time, all that hard work you did will go to bat for you. Your house will smell divine, and your pastry will be flaky and golden brown and gorgeous.

Hey– look at that. You did it. You made pie crust FROM SCRATCH. Gosh. You did it! The first time I successfully made pie crust, I felt like I was going to float through the air, I was so happy. And the more you practice, the better you will get.
Of course, practice means more pie. But someone has to do it. Um . . . can I have vanilla ice cream with that? 😉
You did it. And I’m just so proud of you.

Disclosure: This post may contain affiliate links, which just means that we get a few pennies if you purchase through our link. I never recommend products that I don't personally use and love. Thanks!


Pingback: Sweet Strawberry Pie – Cookies for England