I think Death by Chocolate Cheesecake is probably the method I would choose for my demise. Just set me adrift in a little boat, in a billowing chocolate sea of the glorious stuff, and give me a spoon for a paddle. Death or exile? Who knows! I just know you will never hear from me or my chocolate filled tummy again.
What are we waiting for? Let’s do this!
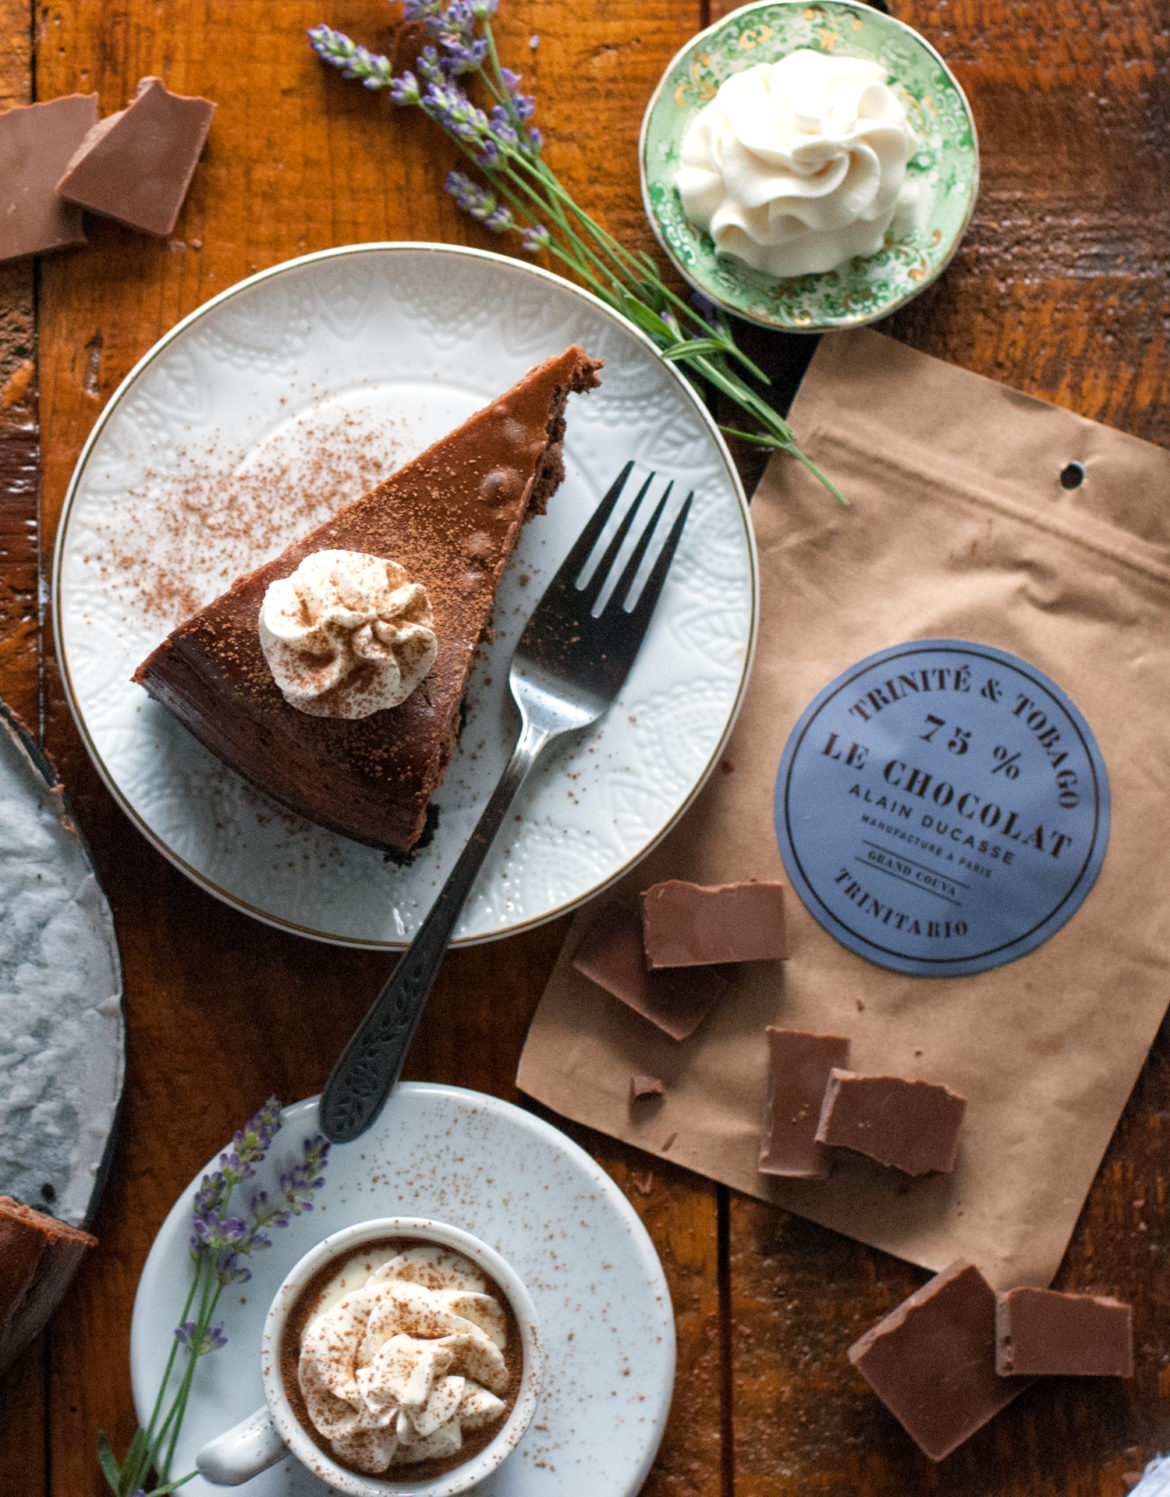
Death by Chocolate Cheesecake
Crust Ingredients:
2 1/2 cups crushed chocolate cream cookies (such as Oreos)
3 tbsp. melted butter
Cheesecake Ingredients:
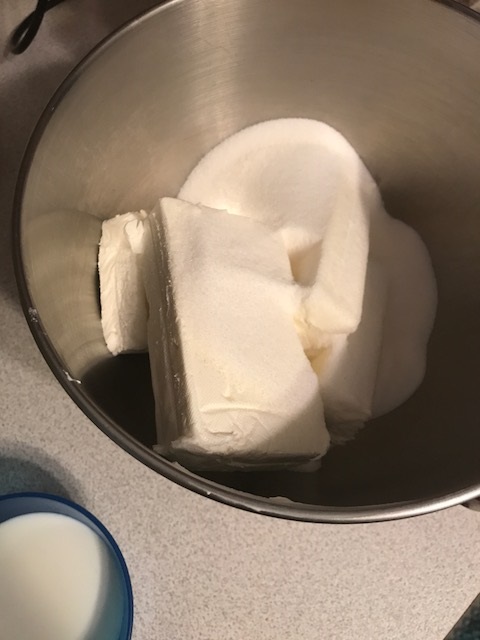
4 (8 oz.) packages of cream cheese, softened
1 1/2 cups white sugar
3/4 cup whole milk (room temperature)
4 eggs (room temperature)
1 cup sour cream (room temperature)
1 tbsp.vanilla bean paste
1/4 cup all purpose flour
1 cup dark chocolate chips, melted
1/2 cup semi sweet chocolate chips, melted
1 cup mini semi sweet chocolate chips (not melted)
Whipped Cream and chocolate curls or cocoa for garnishing, optional
Directions:
To make crust, pulse chocolate cream sandwich cookies in afood processoruntil they are fine crumbs. Mix with melted butter and set crust aside.
Prepare a 9″³ springform pan for baking. Spray the pan with cooking spray and line with parchment paper (I use chip clips to help hold the paper in place). Re-spray the parchment paper with cooking spray. Pour the crust crumbs into the (1) sprayed (2) parchment paper lined (3) resprayed springform pan, and lightly press the crust about 1″³ up the sides and along the bottom of the pan.
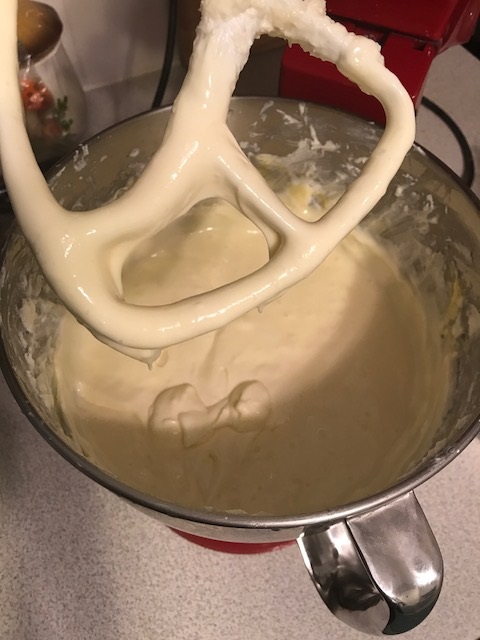
To make cheesecake batter, whip together softened cream cheese and white sugar until the mixture is nice and creamy with no lumps. With the mixer going on low speed, slowly drizzle in lukewarm milk. Stop mixer and scrape down sides of the mixing bowl, to make sure that everything is incorporated. Add in the eggs, one by one, mixing after each addition. Mix in vanilla bean paste and sour cream, and then flour. Stir in melted (just melted– not hot) chocolates until completely combined. Stir in mini chips.
Pour cheesecake batter into9″³ springform panand prepared crust. Place cheesecake on a cookie sheet and place in the center of the oven (move racks if necessary to make sure it bakes in the center), with a pan of boiling water on a separate baking rack underneath. Bake at 350 degrees for roughly 1 hour/15 minutes, until cheesecake is set in the center and a toothpick inserted in the center comes out “creamy,” and not wet. You may need to cover the cheesecake with foil during the last 1/2 hour of baking, to avoid it getting too brown. When the cheesecake is set in the center turn off the oven and crack the oven door, but let the cheesecake inside the oven to cool. When the cheesecake has cooled to warm, and not hot, place it in the refrigerator, with a paper towel overtop to absorb moisture. Allow cheesecake to chill completely in the refrigerator overnightbefore removing from springform pan, decorating if desired, and cutting into slices.
Now, in pictures! 🙂
The key to good cheesecake is . . . drum roll . . . PROCRASTINATION! No wonder I love it so much. 😉 What this means is that you get your cold ingredients out of the fridge and let them sit for 1/2 hour or so, before you begin. Room temperature ingredients play together more nicely in the sandbox . . . er, mixing bowl. Take my word for it. Start by mixing together your softened cream cheese and sugar together until all the lumps are gone and your mixture is nice and creamy. See? This party is going fine. The guests just needed to warm up a little bit. 😉
Cold ingredients will not cream as nicely, and your poor little mixer will be huffing and puffing saying, “Next time read the directions, darnit!”
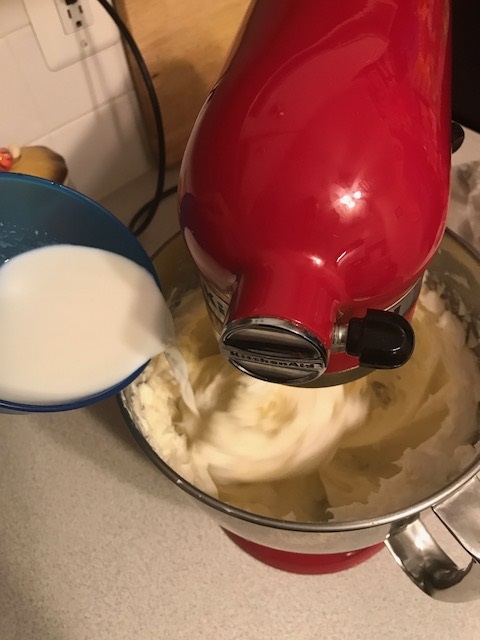
With the mixer going on low speed, slowly drizzle in your lukewarm milk. Halfway through mixing stop the mixer and scrape down sides of the mixing bowl to make sure that everything is incorporated. Mixing the milk in NIIIIIICE and slowly just helps the sweet cheesecake to spend its life relaxing, instead of angry and uptight. And this lovely lady deserves a relaxing life– trust me– it will be sweeter for everyone all the way around, that way.
Because when cheesecake ain’t happy, ain’t nobody happy. Or something like that.
Next, add in the (room temperature) eggs, one by one, mixing for 5 seconds or so after each one. Yes, adding the eggs slowly is kind of a pain, but this cheesecake is a beautiful lady of leisure, and she needs all those little extra touches to look her best.
Mix in your vanilla bean paste (the classy, high end sister of vanilla extract), room temperature sour cream, and then flour. Vanilla bean paste, if you’ve never tried it, is a fantastic way to add killer vanilla flavor, as well as all those little specks of vanilla beans that everyone loves, to your baking. Once you try it you will always want to have it around for special occasions. It’s a little on the pricey side so I try to use it only for the very best desserts– and cheesecake certainly qualifies.
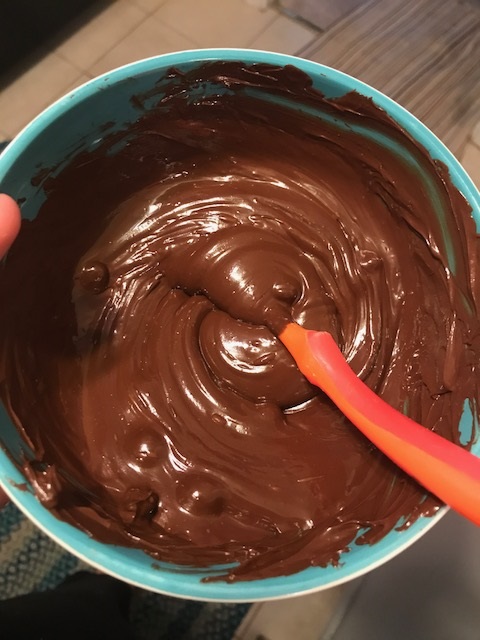
Next, melt your chocolate chips in 30 second increments in the microwave. Stir after each heat. The “stirring as you go” technique keeps the chocolate chips from getting burned as they melt. You can use a double boiler to melt them, if you prefer. But since I hate to do dishes, I use the ‘ole microwave.
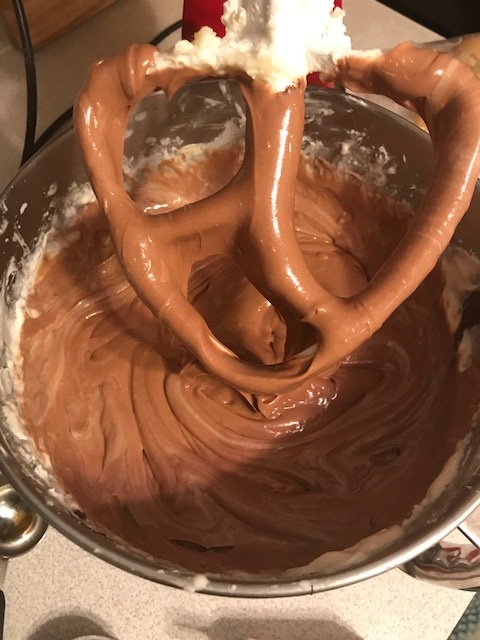
Mix in the melted chocolate until everything in nice, ooey gooey, and completely combined. Stir in your mini chips because, you know, death by chocolate is totally the way to go. Go out with a bang. You may quote me on my tombstone: “She chose an especially dark way to go . . . 70% cacao.”
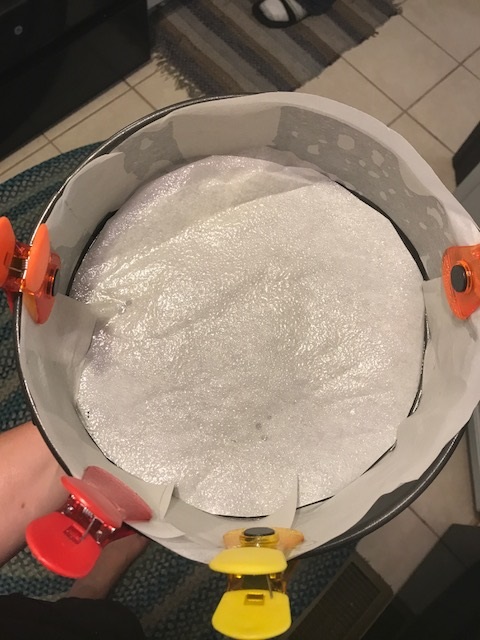
We’ve talked about how to prep your springform pan before, when we made cheesecake. Basically you want a 9″ springform pan, sprayed with cooking spray. Then you trace and cut out a round of parchment paper for the bottom, and a few rectangle pieces for the sides. Stick the parchment to the sprayed pan, then spray it again. I use chip clips to hold the paper in place until the cheesecake is in there.
Why yes, prepping this pan is extremely annoying, high maintenance, and fussy. Yes, it will give you perfect cheesecake that doesn’t stick. You’re welcome.
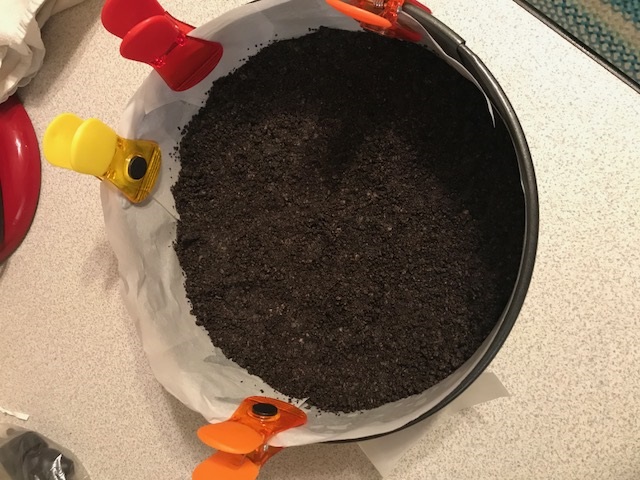
Press your crushed cookies/butter mixture into the bottom of the pan and use the back of a spoon to press it flat and about 1 inch up the sides of the pan.

I like to put a pan of hot water into the bottom rack of the oven before I make a cheesecake. Some people put the cheesecake, bottom wrapped in foil, right into the water bath. The water bath is technically the way you’re supposed to do it, but I’ve always had good luck just re-positioning the oven racks so that the water is on the very bottom and the cheesecake sits in the center of the oven. Make sure the cheesecake is on another baking sheet just in case the springform leaks a little bit. You can wrap the bottom of the pan in foil if you’re worried that your springform may leak more than a few drops.

I like to turn the cheesecake around after about 45 minutes of baking to make sure that it browns evenly. Also worth noting– during baking the cheesecake will swell like a crazy sprained ankle. You will think “Oh my GOSH it’s going to overflow the pan!” But don’t worry. When it cools it will shrink back down, like an argument with your mother in law. Sometimes I also loosely cover the cheesecake with foil during the last 20 minutes or so of baking if it looks like it’s already brown enough. That way I don’t get the sweet little gal burned on top. Chocolate is especially hard to tell when we are getting “too brown,” since it’s brown already. Just be safe and cover loosely with foil the last 20 minutes.
Because let’s face it. Everyone loves a tan but no one loves a burn. *sound of spraying coppertone. Ahem. Pardon me.

You will know the cheesecake is done when a toothpick inserted into the center comes out creamy, but not wet. Dry toothpick means overdone cheesecake. I used to constantly struggle with whether or not my cheesecake was done. I ruined many flawless beauties this way, their lovely lives ending in tragic “thunks” into the trash can. For me, when using an oven thermometer and water bath, it takes exactly 1 hour and 15 minutes, turning cheesecake halfway through and covering with foil last 20 or so minutes of baking, to get it done perfectly.
To recap, watch for:
- Center slightly “jiggly,” like a custard, but not liquid, in about a quarter sized spot in the center
- Toothpick inserted should be not wet, not dry– you want kind of creamy
- You can ever so lightly touch the center, and your finger will not create a wet smoosh mark

When your cheesecake is done, turn off the oven, crack the door, and let the cheesecake just . . . sit. Yep. I told you this was a procrastinator’s dream dessert. That’s right. Let it cool in the partially opened oven, gradually, for about 40 minutes. This technique just helps the temperature to come down slowly, so your cheesecake doesn’t crack. (PS if it does crack just cover the top with whipped cream at the end. No one will ever know. Don’t ask me how I know this ;).

After the cheesecake has rested in the slightly open oven for 40/45 minutes, take it out and place it in the refrigerator until fully chilled (I like to let it sit in the fridge at least overnight). I cover it in the refrigerator with a paper towel, then covered everything with plastic wrap. The towel absorbs the moisture which will accumulate while it cools, while the plastic wrap keeps it from drying out. Don’t unmold the cheesecake from the springform until it is completely cool.
And when it’s cool? *the sound of the Star Spangled Banner playing in the distance*
When it’s cool . . . open the springform. Gasp with glee. Adorn this luscious, chocolate cheesecake with whipped cream and chocolate curls. Dust each slice with a little sprinkling of cocoa powder, if you like.
And feast.
You did it. And I’m just so proud of you.

Disclosure: This post may contain affiliate links, which just means that we get a few pennies if you purchase through our link. I never recommend products that I don't personally use and love. Thanks!