Food Styling 101
We have all been there. We hire a babysitter. We dig through the dusty closet to find an actual outfit that has not been tainted with ketchup, baby food, or chewed up baby puffs. We go to a nice restaurant. We try not to think about how many boxes of diapers we could buy for the price of this entree. We wolf down our food so that we can rush back and make sure the baby is ok. We feel weird not toting a diaper bag. We talk about the kiddos all dinner, and then realize it’s 8:30 and we are already drooping. Not to be outdone, we do the unthinkable . . . we STAY LONGER AND ORDER DESSERT.
The waiter brings out a magnificent chocolate beast, complete with a chocolate swirl on the plate and a little flake of gold leaf on top. We rummage in our handbag (which used to contain makeup but now contains bubbles, lollipops, and an extra pull up because NO ONE wants to be caught without one) and dig out the ‘ole iPhone to take a picture. We smoosh our tired faces into a selfie and grin. Check. We take a picture of this INCREDIBLE dessert for posting on social media. Hmmmmm. The picture doesn’t do it justice. We try again. We rotate it. It looks dark and weird and not decadent at all. We sigh and give up. We eat our dessert. We wish we would have had actual physical evidence of this dessert that we had to laugh in the face of the gods to order, since so many things had to come together for us to be able to do it. If only . . .
If only everyone knew a few little crumbs of information about food styling!
Well fear not, loved ones. It’s time for a little food styling tutorial. I don’t pretend to know it all. No one ever knows it all. Well . . . except Mom. Moms know it all. It is a rite of passage. Become Mom. Know it all. It’s part of her contract. Seriously. Read the fine print.
BUT.
I have learned a lot through the years from just practicing, reading, and learning from other food stylists, bloggers, and artists. No art is ever “finished.” You continually hone it throughout your life. Your style evolves and changes, and you continue to learn and reinvent yourself. This keeps things fresh. And along the way of that process you learn a heck of a lot. So let’s talk about some little things that can take your food photos from amateur to awesome. Date night dessert photos . . . look out. You will never be the same.

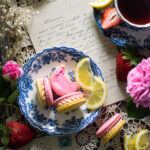
1. Background Matters.
This is especially true in restaurant situations. Have you ever taken a photo and then you caught some random person’s face in there? I have often wondered how many vacation albums I am in, secretly, without realizing it. Someone snapped a photo and there was my blur of a face. haha. See this photo above? It’s a pretty photo. And it’s a pretty setup. But the background is just too busy. What is the focus here? The cookies? The tea? All of it? The porch and flowers? The best photos are the most straightforward. Photography is a way to get your viewer to have a sort of forced perspective– you line things up the way you want the viewer to see them. If you do it right the eyes of the viewer will go right where you want them to go. In this photo I am distracted by the blur of some of the objects (like the teapot and the cake on the pedestal). There is a lot going on here. The photo would be more successful if it were cropped to say, just the upper 2 tiers of cookies, with the flowers in the background). Less is more. And that’s precisely why I never used this photo, and why he is tickled pink to be able to walk the red carpet with the others. Shhhh. Don’t tell him why he’s really here . . .
How do I know this photo is a “him”? Well that’s easy. A girl photo would never have been foolish enough to leave the cookies.

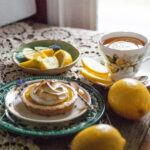
This photo is more successful. It is clear from the start where the eye is supposed to go– the teacup. The rest of the photo is softly muted and slightly blurred (which is achieved by taking the aperture from 3.5 to 2.8– more on aperture here), which guides the eye easily to see it as a soft, complementary background, rather than a competition for the main event going on in this photo.
No bride wants a bridesmaid prettier than she is. Why do you think they always choose such ugly, yucky Bridesmaid dresses? It’s insurance. Let the teacup have her moment.

2. Stand up for what you eat! Er . . . believe in.
Especially when you are using phones to take photos, sometimes the most attractive angles are from straight overhead (sometimes known as a “flat lay”). Phones are not equipped with the same features that a DSLR camera has, therefore they are not as good at focusing in on a specific area of the photo. They are better at taking good pictures if everything is relatively the same distance from the camera. An added bonus is that if you are directly over the food, you will most likely get the blank table as a background which also takes care of your cluttered background/random grimacing man in your photo. You’re so smart. I love working with you.
Oh you WANT the grimacing man in the photo? He’s your husband you say? Well this is awkward . . .

3. Catch the light.
The difference between an ok photo and a great photo is light. EVERY TIME. In restaurants it can be tricky to get a decent photo because the lighting is often very low (and yellow). Yellow light makes all food look unappetizing– like we have all absconded back to spring in the South, when all the world is yellow with pollen. Ewwww. Don’t give your photos pollen allergies. Yucky.
Natural light is always the best. In a restaurant try to sit beside a window if you can. Taking the photo beside the natural window light will always make it look better. But sometimes it’s night, or there are not windows available, and in that case you just do the best you can. If you are home (or just trying to learn a little more about food photography in general) you can use a false natural light (like the homemade light studio we made, here, for about 20 bucks). In short, try to sit by a window. You will always get a better picture.

4. Have a food fight.
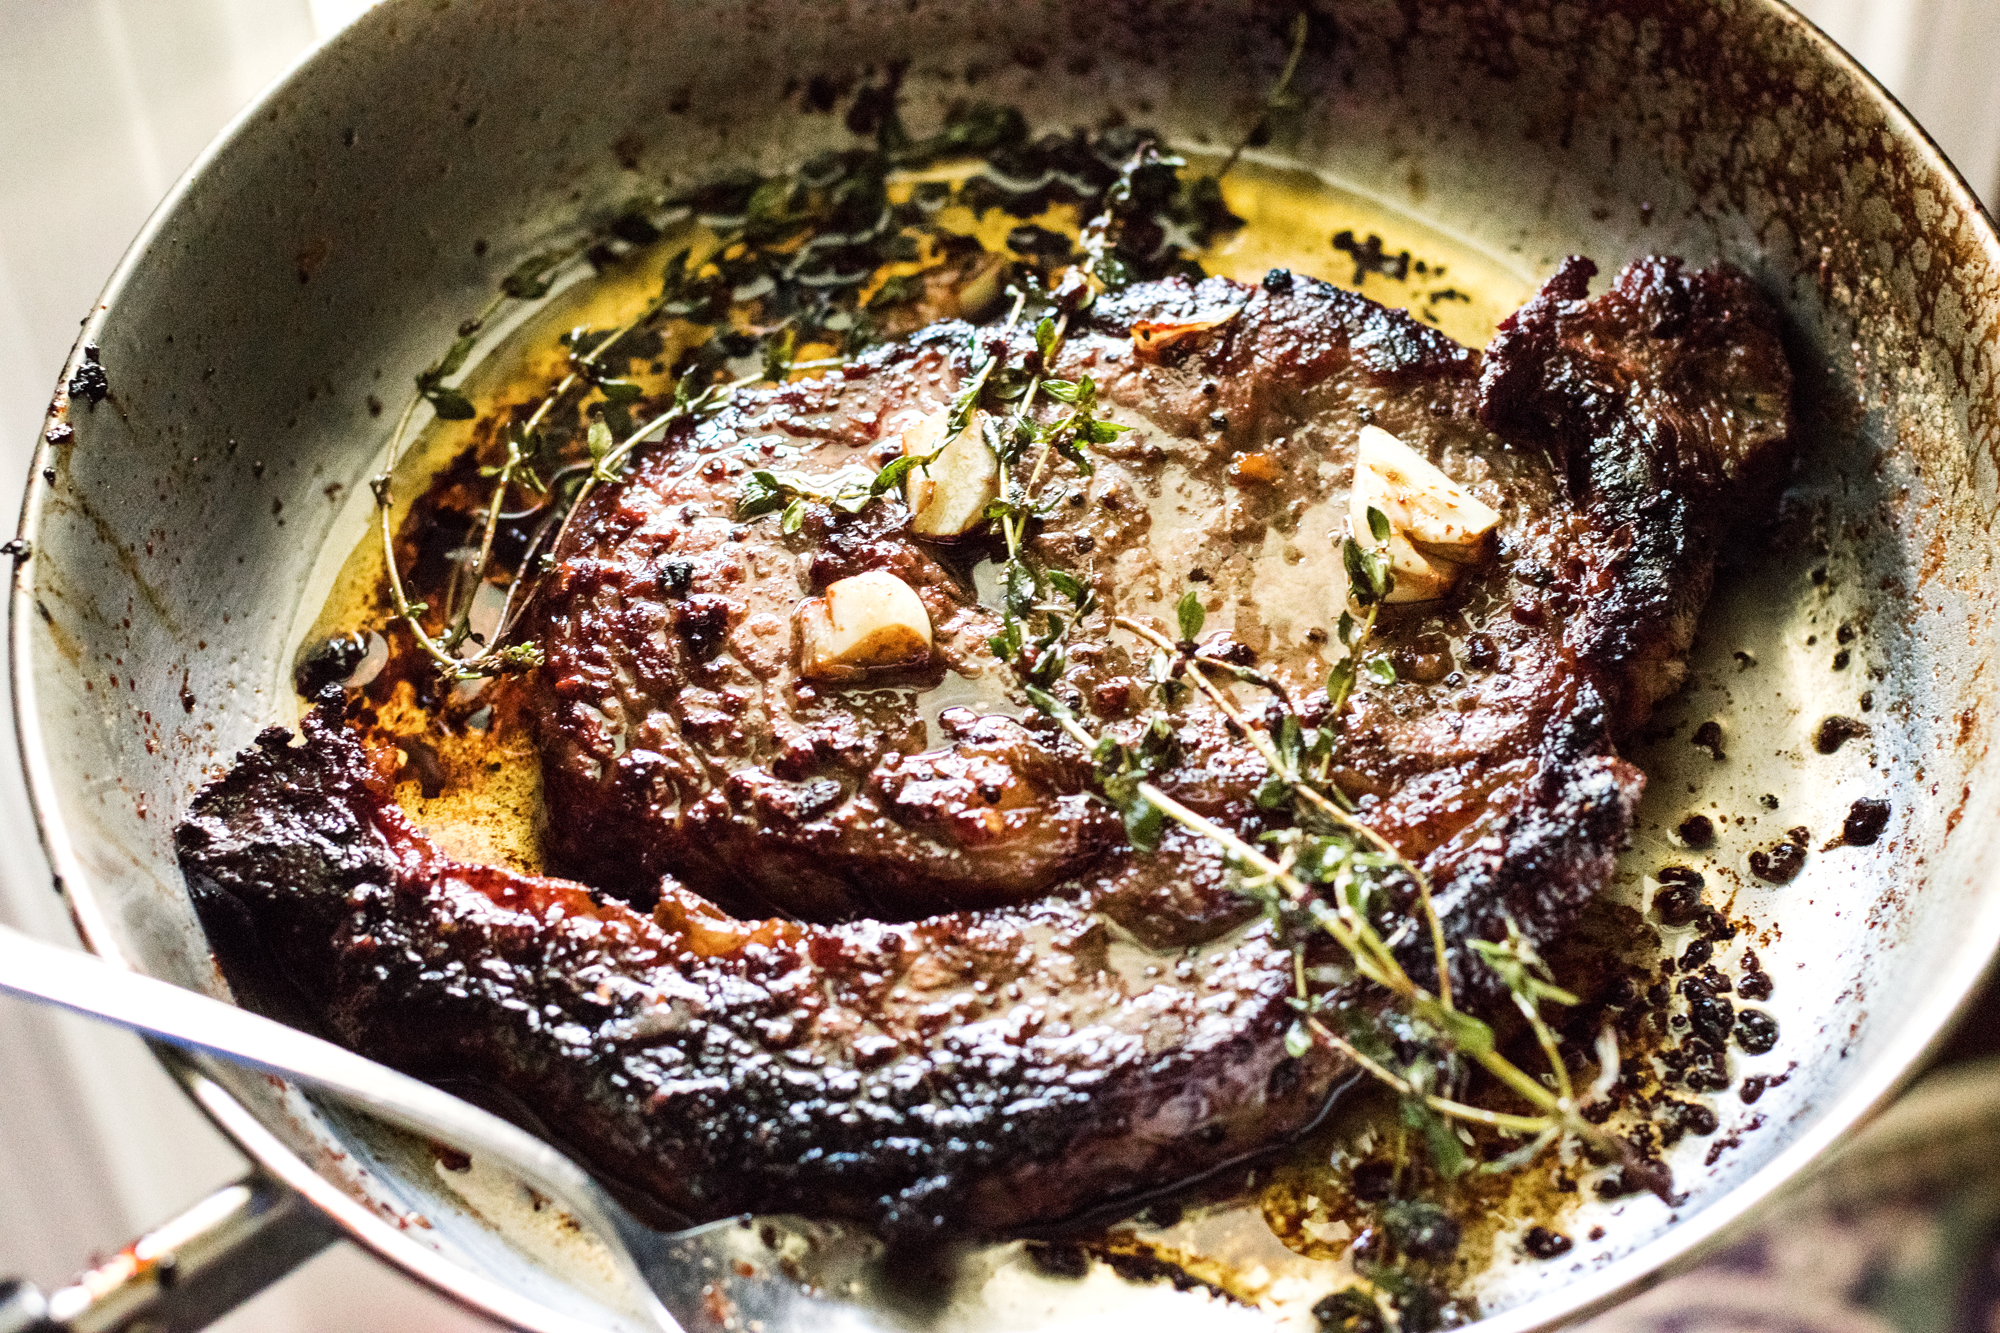
Well, maybe not a full out food fight. But don’t be afraid to stylishly “tear into” your food a little bit. No one wants to see a full out smashed bite, but sometimes sprinkling a few ingredients around the food (the restaurant cleverly already did this for you when they drizzled chocolate syrup on the plate– they must have known they were in the presence of greatness) really helps make it more appetizing. At a restaurant you can’t make a mess like you can at home– but even just placing a fork into the cake, or zooming in on the chocolate sauce around it– can make the dish seem active and appetizing. At home don’t be afraid to sprinkle a few coffee beans or place a spoon with remnants of beautiful, ruby red sauce beside the plate that you just served the dish on. Show the viewers how delicious you are finding this food. Dig in.
I hate to say make them jealous they can’t have a bite, but . . . yeahhhhhhh do it. 😉

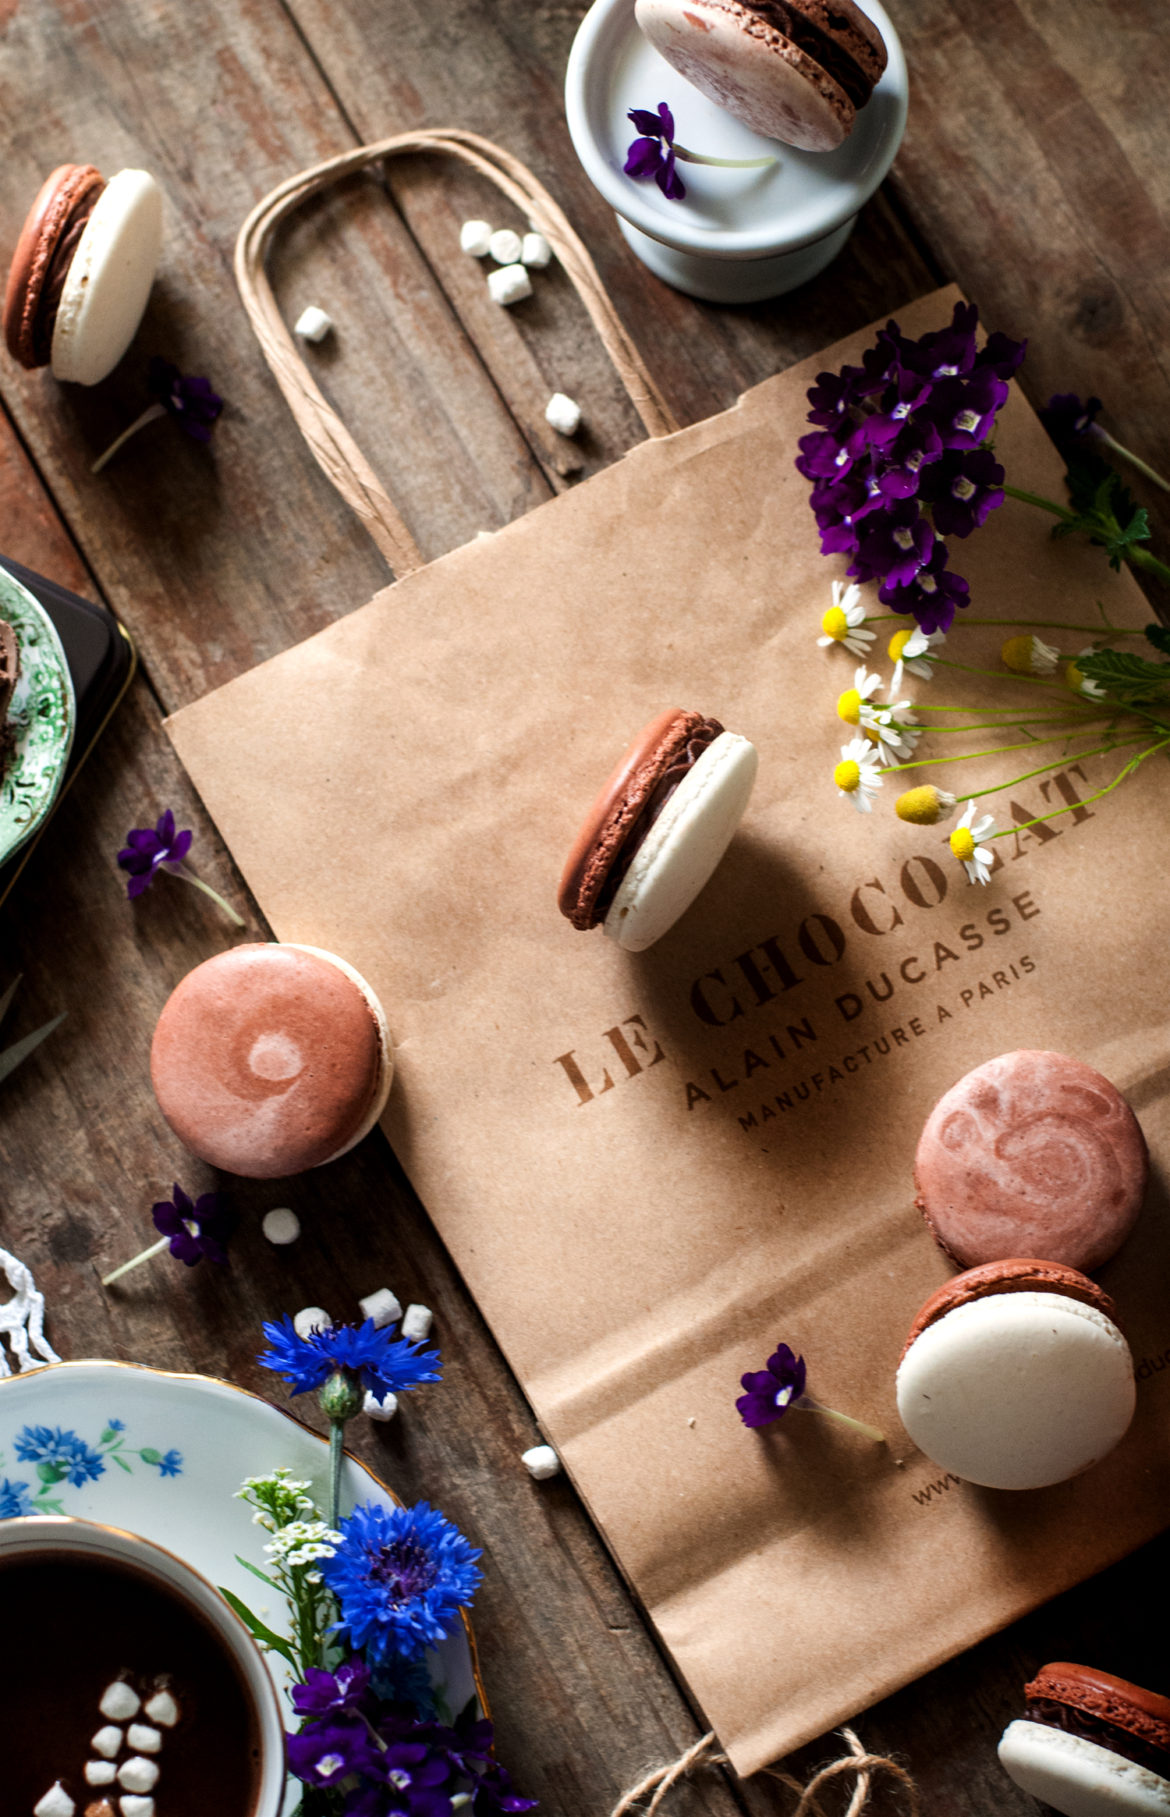
5. Invite Nature to Dinner.
Nothing brightens up a photo more than fresh flowers. I love to garden, and I grow many types of flowers and herbs all year long (both inside and outside) specifically to give my photos a little pop of green life. Many restaurants will serve a fresh component with the meal– maybe a mint leaf or a sprig of parsley. If it’s not too obtrusive, feel free to add a leaf or two of a fresh herb to your photo, even if it’s just on the side of the plate. Fresh ingredients make us think of fresh, delicious food. It brings the photo to life.
No. Your grumpy hubby is NOT your fresh ingredient. I don’t care if he’s being fresh with you. *stern glare*

See? Chamomile from my garden.

Mint from my garden.

Lavender from my garden.

Roses from my garden for these French Macaron bath bombs. Flowers make everything better.

6. Text at dinner.
No, not the phone kind. Except for texting the babysitter because we KNOW YOU CAN’T LIVE WITHOUT DOING IT. I get it. I’m the same way.
Oddly enough, sometimes having a book, or in a restaurant scenario, a fancy menu insert– can actually give the photo some visual interest. Adding a fancy calligraphy brunch menu insert on the side, for example, can make the dish seem purposeful and special, rather than just something random that you ordered. If you tuck the menu partway under the dish it adds a nice flourish without taking over the photo. It also helps your guests realize what is on the plate.
You’re so smart. I love working with you.

7. Humanize it.
What takes a photo from “this is a random food photo” to “this is a meal that a friend of mine loved and enjoyed! How awesome!” is the human element. Photos that show interaction with the subject are always more fun than regular, still photos. Don’t be afraid to grasp the handle of your coffee cup, or place a fork *just* digging in to a decadent piece of cheesecake, while the cherry topping oozes luxuriously over the side. If a photo has interaction and life, it will always be more interesting.
Speaking of life, it’s 8:30. Are you still with us, parents? PARENTS? Oh dear. They forgot to order coffee, didn’t they? Tsk, tsk.

8. Pairing is Caring.
Food photos are always more interesting when they tell a story, instead of merely capturing a single element of that story. If you want to take a photo of spaghetti, try placing a little parsley on the side and drawing up to the sidelines, barely edging into the photo, a basket of hot, steaming garlic bread. Draw your frosty glass of water, with a little pop of lemon yellow on top, to another corner. Make the spaghetti the star, but allow the supporting players to poke their heads in. Allowing other elements to barely show helps the viewer to imagine the entire meal, or the story, of the amazing food adventure you are having.

At the end of the day, if you love the picture, then your love will show through your photo. Any fellow sleep deprived parent warrior will know how hard it was for you to get out there and take this photo for them. And they will love it just for that.
But sometimes knowledge is power, and just having a few tips and tricks up your sleeve can make your photos even better than they already were– something to give you a pleasant memory when you are frantically searching your photos looking for that coupon code you saved, while the cashier taps her fingers at the checkout and you remind the kids they MAY NOT have a pack of Tic Tacs and you don’t need to explain why. You’re Mommy– that’s why.
Because I said so.
Don’t make me pull the ice cream privileges. You do not want to see that side of me, young man.
You did it. And I’m just so proud of you.

Disclosure: This post may contain affiliate links, which just means that we get a few pennies if you purchase through our link. I never recommend products that I don't personally use and love. Thanks!