Food Photography
One of the questions I am asked most often on this blog is “how can I improve my food photography?” This is not an easy question to answer, mainly because there are many facets to a good food photo, rather than just a single thing. So I thought I would share a little bit about my photography journey, as well as some of the mistakes I made (and learned how to fix) along the way. I am not an expert, but I have put in the work to learn as much as I can, and you can too!
What are we waiting for? Let’s do this!

When I first started my journey into blogging and food photography, I knew nothing about it– and that’s ok. You have to start somewhere. Don’t get discouraged if you don’t know it all right away. There is always something to learn and improve, even when you have been practicing for years. I still try to learn something new every day, and I will never “know it all.” A journey of humble learning is a lifetime pursuit.
My first food photos looked something like this. I had garish, yellow kitchen lights, random plates (or sometimes no plates at all), and the food kind of plopped in the center. I used my phone for pictures and I didn’t edit them. I figured that “the recipes are good, so why does it matter if my pictures aren’t professional? The recipe will speak for itself.” The problem with that philosophy is that if a photo looks unappetizing, then chances are no one will ever get to the point of trying it to find out that it’s good.
“What is wrong with this type of photo?” I can hear you asking, defensively. Why do I need a camera when my CELL PHONE TAKES REALLY GOOD PICTURES???? Hmm. I have said this before, and I’ll say it again– your camera, phone, whatever, is just the tool. YOU take the pictures. Before you improve your tools, you should improve your skills. And that’s what we are going to do today.

This is another form of the famous “my cell phone takes really good pictures” syndrome. The next step after “garish kitchen lighting 101” seems to be “garish kitchen lighting 2.0, side view.” Turning items on their sides can add interest and dimension, but I would say that proper lighting is the single most important thing that will take your photos from “How cute– an art project Mommy made at home” to “Wow– that looks like it came out of a magazine!” This photo still has the yucky yellow kitchen lights, so it still looks amateur. You could have a Michelin star restaurant dish under these lights, and it would look bad. Understanding proper lighting is the single most important part of achieving professional level photography, in my opinion.
Good photographers don’t “get lucky” and just randomly score a good photo. They don’t “take” photos– they make photos. I had a friend tell me once– if you get it right once, then it’s an accident. If you get it right twice, then it’s success. It’s true. If you accidentally get a good photo but have no idea how to recreate it, then you didn’t learn anything. Making a photo means that you know how you want it to look in your head, long before you ever snap the actual shot. You can close your eyes and see how you want your photo to look, and you set it up that way in advance. You create the light you want. You create the shadows the way you want them. You create your own little world, in that small rectangle, with every point controlled the way you would like it to be, and that’s what makes a good photo. Turning a macaron on its side doesn’t do much when the lighting is horrible. PS– yellow kitchen lights are never a good idea.

Well, if I can’t use my kitchen lights, then what kind of lights should I use? Ohhh I’m so glad you asked.
The best type of lighting for food photography is a pure, indirect, white light. Um . . . what?
Basically, you want your subject to be well lit, but without any direct sunbeams on it. Someone told me once that “the best light for food is a dirty window on a sunny day.” I’ve also heard proper food lighting described as being “In the shade on a sunny day.” You want bright, but indirect light. If you are working from your home, a bright window with a sheer curtain diffusing it (softening it, so there are no direct sunbeams) will work.

This is a place I like to shoot food photos in my house. The windows are big and bright, but they aren’t getting direct sun. I have some sheer/lace curtains that soften and diffuse the light, and I use black and white foamboards to control the light even more. Keep in mind that the lights in your house will change with the year– winter photos and summer photos will be different, and you may have to change your location in the winter to a sunnier window, since the light tends to be shorter and less intense than the light you will get through the same window during the summer months.
Speaking of winter months, it can be tricky to use sunlight during this time for your photos. The sun comes out late, gives a sickly, watery gray light, and then slinks back to bed by 4:30. It’s very hard to shoot photos when you have to make dinner at 2 PM to get some light for your pictures. You can purchase studio lights, or you can make your own (I show you how I made one, here, for 20 bucks). In the winter, studio lighting is pretty much a must, for me. You should know how to use both natural and (natural looking) studio lights to achieve the effect that you want, regardless of the temperament of the weather.
But won’t fake lights look, well, fake? Well, remember that most magazines use studio lighting because they are doing things like shooting their Christmas issue in July. They are shooting their summer recipes at Christmas and recreating that summer burnished glow in December. So yes, you absolutely can get lifelike lighting from studio lights. I shot this photo of strawberry shortcake in the dead of winter, when it was completely dark at 6 PM, using the photography light setup I described in the link, above.

I think sometimes people make the mistake of trying to get a perfect atmosphere for their photos, so they end up in crazy places trying to block out all semblance of kids, toys, dishes, etc. They try to get perfect lighting. They make dinner at 1 PM trying to catch that elusive whiff of winter sunlight. They despair when something doesn’t get captured that day, because the sunlight is gone.
Pshhh. You control the light, rather than the other way around. If the sunlight is there, then yes, use it. But get comfortable with studio lighting, as it is SO much more convenient, especially in the winter or evening. You can take your time with photos, knowing that even if you are shooting “breakfast” at 10 PM after the kids are asleep and you can finally take a breath of time to yourself, you can get it to look like morning light. Don’t be a slave to the 2 minutes of winter daylight– take your time and know how to set up the lights to look however you want, whenever you want. All that matters is that tiny little square that is in the photo, and it’s fun to create that tiny little universe to look any way you please.

Case in point.
Wait. Is that . . . the GARAGE????
Why yes. Yes it is.

And this is the photo I got from it.

Also this one.
But, but . . . it doesn’t look like a food studio! It doesn’t look like it’s daytime! How are you DOING THIS????
It’s easy– create that homemade studio light for 20 bucks (or less if you have some of this stuff already lying around). People fear darkness. My photos will be DARK. I can’t shoot in the DARKKKKKKK. Actually, a dark place is perfect for food photos, because you control everything.
I CONTROL EVERYTHING!!!!!!!!!!! *lightning and thunder crash* haha. Well, not everything, but you do control all the light factors in a dark room, which honestly makes it easier because it cuts out any light guesswork. If you are trying to take a photo during, say, a cloudy day, you might find that the sun comes out randomly in the middle of shooting, after you have your camera settings just right. Then your photo will be blown out with a sunbeam highlight that wasn’t there before.

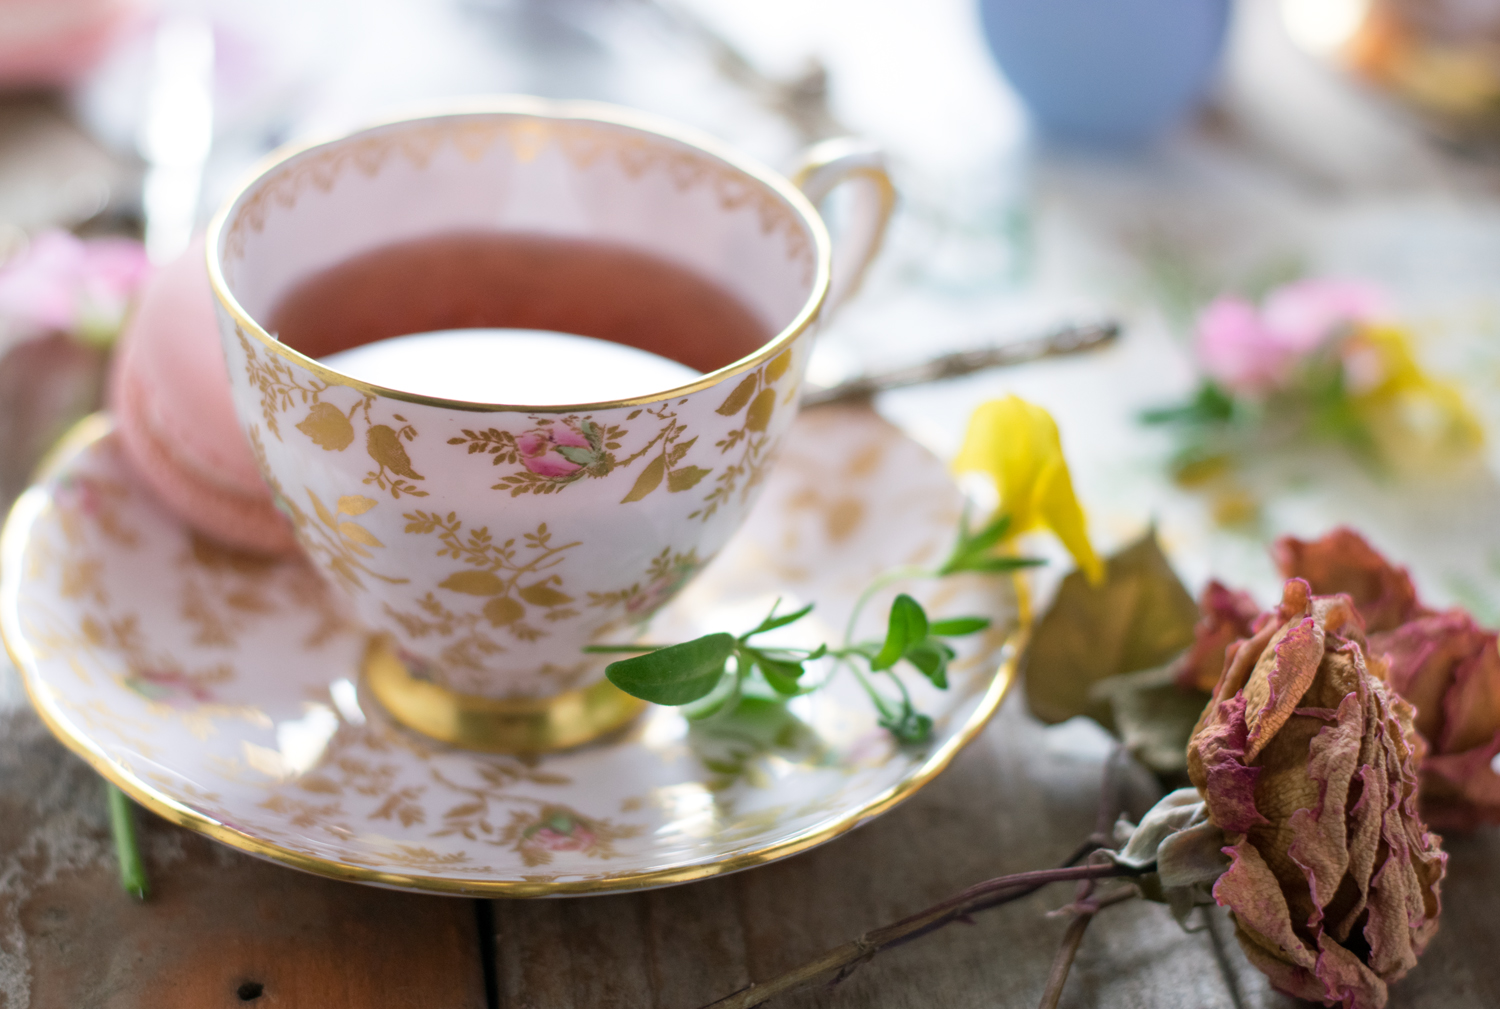
That’s what happened here. It was a cloudy fall day, and I had my lights set up to receive cloudy light. I had my ISO set really high, my shutter slow, and my aperture wide open. I was getting ready to take my photo, and suddenly the clouds cleared, and a HUGE sunbeam went across my photo. The light proportions blew out the highlights of my picture. In the end I chose to keep this specific shot because it was interesting looking. But honestly, I don’t normally care for photos with blown out highlights from the light sources being so wildly different. Sunbeams are pretty in real life, but they tend to mess up photos if they aren’t diffused and softened.

If you want the “sunbeam look” in your photo, try to naturally diffuse them somehow, so the edges aren’t as harsh as in my teacup photo up there. Use something to kind of break up the light– a soft sheer curtain does it, as does some greenery or flowers. You can use the sunlight without getting that “I NEED SUNGLASSES! MY EYES ARE MELTING!” zone. Walk softly and carry a big lightstick. Or something like that 😉

Another mistake people make is using the weird “special effects” on their phone’s photo editing section without understanding what the tool does, exactly. Your phone has all kinds of “cool” effects, but just because it’s there doesn’t mean you need it. The idea of really sharp food photos is to make them as deliciously realistic as possible. Using an artsy “blur” around the edges “just ’cause,” is weird, to me. This effect is trying to simulate a blurred depth of focus that a real camera would give you with a wide open “eye”, or extremely shallow depth of field (f stop about 1.8 or so). But just having “blur” in random places doesn’t make a photo look dewy, dreamy, or professional.

A real camera will blur portions of the photo, but it won’t have a weird “halo” of blur randomly surrounding the image. A proper “blurred” photo will still have a point of focus– a clear spot of sharpness where you can look. You could draw all over your face with “professional” makeup, but it won’t make you beautiful. It’s the same thing with a blurred background– it’s a tool, and to make it look good you must know how to use it. Just smearing blur all over random spots in the photo (which is what iphone does, trying to “guess” randomly what a professional camera would do) ends up looking fake and contrived. As a general rule, if you must use a phone for your photos, then it’s best to stay away from the special effects. They are the photographic version of clip art.

Another interesting trip up I see often in food photography (a mistake that I have also made, myself, many times) is “dark” photos. There has been a bit of a trend, lately, to have super dark, moody food photos. This is almost more of a style preference than it is a “right or wrong” technique, but I wanted to mention it. I think that most people trying to do dark photography actually make the mistake of making their photos completely dark, with no portion highlighted. Now I want to tell you something, and you can take this to the bank:
Dark photos are not the same thing as deeply shadowed photos.
Basically, if you like that somber, almost mystic and shadowy style of photography– moody, deep shadows and brooding, “Rochester-esque” Victorian creepiness, then realize that SOME PART of your photo still has to be lit up in all those extra shadows. Let me show you what I mean.

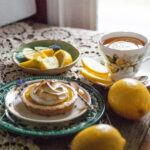
This is a “dark” photo.

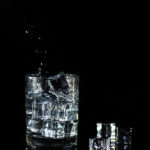
This is a deeply shadowed photo.
Photography has been called “forced perspective.” This means that a photo directs the viewer where to look. Your eyes naturally go to the lightest parts of the photo first, so a photo that is completely dark leaves the viewer saying, “Um, I can’t see anything.” I have been to food blogs where the photos are so dark in the creator’s attempt to be “artsy,” that I can’t even tell what the food is on the plate.
That’s dark, rather than deeply shadowed, when nothing is highlighted, lit up, or focused upon in a photo. At least a small portion of the photo must be highlighted to be the focal point of the piece.

This is a deeply shadowed photo, but it’s clear that your eye should be looking at the magical cascade of sugar. All photos NEED light. It’s your job, as the photographer, to decide where you want the light to be, and where you want the viewer to look. Photos that are completely dark leave your viewer, well, in the dark.
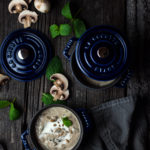
I’m going to reuse this photo for a second. Because one of the most controversial and underused means of improving one’s food photography is also one of the most hotly debated.
Ye olde photoshop.
I have had people tell me proudly that they sport only “unedited” photos, because “I want people to see what the food REALLY looks like!” Well, that’s just the thing– photos don’t always capture what the food looks like without a little help.
The camera functions like an electronic eye, but it’s not nearly as adept as a real, human eyeball at picking out color contrasts, evening lighting differences, or picking out details. Photoshop can help you to make a photo look the way it did to your eye before the camera failed to capture it.

This is the dark steak, above, after I got through fixing the image with photoshop. This is what the steak truly looked like to my eyes, but the camera couldn’t get it just right because it was evening and the light was poor. I could have set up a tripod, studio lights, etc, but truth be told, the steak smelled so mouthwatering and was sizzling in that pan, smelling like herbs and butter and GORGEOUSNESS that I didn’t feel like doing anything but snapping a 3 second photo and getting down to the business of devouring it.
So I snapped a couple quick photos that I knew would be too dark, and then I had to fix them later to look the way the steak really did look to my eyes, in that moment. I don’t consider that “cheating.” I consider that putting the makeup on the photo, if you will. When a woman wears makeup she isn’t “inventing” a new face. She is enhancing what is already there– making it look its best. You don’t wear makeup constantly, but when you want to look your best, professional self, you might. Photos are the same. You can definitely show what something looks like with a quick cell phone picture (and I do this often, with step by step photos in recipes). But for the finished “gallery” shot, I think the photo needs to have its hair and makeup done. You would be hard pressed to find a professional photographer who doesn’t use photoshop for touch ups in his finished pieces.
Photoshop is difficult to learn when you first begin, but the more you use it, the more intuitive it becomes, and touch ups become second nature. Photoshop, just like your phone, your camera, your lights, and your backgrounds, is a tool. YOU are the photographer. You use the tools to create, but it is you, and not the tools, making the final piece. I don’t consider photoshop “cheating,” but rather utilizing yet another tool to polish your photos the way you want them to look in the finished product.

Photography, like anything else, is a hobby that is fun to learn more about. You can try out new things and new styles to see what matches your style best. I try to learn something new every day, and I realize that I, by far, do not “know it all.”
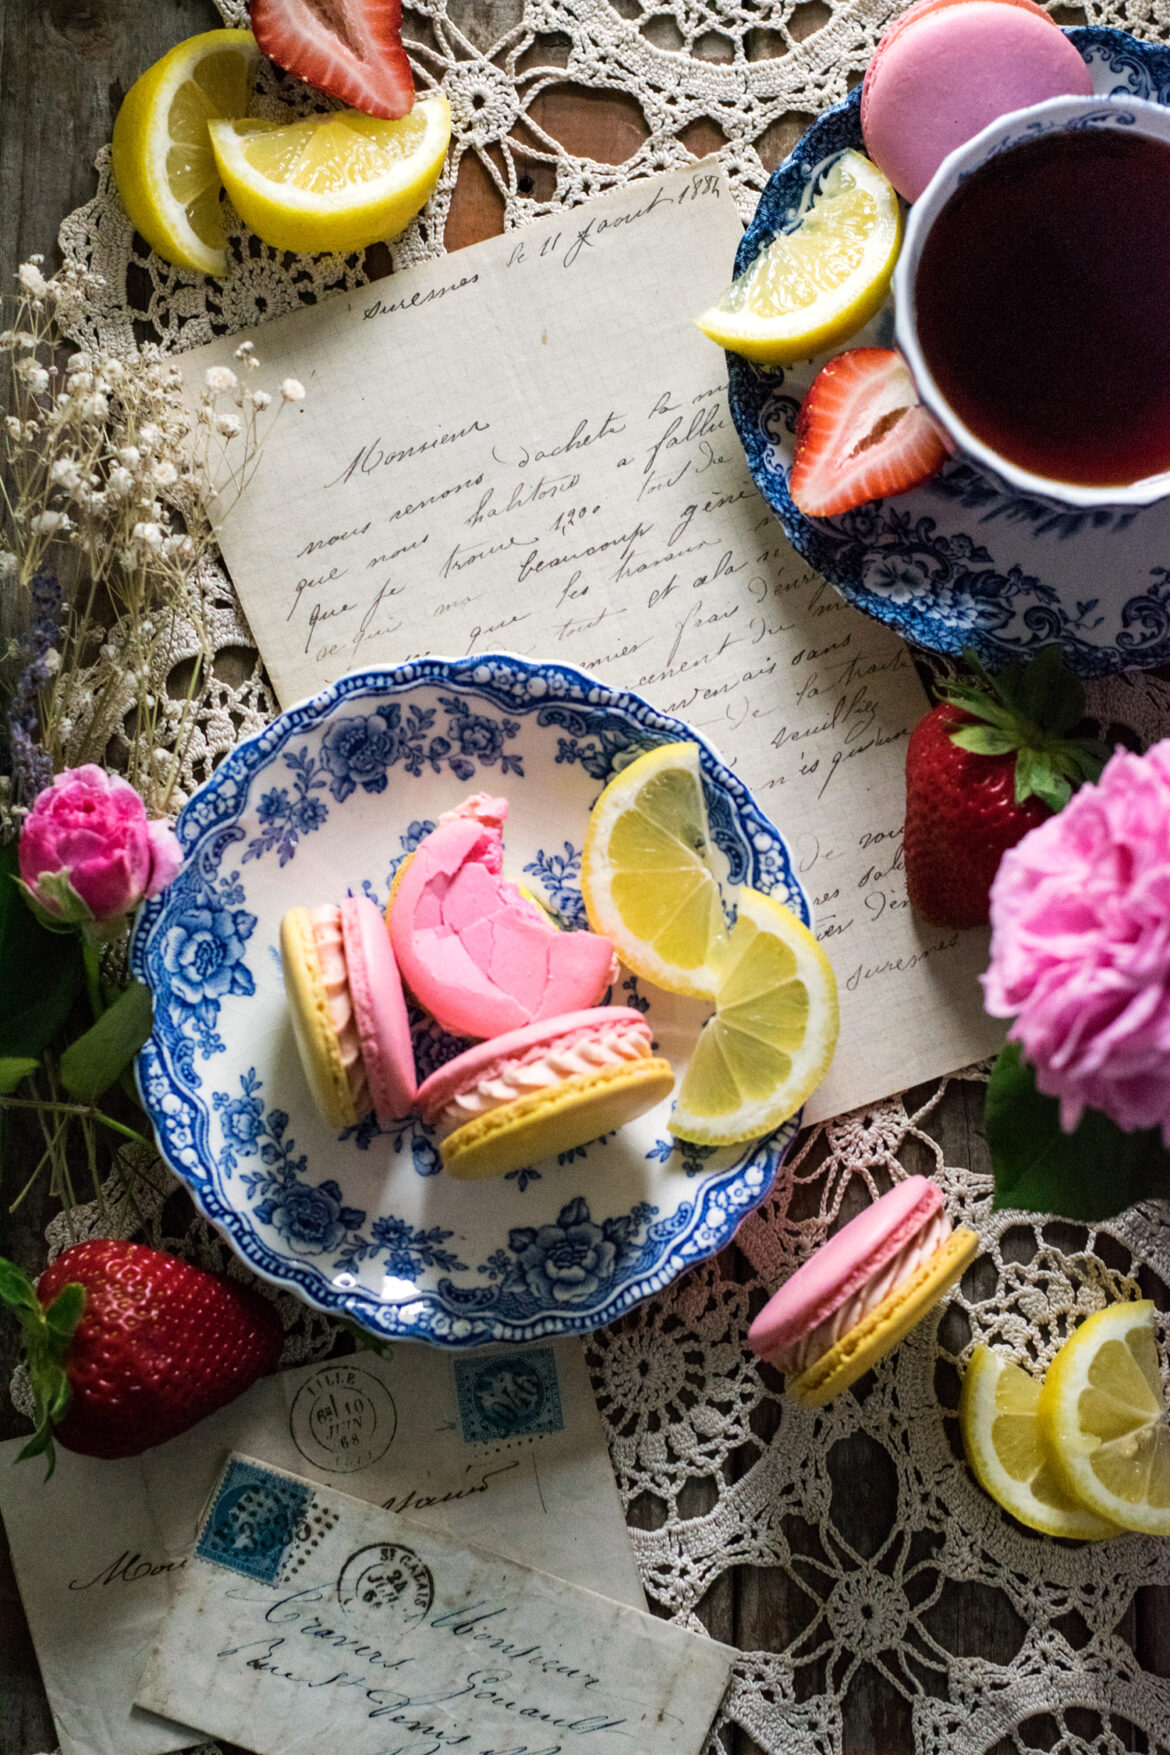
But over the years, practicing, learning, reading, I have been able to go from this, above,

To something more like this. I have learned a lot, and I have practiced even more. Over the years my style has evolved into trying new things, to what I consider “me.” When people ask me how to improve, I generally say, “Practice, practice, practice.” You can read and watch all the videos you want, but you won’t get better until you practice and experiment with the tools and equipment that you have, with your own hands.
And that’s the best thing about a hobby– there is always something new to learn and discover.
Happy snapping. 🙂
You did it. And I’m just so proud of you.

Disclosure: This post may contain affiliate links, which just means that we get a few pennies if you purchase through our link. I never recommend products that I don't personally use and love. Thanks!