History says that Thomas Edison failed over 1,000 times at making the light bulb. That’s nuts. Think about that . . . if you tried every single day, it would take you almost 3 years to get it right. I can see it now . . . Thomas, in the spring, trying to make a light bulb. Thomas, in the winter, trying to give himself a Christmas present. Thomas . . . wondering why in the world he is still working on this stupid invention. What was really wrong with candles, anyway?
Thankfully, ‘ole Thomas didn’t give up. Now, each time you get your electric bill, you can toast Edison and his “I will never give up!” spirit.
I once read that “You can’t make decent biscuits before menopause.” Bwahaha. And I have ruined more biscuits than I can possibly count. But, somewhere along the way, the hours and hours of practice paid off . . . and I figured out how the dough should look, feel, and BE. It’s more than the recipe. It’s definitely the technique that makes a pillowy soft, to-die-for fluffy Buttermilk Biscuit. So don’t give up. I’m going to help you learn how to do it.
What are we waiting for? Let’s do this!
Perfect Buttermilk Biscuits
Classic White Lily Flour recipe; techniques and adaptations are my own
Ingredients:
2 cups White Lily all purpose flour
1/4 cup chilled butter flavored shortening (I use Crisco)
3/4 cup buttermilk, more or less (will explain this in a minute)
Extra melted butter for brushing tops of biscuits, optional
Directions:
Use a pastry cutter to cut chilled shortening into flour, making pieces about the size of small peas. Gently stir in buttermilk, just until a shaggy dough is formed. Roll out the dough, making a “business fold” 3 times. Bake biscuits at 425 degrees for 10-15 minutes, or until tops are golden brown. Brush tops of finished biscuits with extra melted butter, if desired, before serving.
Now, in pictures! 🙂
Making biscuits is a bit like having a successful marriage. It seems simple enough, going in. But you don’t realize just how difficult it is until you’re in the thick of it. It can be really messy, and you make a lot of mistakes. But with practice, you get better at it. And biscuits are the exact same way.
Out of all the ingredients I’ve tried (and believe me . . . I’ve tried them all), there is really just one thing that I consider a staple ingredient of the perfect biscuit, and that is the flour. Even after I managed to learn how to get a decent biscuit, I just never got the best results with any other flour.
White Lily
is definitely the way to go, and any Southern cook will tell you that. Generally, you can buy this flour only in the Deep-ish South, but you can order it online, also, if you really want to try it. Other flours work also, but this is the best. Don’t cry if you can’t get it. Try what you have, but keep an eye out for this one on your next trip South. Not planning a trip South? There’s your first problem, right there! 😉

Now let’s talk fat. “Hey– is that a fat joke?” Naw. I mean it. What kind of fat you use in your biscuit will affect how it looks and tastes. When I first started this biscuit failure marathon, I saw so many recipes with ALL BUTTER in capitals, or maybe “nothing but pure lard will deliver results!” I saw some recipes with a mixture of shortening and butter, or butter and lard. I felt like rubbing my head and asking for a Tylenol. Headache alley, here I come.
The fact is, biscuit ingredients do have a certain science to them. It’s not magic. If you get to know your ingredients, you can come up with a “plan” to make the biscuit (or any baked good, really), exactly the way you want it to be. Here’s a quick breakdown:
1. Pure butter will yield a delicious, tasty, yet heavy biscuit
2. Shortening will yield a high-rising, gorgeously light, yet tasteless biscuit
3. Lard will yield a robust, almost meaty tasty and decent rise
Mixing these ingredients will also mix their effects. And after years of experimentation, I find that butter flavored shortening (like Butter Flavored Crisco
here
) is the best of all worlds. It has the light-as-air rise of shortening, but with the meltingly delicious butter flavor we all crave. But use your judgment. And by all means . . . practice them all! You may discover you have found a new favorite! 🙂 Make sure that your shortening is COLD. Because cold fat=oven puff=light and fluffy biscuits. You’re welcome.

Now, let’s talk tools. I use a pastry blender to cut my butter and shortening into the flour. (
But what if I don’t have a pastry blender? What if I’m a purist who doesn’t like to spend extra money on kitchen tools? What if you got my hopes up that I could make light and fluffy buttermilk biscuits for nothing! WAHHHHHH!!!!). Naw . . . don’t worry. Many people make great biscuits using 2 knives, or even just a fork, to shred the chilled shortening into the flour. But I, personally, was not able to make decent biscuits until
this pastry blender
came into my life. I like this blender because, unlike traditional pastry cutters, it has a flat (rather than rounded) bottom. I find this much easier to use, as it creates a flat surface for cutting the butter.
I use it for everything from Strawberry Shortcake to perfect, airy scones. And I will never go back to the odious “two knives” method. Yeeeeck. Spend a few bucks on yourself to make your life easier. You deserve it.
You want your pieces of chilled shortening to be roughly the size of peas. Like I said, trying to cut all the pieces this small is a pain when you’re using 2 knives. But the pastry blender does this butting process in about 5 pushes. Nice.
For the best biscuits, you really can’t beat buttermilk. If you just have regular milk, you can add a few tsp. of white vinegar to it to curdle it, similar to buttermilk. HOWEVER . . . in my humble opinion, real buttermilk really does make a difference and is totally the way to go.
*Interesting fact. Many times, when I’m making biscuits, I mix and cut them, ahead of time, cover with plastic wrap, and refrigerate until I’m ready to bake them. That saves me time during the “let’s get this meal on the table! Everyone is starving!” rush. I learned the hard way that biscuits with buttermilk can’t wait. The acid in the buttermilk kills the leavener in the baking powder if you let them sit too long. The moral of the story: biscuits made with plain milk can be made up to a day ahead and refrigerated. Biscuits made with buttermilk have to be baked right after mixing/cutting. I may have just saved your Thanksgiving biscuits. You are oh so welcome! 😀

I know the recipe calls for 3/4 cup buttermilk, but honestly, I never measure it. I just know how the dough looks, and I am convinced that this “knowing the dough” is truly the reason that only Grandmas can make decent biscuits. Through years of trial and error they have learned what biscuit dough is supposed to “feel” like. The best way I can describe it is “a shaggy dough.” To me, it’s kind of like a big glob of brownie batter. It’s goopy but not wet. If you plop it onto the counter it will “plop” but not settle or run. And like I said, the feel of this dough really has to be experienced. And don’t give up– you’ll get it! 🙂
Stir in the buttermilk with your butter knife. Kind of “slice” the dough again and again– I do vertical “slices” and then horizontal slices. This technique helps to avoid overworking the dough and giving you tough biscuits. Try not to touch the dough with your hands, because the warmth from your hands will warm the fats (cold fat equals high rising biscuits). When the grandmas told you “not to handle the dough,” they meant it. Less handling keeps things light and fluffy and high rising.
Here is another close up of the “goop.” Not wet, but definitely goopy. You may quote me. 😉 Notice that there is still some flour visible. That’s OK. Just get it mostly mixed. A little extra flour is OK.
Dump your goop out onto a floured surface. It won’t look like dough. It will look like winter mud– not liquid, but . . . yeah. You know. Goopy. Some recipes tell you to knead the dough. Oh my goodness. Don’t do it!!! This will destroy all that soft and tender perfection you have worked so hard to create. I’m going to show you something that will kind of “knead” the dough, without actually kneading it, and will give you all those nice, flaky layers.
Cover your goop with a light dusting of flour. You don’t want too much– just enough to keep it from sticking.
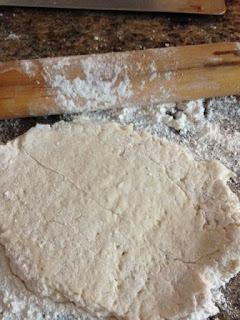
Gently roll out the goop with flour on top. Amazingly, the flour will soak in, and it will be a little less goopy.
Now . . . wait for it . . . here is where the magic happens. You gently and quickly fold that flat as if you were folding a business letter. Yes. A business letter made out of bread. Oh, why can’t all memos be made out of BREAD? You could sign in jelly. (Drifts off into mental delicious town . . .) Highlight in butter? Haha. Sorry. OK. Back to business.
Start by folding one side over to the center.
Fold the other end up and over the first flap– just like you’re folding that business letter out of dough. Sprinkle a tad more flour. You may have to scoot it over an inch or two, to make sure the bottom gets a tad more flour, also.
Roll that out, flat, and fold your business letter, again, the opposite way. Do this whole shebang one more time. Basically, you are rolling and folding 3 “business letter” folds. This will create all those amazingly delicious and fluffy layers. And presto . . . after the 3 “business folds,” your dough will no longer be goopy. It will be oh-so-soft and delicious. And the layers will go to bat for you when these bake up into high-rising lovelies. You’re so good at this. Are you sure you haven’t done this before? 😀
When you have your third business letter “folded,” gently roll the dough to be about 1.5″ thick. Select your biscuit cutter. This is my favorite one: a vintage gem that was an unexpected find at a flea market. I can just imagine the soft, grandmotherly hands that must have used this thing hundreds of times to make delectable biscuits. I hope it won’t be too embarrassed to be owned by myself, after such an illustrious history.
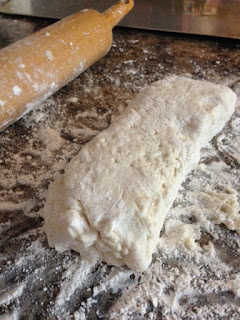
Here is my finished log (AKA, flattened third “business letter”), ready to cut. Why do you make it a log? Well, the thing about biscuits is that the first “cut” is always the lightest and most tender. The more you re-roll your dough, the tougher and uglier they get. So you want to get as many biscuits as you can out of that first dough. I make mine long and thin because it’s exactly the width of my biscuit cutter, and I don’t waste any dough on tough biscuits. I’ll show you.
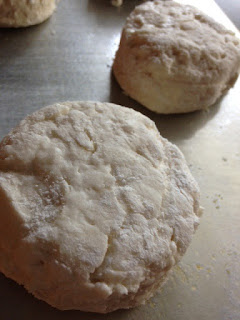
See? This long, thin log exactly fits my cutter. When you’re cutting, use something with a sharp surface (glass cups don’t work too well, because they have blunt edges). Aluminum glasses, cookie cutters, and even a pizza cutter will work. The rule is, DON’T TWIST. Just a quick cut down, and back up.
Place your biscuits on a greased cookie sheet (or in a cast iron skillet, if you have one). If you put the biscuits close enough that their sides touch, they will rise higher and have soft sides. If you want defined crunchy sides, then bake them with a little space in between. You can also brush the tops with melted butter right before they go in the oven, if you want a golden, somewhat salty top.
Bake at 425 degrees for roughly 8-12 minutes, depending on the heat of your oven. Biscuits thrive on hot, fast heat, so make sure that your oven is the correct temperature before you stick them in. I bought a cheapie oven thermometer at walmart for about 5 bucks, because it’s amazing how often ovens are off temperature, even when they beep that the temp. is correct. Sometimes my oven is off by 50 degrees!!! Sheesh. If you’re doing everything right and your biscuits are still coming out bricks, then it might be worth a check on the oven temp. Lower temperature will make bricks out of biscuits every time, no matter how heavenly you’ve made them.
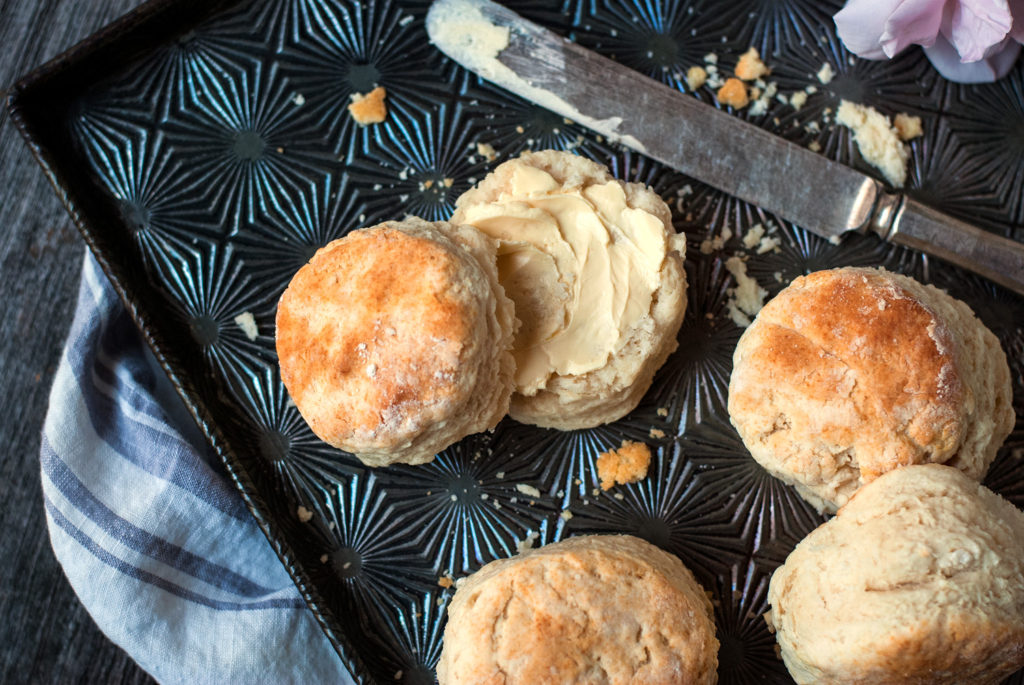
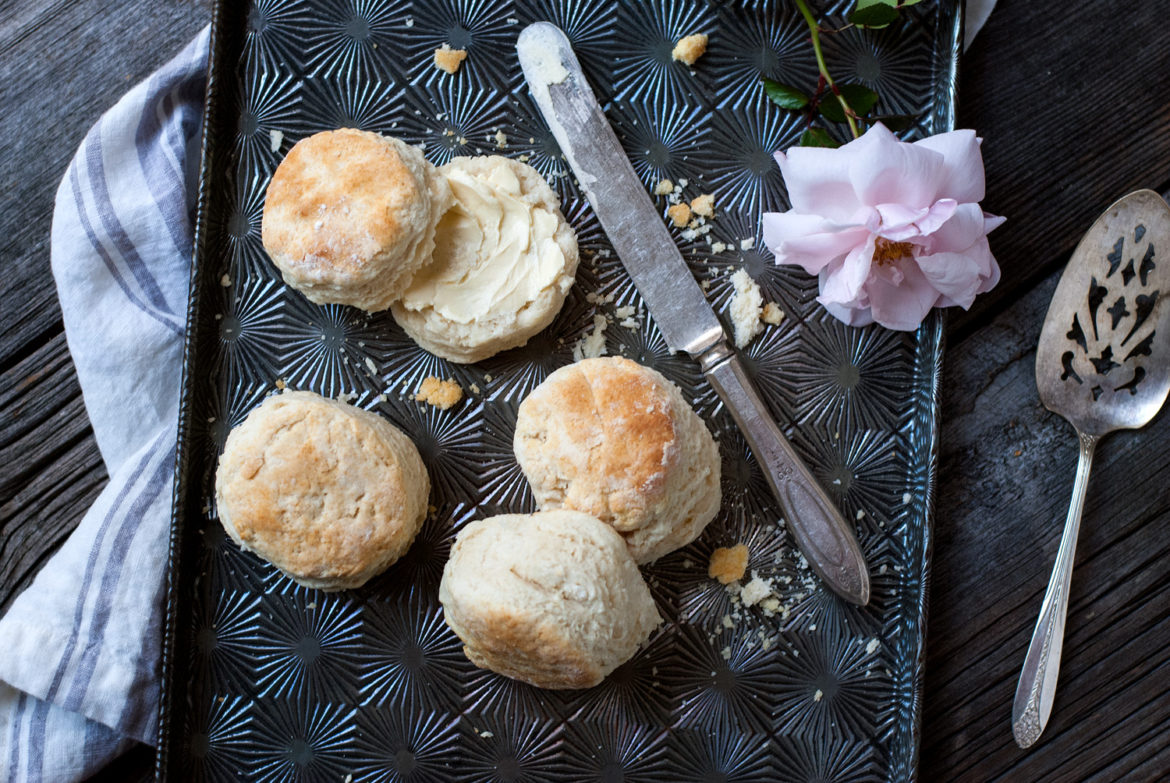
When your biscuits come out of the oven make sure they are golden brown on top, and then brush with melted butte. See how beautiful they are? Look at those layers! We did that with our business fold! Yay for us! If you put the biscuits together with sides touching, they will be even higher and have soft sides.
Mmmmm. You just can’t beat a delicious, homemade biscuit. These were soft and amazingly delicious, inside.
Whip up a batch of these for a leisurely Saturday breakfast. Drench them in gravy or butter and honey. Nothing says comfort like layers of soft, flufffy biscuits.
And if you are lucky enough to have any left, they reheat just as well for later. Or make little ham biscuits and take a nice picnic with someone you love. Spend the day eating delicious food and swapping stories. These are the times from which memories are made.
You did it. And I’m just so proud of you.

Disclosure: This post may contain affiliate links, which just means that we get a few pennies if you purchase through our link. I never recommend products that I don't personally use and love. Thanks!













Pingback: White Sandwich Bread – Cookies for England
Pingback: Classic Strawberry Shortcake – Cookies for England
Pingback: Irish Honey Breakfast Bread – Cookies for England
Pingback: “Green Chicken” (Honey Chicken Curry) – Cookies for England
Pingback: Easy BBQ Chicken – Cookies for England
Pingback: Creamy Potato Soup – Cookies for England
Pingback: Cranberry Almond Scones – Cookies for England