Well, here we are in cold, silent January. Don’t get me wrong– there are beautiful things about winter: the crisp crunch of snow underfoot, the chilly kiss of steam curling from your coffee cup, or the silent, sterile beauty of a cold winter sunrise.
But, I don’t know . . . in January I start to itch for springtime. Christmas is over, so my reason for looking forward to winter is, essentially, past. I start to get sick of cold weather, and scraping the windows, and stashing a huge winter coat in the car every time I go somewhere. Most of all, though, I miss the sunshine.
In January I start to get homesick for clothes drying on the line, drifting lazily in a sun-washed summer breeze. I miss rocking chairs and porch swings and fireflies. I miss 9:00 sunsets and bold, blazing sunrises. I miss flowers and pools and big, thirsty towels. And lemonade. I miss lemonade. Lemons embody everything that is bright and crisp and beautiful. They are clean and fresh and happy. So let’s bring some sunshine to this dreary January day and ask Lovely Lemon for a dance.
What are we waiting for? Let’s do this!
Lovely Lemon Macarons
Ingredients:
Filling Ingredients:
Directions:
As complicated as this tutorial is, I could go into a lot more detail, as I have done on other macaron posts, like my Strawberries and Cream Macaron tutorial here. If you are a macaron expert, go right to the head of the line. You don’t need that basic tutorial. But if you’re trying macarons for the first time, or if you are having trouble making these finicky little guys, I’d strongly recommend reading that article. I explain a lot more fancy macaron moves, there, than I can put into every macaron recipe. The help is there if you need it. Either way– this is going to be so much fun!
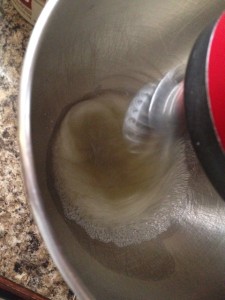
To begin with, let’s get our egg whites going. Don’t tell the Macaron Police, but I use bought, good ‘ole cartoned egg whites. Yep. I know that goes against every rule in the macaron book, but I’ve tried everything– aged egg whites, fresh egg whites, a mixture of boxed and fresh, a mixture of bought and aged . . . and I get the most consistent results with the boxed kind. Bonus . . . I don’t have tons of yolks to use up– not that crème brulee or gorgeous lime mousse cups are necessarily a bad thing . . . 😉

While your egg whites are whirling and twirling, pulse your powdered sugar and almond flour, together, in a food processor until it’s nice and combined. If you want to skip this step . . . don’t. Macarons can smell a short-cut a mile away. I love speeding things up and taking kitchen shortcuts, as a rule, too . . . but on these little babies . . . just don’t.
Just say no.
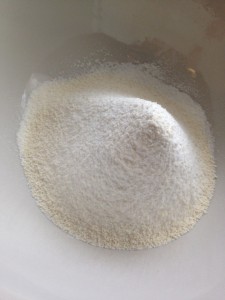
Once your ingredients have been pulsed in the food processor, sift your ingredients. I can see your eyes rolling, from here. Here you go– I just rolled them back to you. You’re gonna’ need ’em.
This is another one of those “Don’t take shortcuts, Miss” (or, mademoiselle, I guess, since this is a French recipe). Sift those ingredients. Don’t own a sifter? Either get one or give up making glorious macarons. Sift your ingredients until they are nice and light, and then throw away the little bit of grit that won’t go through the sifter. This is not the time to meet “a man with true grit.” Grit=bad macarons. And we didn’t go through all this work to ruin our little beauties at the end of the race. We don’t want the grit cutting up our perfect meringue and tearing up its gorgeous, delicate layers.
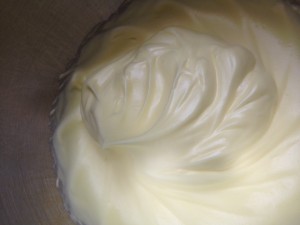
By this time, your meringue should be nice and light and gorgeous. Seriously. Doesn’t that just look like the stuff from which heavenly desserts are made? When your meringue holds soft peaks (the peak bends over when you remove the whisk), go ahead and add a little gel coloring, if you want. Then whisk the egg whites to stiff peaks (tradition says you should be able to hold proper macaron meringue over your head, upside down, when it’s ready. I guess that’s one sure-fire way to make sure you don’t make the same mistake twice 😉
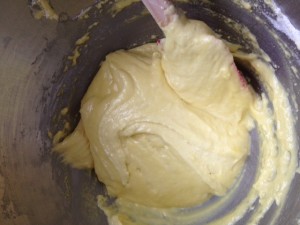
Now, gird up your loins and take a deep breath . . . because this next bit is the absolute hardest part of making macarons. I don’t even know how many macarons I have ruined by messing this part up. You want to gently incorporate the sifted ingredients into the egg whites by making “J” folds– bringing the spatula down through the center and sweeping it along the bowl to the left, making a letter “J.” Continue doing this and folding the meringue until your batter becomes thick and shiny, but still thick. I used to stir and stir and stir until the batter was shiny . . . but extremely runny and liquidy. If you get there, imagine the GPS saying, “That was your right turn BACK THERE!!! Make a U-turn like, NOW!!! Um . . . if possible.” (At least that’s the way the annoying GPS lady sounds to me). If you get to liquidy and watery, just throw the batter away. It’s too mixed, and your macs will be little flat pancakes that would be better suited to a life of service as communion wafers than macarons.
If you batter is extremely lumpy and breaks when you fold the meringue, it’s not quite there. There is still hope. You want to fold your meringue until it “ribbons off your spatula.” What the heck does that mean? I wondered this for ages, as I read book after book and article after article describing proper macaronage (mixing the macaron batter) in this way. What the heck does “ribboning off the spatula” mean? Basically, when you sweep your spatula along the outer circle and lift it up, the batter will extend about 4-5 inches off the “ground,” still hanging to your spatula. It will kind of stream down from the spatula in a smooth, almost slow volcanic lava looking flow. It will not clump and fall, and it will not stream like water. It will look like pancake batter dripping seductively from your spatula, without breaking, from 4 inches above the pool. It will be smooth and shiny, but not thin, at all, and it will still have a few specks of bumps from the almond flour in it. This process takes so much practice– please don’t give up. Even if the shells don’t turn out perfectly, they will still taste amazing, so never fear– keep practicing, and get really good at finding ways to use damaged macarons (macaron trifle, anyone?).
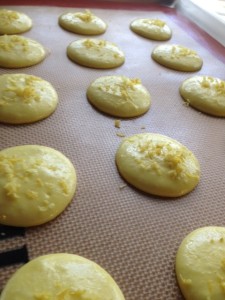
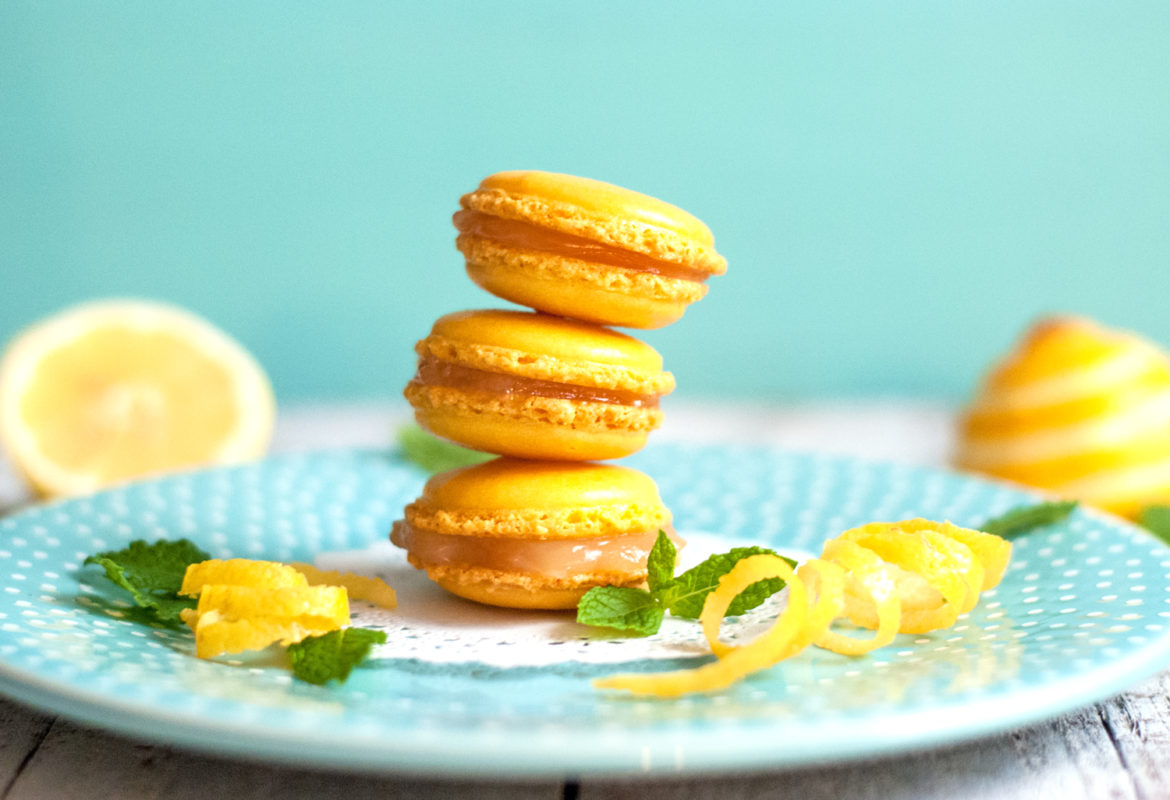
When you have achieved that glitchy and elusive stage known as “proper macaronage,” go ahead and fill your piping bag and pipe your macarons. I use a little hand-drawn template that I made, using a piece of parchment paper, a marker, and the lid from my son’s bottle of Juicy Juice 🙂 I can see the marks through the silpat, to pipe my circles. I can then slide the template out from underneath the silpat, move it under the next tray, and pipe anew. 🙂 For these macs, I topped the shells with a few shreds of lemon zest. It was pretty, light, and a great pack of flavor.
Allow the shells to rest for 20 minutes before you bake them. Rest? Why do these shells get to rest? I’m a Mom, and I never rest!
Ah, the mysteries of life.
I don’t know why, but if they don’t rest, the shells won’t work. What can I say. Perhaps the Americans should be more like the French. No rest? Then no work. Then, maybe we could have better pastries to go with our morning coffee.
But I digress.
After the shells have rested for 20 minutes, bake them, 1 sheet at a time (yes. This really is necessary. Another “Do I smell a shortcut? Then I won’t play!!!” thing by the macarons), at 285 degrees. Not 275. Not 295.
285.
For 20 minutes. Exactly 20 minutes. Don’t open the oven to peek. Don’t mess with the temperature. Do not pass Go. Do not collect $200. When the shells are done, they should feel “firm on their feet.” Since ovens vary, yours may take another 1-2 minutes to get that firm feeling, rather than deflating the shells when you touch them. At the 20 minute mark, it is safe to open the oven and gently check them. When the shells are firm on their feet, take them from the oven, but slide the silpat off the baking sheet onto a cooling rack so their delicate French behinds don’t get too toasty. Yes. These things are more sensitive than an albino without sunscreen on a Florida beach.
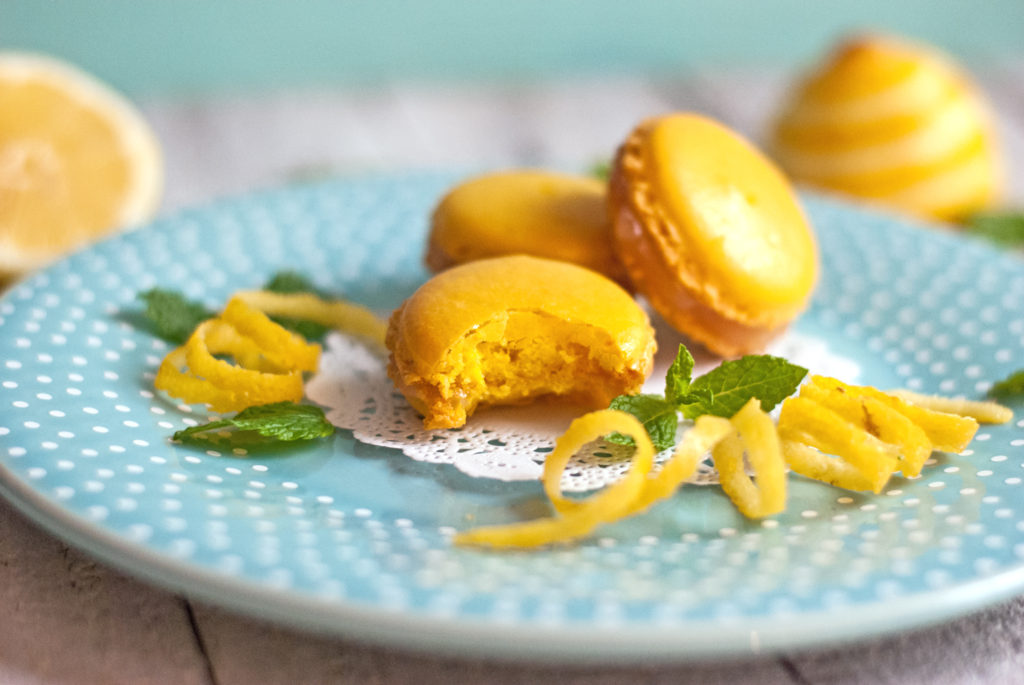
When the shells have completely cooled, gently peel the silpat out from under them (rather than peeling them off the silpat), and fill them with glorious, golden lemon curd. It is January, and you just made sunshine, in your very own kitchen. Look at you. Cut yourself a few of those gorgeous lemon curls (called “twists”– tool to make them here) and adorn your plate with golden riches.
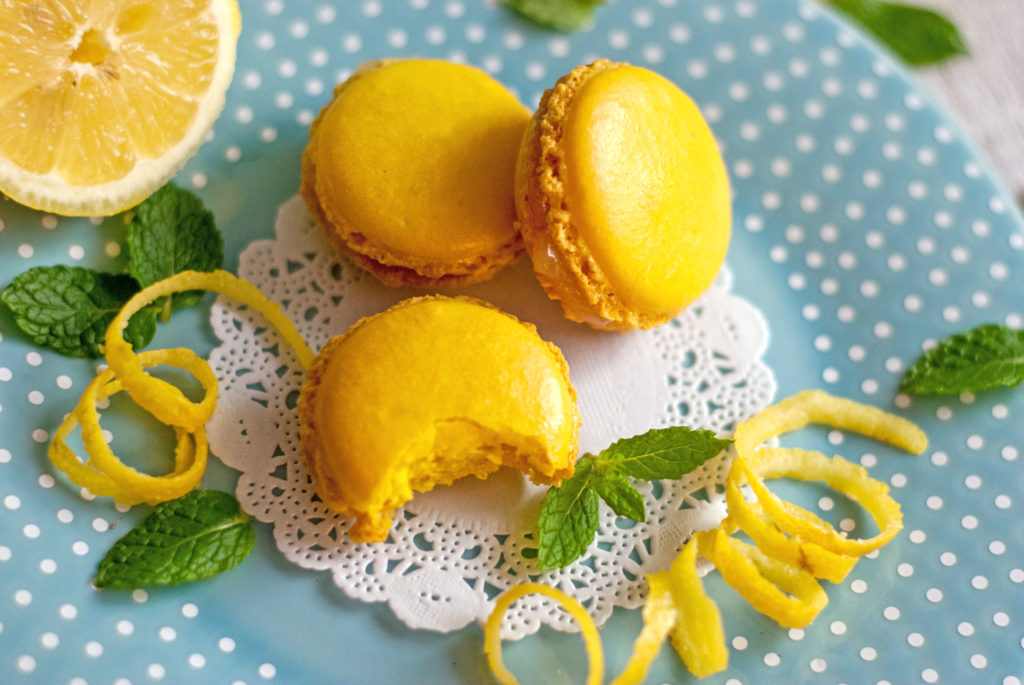
They look like sunshine . . . and they taste even better– a kiss of ethereal sweetness, combined with a pout of tart. Opposites attract, and the marriage between these two golden goddesses is no exception.
You did it. And I’m just so proud of you.

Disclosure: This post may contain affiliate links, which just means that we get a few pennies if you purchase through our link. I never recommend products that I don't personally use and love. Thanks!