


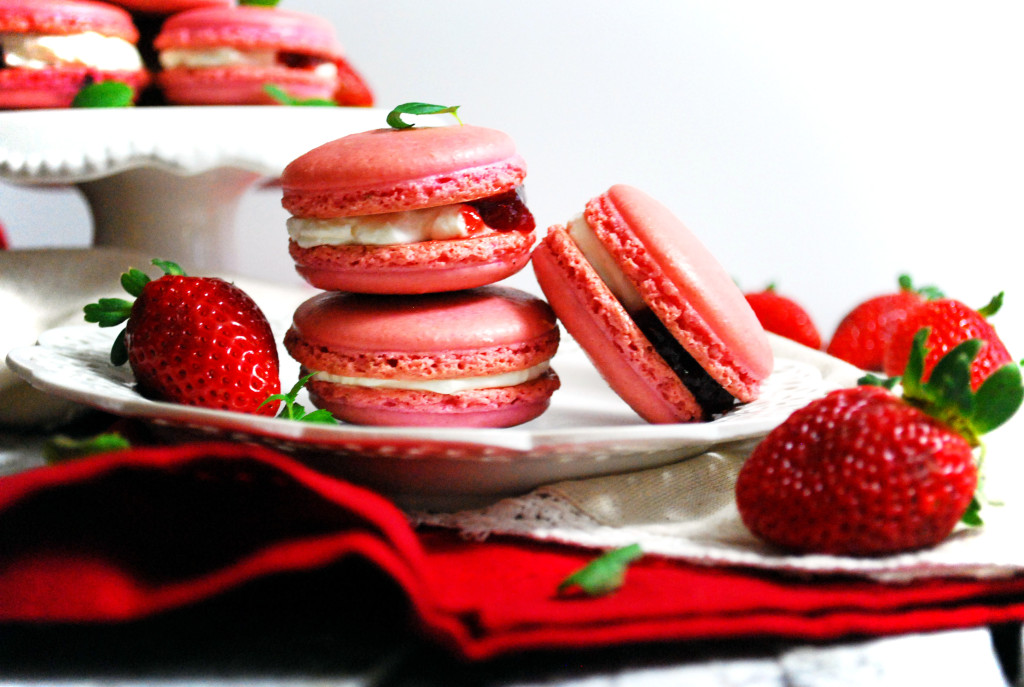
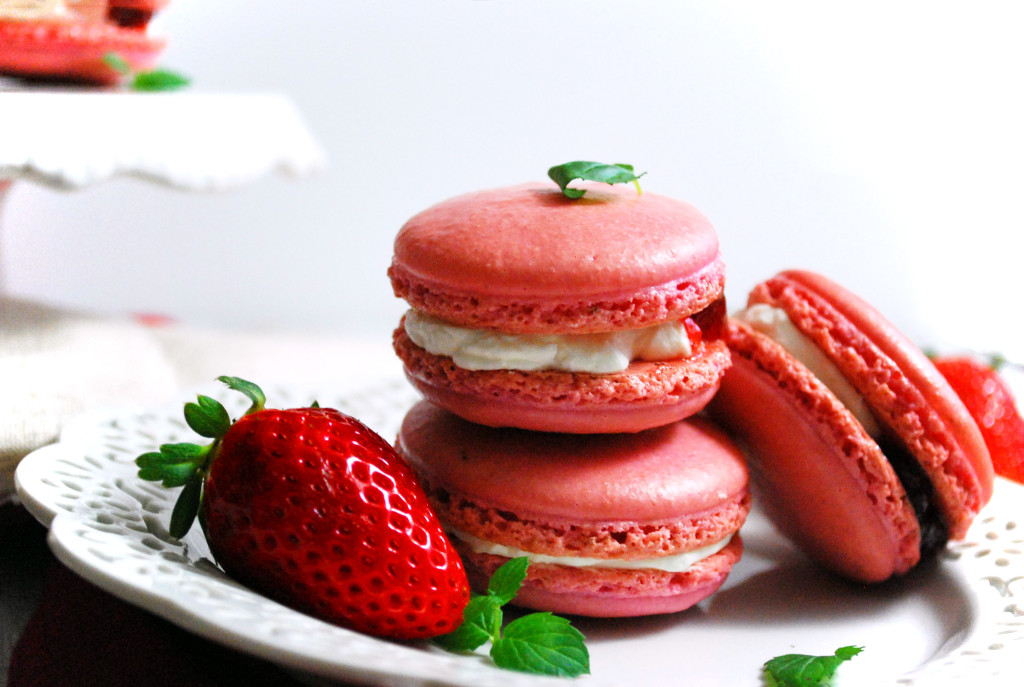
Look at them. Aren’t they gorgeous? Sigh.

Now look at these. Look long and hard, and remember. This here is Macaron Heartbreak Alley. I have traveled this horrible road many times. I have ruined so many macarons that I could have started my own country, with all these little bits of France I have thrown out for the trash man to flex his muscles on. If each of my failed attempts was named after a letter, I could have restarted the alphabet. Several times. In several languages.
Macarons, for all their ethereal charm and wispy, feminine beauty, are tough as nails. They are NOT, I repeat, NOT “macaroons.” Macaroons are soft, easy coconut lumps, that masquerade as their beautiful, evil sisters. These are not macaroons. These are not easy. And these are not going to leave your mind, once you try them.
They are your ex wife and her new husband. They are the kid who picked on you every day at recess. They are the time you smiled and forgot you had just eaten a stalk of broccoli. They are the flat tire that made you late on your first day of work.
They are the stuff from which nightmares are made.
WHAT??? How can you call these adorable, gorgeous beauties with their soft, cherubic cheeks evil? Do you decorate your Christmas tree with Grinch heads? Do you stick your tongue out at babies? Do you order your milkshakes without the whipped cream and cherry? What is wrong with you????
Well, as one who has ruined more macarons, in more creative ways, at more inopportune times than almost anyone, I can say, with authority, that these little wafers, for all their seeming simplicity and delicacy, are some of the trickiest cookies to get right. But for all their intricacies . . . once you “get it,” you get it. Once it clicks in your head, they become yours. The giant falls. You start dreaming of macarons and imagining them for every occasion, in every flavor. You become obsessed. You start dreaming the dreams that only those obsessed with macarons understand.

And you become one with them. The first time I made macarons, successfully, it was like the heavens opened, and a golden light shone down on me. I stared at my adorable little meringues, with their cute little feet, and I just couldn’t believe that I . . . I– the macaron “slayer,” had made them. But I did. And it only took 2348293847293847239847 failures. But I got my success. And you can, too. Just don’t give up. Ever. And, when all hope seems lost, you will pull a sheet of perfect macarons from the oven, and you will join the precious few who have made these cookies, successfully, and lived to brag about it . . . to receive the admiring and jealous stares of others. To know . . . you did it. And boy . . . does it feel good. 😉
What are we waiting for? Let’s do this!
Basic French Macaron Recipe
(adapted for my own use from Allrecipes.com)
Ingredients:
100 grams egg white (the whites from 3 large eggs)
1/4 tsp. cream of tartar
50 grams white sugar (roughly 1/4 cup)
200 grams powdered sugar (roughly 1 2/3 cup)
110 grams almond flour (roughly 1 cup)
Filling Ingredients:
Strawberry Jam or fresh berry puree
Whipped Cream or Cool Whip
Directions:
Whip room temperature egg whites and cream of tartar with the whisk attachment until the whites begin to foam. Slowly pour in the white sugar and begin to whip the whites on high. Meanwhile, pulse your almond flour and powdered sugar in a food processor until the mixture is well combined. Sift your almond flour/powdered sugar through a sieve and throw away the pieces that are too large to pass through the sieve. When the whites have whipped into stiff peaks, fold the almond/sugar mixture into the whites, gradually and carefully until they reach proper “macaronage.” Pipe the circles onto a silpat , using a template, if desired, and slam the cookie sheets 15 times on the counter to dislodge air bubbles. Allow circles to dry for 20 minutes before baking at 300 for 20 minutes, one sheet at a time, in the center of the oven (move oven racks, if necessary. Do not open the oven until the 20 minutes are up, and use an oven thermometer for best results). When your macarons are done, they should feel “firm on their feet.” Remove entire silpat to cooling rack and allow to cool, completely, before removing almond shells from the silpat.
Whew. And I’m majorly simplifying these directions. So let’s just show you! I learn best by seeing, anyway. Just keep in mind that most of learning how to make macarons is practice– so don’t give up, read all you can, and just keep at it. That’s the recipe for success 🙂

First, understand that macarons are an extremely finicky cookie. Varying their ratios even a little bit will ruin them. Varying the temperature even 15 degrees? Burned shells. Whipping the meringue a minute too long? Cracked shells. Not incorporating the meringue enough? Bumpy, lumpy shells. Not enough drying time on the shells? No feet. Not slamming the sheets enough? Air pockets.
Oh my goodness. These things are more demanding than a hormonal, pregnant woman.
I’m serious. When I first started reading about these things, I was like, “Are they serious?? Can a cookie seriously be that high maintenance? This dessert is so high maintenance it needs its own personal stylist and weekly spending allowance. Seriously.” And yet . . . something about all these warning signs and danger zones made me want to take that path, even more. Just to see if I could.
Little did I know I was in for the ride of my life.
To start with, what’s with all the gram measurements in the ingredients? This isn’t math class!
I know. And I first (foolishly) tried to just kind of “wing it” and use the cup measurements. But the thing is this . . . everyone measures differently. Some people pack their ingredients, while others spoon them in and level off. And with macarons, even a teeny difference like that can ruin the finished product. So, honestly, the only way you will get consistent results is to use a kitchen scale . Measure your ingredients in grams to make sure that you have exactly the right amount.

Now, let’s talk egg whites. In the macaron world, the egg whites are a MUCH debated subject. I have read probably 15 articles proclaiming the positives of doing the egg whites a certain way. Traditionally, the egg whites are aged for 5 days, in the refrigerator, before being brought to room temperature prior to the meringue process. There are SO MANY other schools of thought on this. Some people age their egg whites only a day. Some people try to “age” them in the microwave. Some people try less, or more . . . it makes your head hurt.
I told you. I have been trying these and reading everything I could about them, for a long time. You wouldn’t think there would be that many ways to prepare egg whites. I mean . . . it’s egg whites– the most boring part of the egg, anyway.
And yet . . . there are.
But for all of those schools of thoughts about the egg whites, almost everyone agreed on one thing: you must never, ever, under any circumstances, use processed, carton egg whites. Purists and modernists, alike, sneer at this method.
And yet . . . (whispers) . . . after trying every method under the sun, I had the best luck with regular, old, processed egg whites. I could measure them, exactly, in grams. I could make macarons as many times as I needed to, without having a billion egg yolks to use up.
So if your head isn’t already hurting, like mine was, when I read all this malarkey when I first started, just don’t tell the Macaron purists that I use boxed egg whites. They’d never forgive me.
But the macarons taste exactly the same. And they never have to know. 😉

After measuring my 100 grams of egg white, I place the whites in a small, plastic bowl and microwave them for 10 seconds. This takes the chill off and helps the meringues to whip better. Add in your cream of tartar (this helps to stabilize the meringue), and whip until the mixture gets a little bit foamy. At this point, add the white sugar as the whisk continues to beat the whites. The whole meringue process takes about 10 minutes (I know! Right?? How the heck did they do this before the arrival of Kitchenaid Mixers ? It makes my arm hurt just thinking about it). Meanwhile, while glorious Kitchenaid is doing the heavy whipping for you, go ahead and get the nut flour ready.

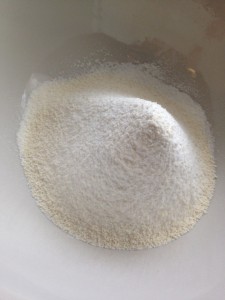
Measure your almond flour and powdered sugar with the kitchen scale. Place them into the bowl of a food processor . Do I really need to blend the almond flour and powdered sugar together? I’m kind of a kitchen shortcut taker–
Stop it right there. I know. It’s painful. But with macs, there are no shortcuts. Get out the blender and pulverize your almond flour and powdered sugar.
Whirl all these ingredients around until you get a nice, homogenous mixture. Now it’s time to sift them.
If you’re like me when I first started my macaron journey, you’re thinking, “Uh, yeah . . . I don’t need to sift. These ingredients come pre-sifted.”
*Hairy Eyeball*
You need to sift. You need to buy a sifter , if you don’t have one. I don’t know how many batches of macarons I ruined by trying to shorten the recipe process. Most recipes, you can take shortcuts. Macs? A big, fat nope.
Sift your ingredients. Don’t take shortcuts. Just say no.
I find that it takes about the same amount of time to sift my ingredients as it takes my meringue to whip. So I work, and the Kitchenaid works. We make a good team. When you get down to the little bit of grit that won’t pass through the sifter, throw that out– large chunks of almond will tear up the delicate meringue, and we can’t have that.

You will know the meringue is ready when 2 things happen: (1) the removed whisk leaves firm peaks (the peak will not “bend over”), and (2) you can turn the bowl upside down without the meringue moving or shifting at all. I have turned my bowl upside down for your viewing pleasure. It’s good. And that is a stiff peak– it looked exactly like that before I flipped the bowl over– that’s what you want. You don’t want the peak to bend at all– it should remain upright when the beater is removed. If you want to add color to your macaron shells, mix the gel in right before the mixture reaches the stiff peak stage, so you don’t overbeat the meringue while mixing in the color.
Work carefully, here, because once the meringue is done, you need to be able to instantly add in the almond/sugar mixture. Your meringue will overbeat if you take too long sifting your flour. So work quickly.

Next, take your egg whites (which are stiff and whipped), and add your sifted nut flour, little by little (I usually add mine in 3 parts). I think, of all the parts of macaron making, this part is the trickiest. This is called “macaronage.” Knowing how to deflate the egg whites and incorporate the nut flour is the absolutely trickiest part of this business. Mix too little, and your meringues will be pointy and coarse. Mix too much, and they will be flat and completely runny.
My best advice is to use the “J” stirring technique. Basically, bring your spatula straight through the middle, and swing around left– forming a letter “J.” Turn the bowl a quarter turn, and repeat the J. Mix carefully and take your time. Even one stir too many can ruin the macarons. You want your batter to be shiny, with a few bumps showing (the almonds). When you lift up your spatula, the batter should flow smoothly down into the bowl, like a ribbon. Yet, it has grit to it. Don’t stir so much that it’s completely liquidy. Look for “magma”– the slow ooze of a volcano. That’s what your batter should do.

See how this batter is still thick, but shiny? When it looks like this, it’s ready to go. If you want to do a “test circle,” just take a spoon and put a blob of batter onto a plate. If it smooths slowly into a nice circle, you’re good to go. If it is stiff and doesn’t smooth out, give it another stir and try again.

When your batter has obtained proper macaronage, place it carefully and gently into a piping bag.

I laughed when I saw the size of this piping tip. After months of cleaning the tiniest piping tips while I decorated wedding cookies with royal icing, cleaning this one was like taking a walk in the park!

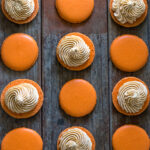
Place a piping template (you can print many free versions online) under your silpat and pipe your circles. To do this, hold your piping bag at a 90 degree angle and squeeze firmly, allowing the batter to kind of “push out” into the circle. When you have filled the circle, stop piping and swirl your tip clockwise to avoid getting a little point on top. Remove your piping guide when you’re done– we don’t want that paper to go into the oven!
Now . . . for the fun part. Take your baking sheets and slam them on the counter. I’m serious. Hold them about 6 inches above the counter and really wham them down. Just make sure you hold onto them– you don’t want the macarons slithering all around. They need to be slammed about 15 times to get the air bubbles out. Everyone will think you’ve become the mad chef.
And if you’re making macarons, of your own free will . . . perhaps they’re right.
Most of the lumps and bumps should settle out with the slamming, but if any “tails” remain, just lightly dab a (clean) finger in water and gently push the point down.
Let these macarons sit for 20 minutes. They need to form a thin “skin”– you should be able to extra gently touch them, without them sticking to your finger. When they have rested for 20 minutes, place 1 sheet in the center of the oven, at 300 degrees. Move your oven racks around, if you don’t have one in the direct center of the oven. And I really strongly urge investing in an oven thermometer. These cookies can be ruined if you change their spoiled little environment even 10 degrees. Ovens often lie– I bought a cheapie oven thermometer at Walmart for $5, and I keep it in the oven all the time. You’d be amazed how off the oven can be. Just keep watching your thermometer and keep that temperature right at 300. Leave the macarons in the oven for 20 minutes. Do not open the oven. Do not rotate the pans. Do not put more than 1 pan in. Just watch that oven thermometer like a hawk. And don’t forget to set your oven timer for exactly 20 minutes.

When your macarons have been in the oven for 20 minutes, take them out. Be careful, because macarons are very fragile when they are hot– they are basically egg white castles, after all. If you gently press on one, it should seem solid– not slithering around under your finger. Take tongs and move the entire silpat to a cooling rack. Yes. The macarons are that delicate. Even leaving them on a hot pan, out of the oven, can toast their little bottoms. Sigh. If these were a relationship, I’d suggest you move on. But as cookies . . hang on. You’re almost there. And it’s so worth it.
When the cookies are completely cool, go ahead and gently peel them from the silpat and fill them. To do this, just place a dab of strawberry jam and a dab of whipped cream in the center of each shell and gently twist as you press another cookie on top. Allow the macarons to cure for 24 hours in the refrigerator, for the perfect mix of crunchy shell and soft, melded flavor interior. You can also freeze macaron shells– and then just whip them out (like you whip the egg whites. See what I did there? Never mind. I’m tired. And fill when you’re ready.
Above all, don’t get discouraged. These cookies are tricky to make– even the best patisseries reportedly throw away 25% of their finished macarons. Even the pros have bad macaron days.
And even if your results aren’t very pretty, the first time, they will still taste great. So enjoy them, savor them, and plot your next attack. 😉
Because you did it. And I’m just so proud of you.

Disclosure: This post may contain affiliate links, which just means that we get a few pennies if you purchase through our link. I never recommend products that I don't personally use and love. Thanks!


All that time spent on giving detailed instructions for mixing and baking the macarons and none given for the filling? Not even measurements given? Please edit this page. I came here via a link specifically to get the recipe for the strawberries and cream filling.
I have debated for several hours how to respond to the entitlement and rudeness of your comment. I think perhaps I will address these facts: (1) you paid nothing for the work I put into researching, testing, writing, photographing, publishing this post. You have no right to complain when I have shared this knowledge freely, and of my own volition. (2) this is an extremely old post, from when I first started blogging. There are many other strawberry macaron recipes, filling recipes, and even strawberry bath bombs on this site, with more detailed filling instructions. The effort it would have taken to search “strawberry macarons” is a fraction of the effort taken on your part to complain. (3) this post was in response to reader requests for a tutorial focusing on shells and how to make them. For that reason I focused heavily on shells and kept my filling very easy (in this case a simple purchased whipped cream and strawberry jam). That is what is in these. I have both white chocolate and strawberry ganache and strawberry Swiss buttercream available on this site, again, if you had cared to check before you complained. (4) in this world we have become a chronically unthankful people. We forget sometimes that others are out there, trying their best to write, to create, to make something. These people maybe don’t get paid for this knowledge, for this work, but they do it out of the love of what they do– love of baking, love of writing. They are not perfect, and a simple “Would you mind sharing how to make the filling in more detail?” would have certainly resulted in a much more civil, thankful request on your part, and no doubt a much easier, “Why of course– thanks for asking” response on my part. Kindness and manners are free, but rare these days. You can find the information in the ways I suggested above, or if you need further help, a civil reply will be answered. Others will not. Have a nice day.
Pingback: Paris – Cookies for England
Pingback: Chocolate Chip Skillet Cookie – Cookies for England
Pingback: 50 French Macaroon Flavors To Experiment With In The Kitchen
Pingback: Salted Caramel French Macarons – Cookies for England
Pingback: Lavender Macarons with White Chocolate Ganache – Cookies for England
Pingback: Molten Chocolate Lava Cakes – Cookies for England
Pingback: Lovely Lemon Macarons – Cookies for England
Pingback: Luscious Lime Mousse with Swiss Meringue – Cookies for England
Pingback: Heavenly Angel Food Cake – Cookies for England
Pingback: Luscious Lemon Curd – Cookies for England
Pingback: Mint Chocolate French Macarons – Cookies for England
Pingback: Fabulous Funnel Cakes – Cookies for England
Pingback: Coconut Cream French Macarons – Cookies for England