
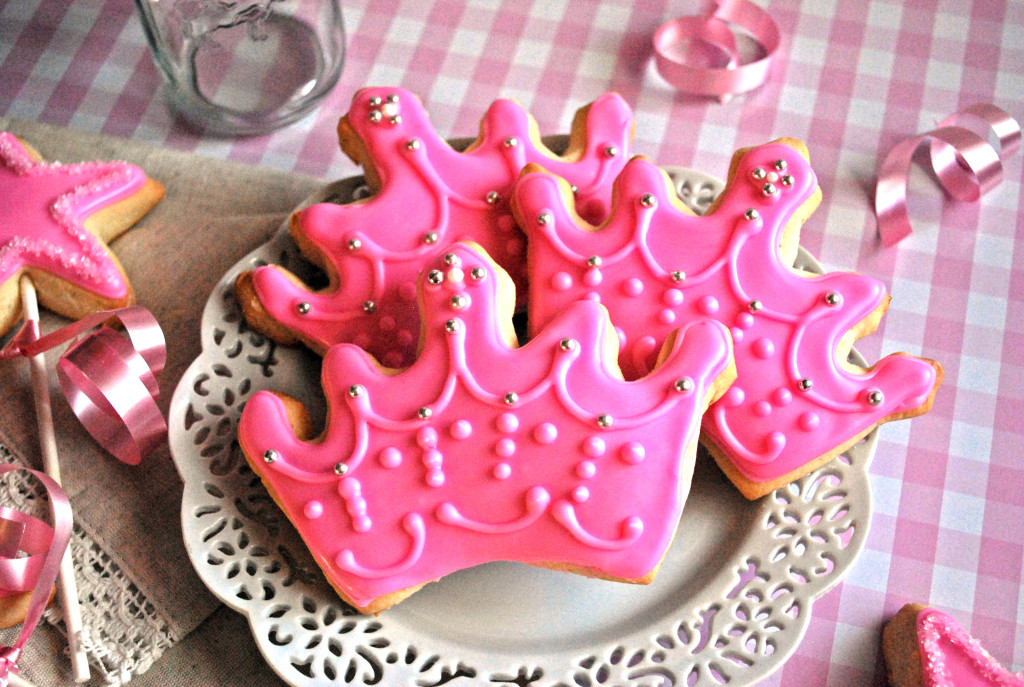
Perfect Princess Cookies
When I had my son, I was indoctrinated into the culture of Matchbox cars, action heroes, and everything messy, squishy, and loud. I learned that burping is hilarious, and no one ever needs a bath. I thought I had this parenthood thing down.
Then I had my daughter. And dipping a toe into the world of “baby girl” has been an adjustment. I now have to take a turn down the screaming pink Barbie aisle, in addition to the Matchbox aisle. I have to buy sippy cups in pink, instead of just blue. Disney Princesses have started to infiltrate the action figures.
Ahh . . . I just love it.
Here are some pretty princess cookies for the little princess in your life. They are surprisingly easy to make, and, when decorated with sugar pearls, they really make a serious cuteness statement. Make these for your next princess birthday party, and you’re sure to bring a smile to a little girl’s face.
What are we waiting for? Let’s do this!
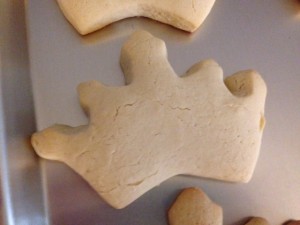
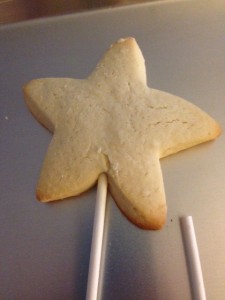
To begin with, every princess needs . . . a crown! Bake yourself some crowns (I like that– if you don’t have a crown, bake your own. ha). For more on baking cookies and how to cut out shapes without getting a disgusting, sticking mess, check out my tutorial here. You will also need some star cookie pops for some awesome “magic wands.” We will get more to that, in a minute, but if you need help making cute little cookie pops (cookies on a stick that double as Magic Wands– how much more awesome can you get?), check out my cookie pop tutorial here.
Once your cookies are baked and cooled, now it’s time for the fun part– the decorating! 🙂 These cookies are super easy, because you need only 1 kind of icing. That’s right. ONE piping bag. Oh, how I love simple cookies. 😀 You are going to make yourself some 17 second pink icing, which will work for both outlining and flooding. Say whaaa???? I’m not Noah! How the heck do I know what flooding is! No worries– if you are new to royal icing and how to get your icing the right consistency (icing consistency is basically the key to failure or success, where sugar cookies are concerned), check out my handy dandy tutorial here.
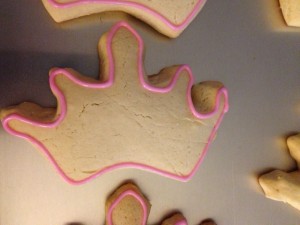
Once you have become a royal icing pro and gotten your pink 17 second icing ready, go ahead and outline your crowns. I find that the outlines need about 15 minutes to dry, before I flood them, or they melt into the centers and allow the “dam” of icing to break, ruining your beautiful cookies. If you outline all of the crowns before flooding any of them, the first ones should be dry enough to flood by the time you finish your last outline. It’s a beautiful system.
Don’t forget those cute Magic Wands! Go ahead and outline those in the same 17 second pink icing.
There we go. Nice. If you get a little extra blob of icing where you join the starting and ending points, just smooth it gently with a toothpick, and it will blend right into the rest of the line.
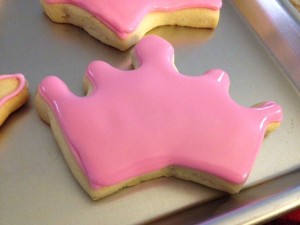
After the outlines have dried for 15 minutes, or so (again, this is just about the time it takes to outline all the cookies– we won’t split hairs on the minutes and seconds), flood them with the same pink icing. If any rebel air bubbles try to ruin your beautiful finish, pop them with a toothpick before the icing dries. You don’t want to pop them after the icing has started to set, or it will leave a scar. You’d be amazed how creative you can get with ways of covering up cemented air bubbles 😉
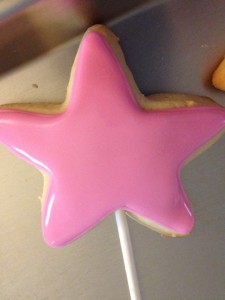
Flood your magic wands, as well. Aww. These cookies are just so cute! Your little princess is going to love them!
When you have finished outlining both the crowns and the Magic Wands, the cookies need to rest, for a while. What can I say. They are American. They can’t perform without sufficient rest 😉 It’s best if you can leave these cookies to dry overnight, but if time is short, give them a good 3 hours, at least. When you are piping details on the tops of cookies, you want to make sure the “ice” is solid before you skate 😉
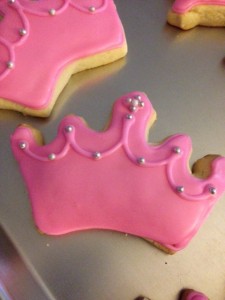
When the cookies have completely dried (preferably overnight), it’s time to add some bling! (*Note– if you are storing piping bags full of icing, overnight, place them upright in a glass with a little water in the bottom, so that the tips are underwater and can’t dry out). What little girl (or big girl!) doesn’t love a little bling? You can decorate your crowns any way you like. I will show you how I did mine, and you can feel free to change it up any way you like. To start with, I piped a line of pink icing (yes– the same pink icing) in a scallop around the crown’s points. I then used edible pearls on the tops and bottoms of the scallops to bling it up, a little bit. I put several small dabs of icing on the center point, using a large white pearl in the center, and 4 silver pearls in a square, around it, to make kind of a jewel for the centerpiece.
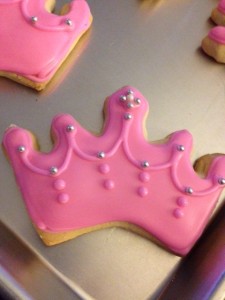
I then added some icing dots underneath each bottom pearl– on some crowns I did 3 dots, and on this one, I did 2. It’s really up to you.
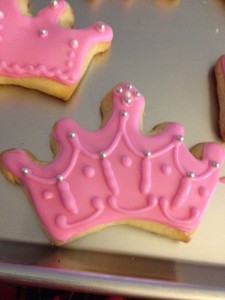
I added some little “U” shaped garnishes to the very bottom of the crown, just to add some dimension, and a small dot in between the lines of dots. This sounds so complicated, but there is really no rule to this– just do what you like and consistently pipe the design across the entire crown, and it will look fine. When all your crowns are finished, allow them to dry overnight to make sure they are completely solid before you try to stack or pack them. After all that hard work, you don’t want your crowns to get bumped and their beautiful jewels to come off.
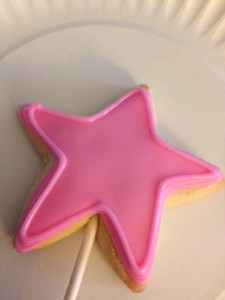
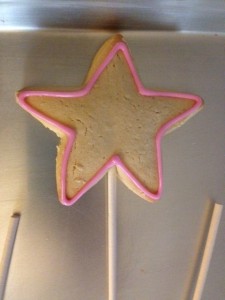
The Magic Wands are super easy to do. Take one of your finished stars and make an outline on it in the same pink icing you used for everything else.
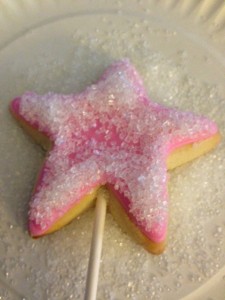
Before your icing dries, give it a sprinkle of sparkling sugar. I love to use King Arthur Flour’s sparkling sugar (more on that on my Favorite Finds page), because it doesn’t melt and really keeps its glittery crunch, even after sitting on a cookie for several days. Use one of those cheapie paper plates that everyone hates, because you have to use 5 of them to keep your potato salad from leaking through, at a picnic. In this case, their cheapness comes in handy, because you can decorate your cookies, then fold the whole plate in half and dump the extra sugar back into your container for another round.
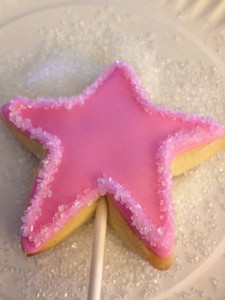
Gently turn the cookie so that the excess sugar comes off. Place the finished cookie pop on a cookie sheet to dry, completely, before you try to wrap or store it.
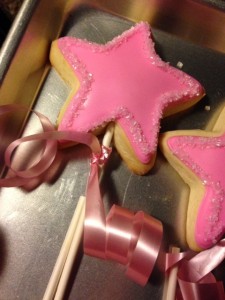
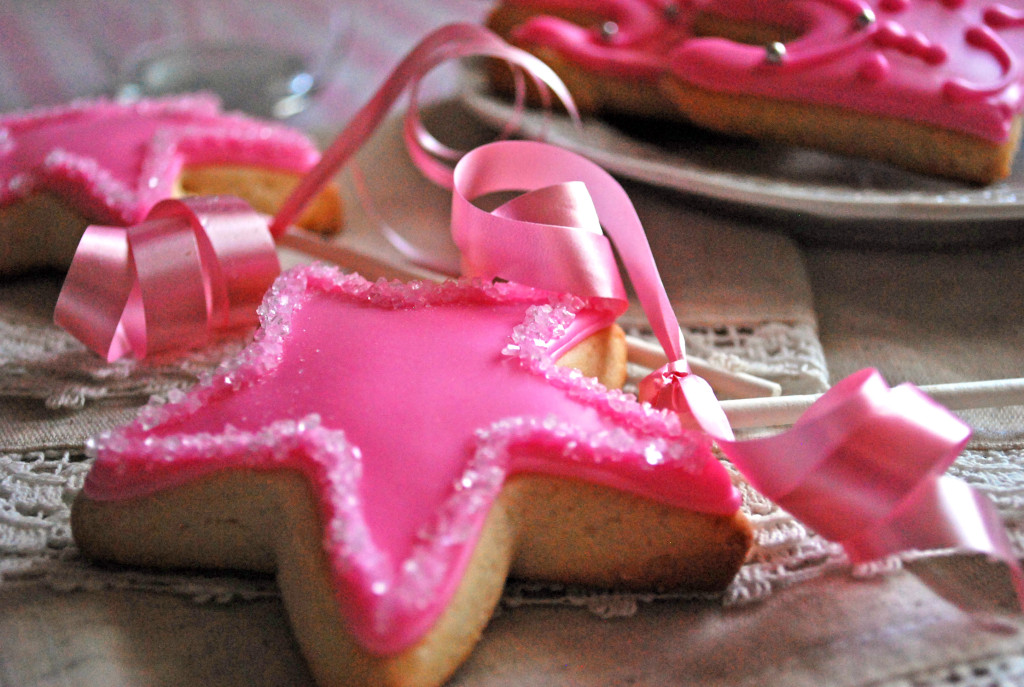
If you like, you can decorate these little cuties with pink curling ribbon. Another option would be to wrap each star in a small cellophane bag and tie the bottom with curling ribbon– and, presto– you have a cute take-home favor for the kids who come to the birthday party.
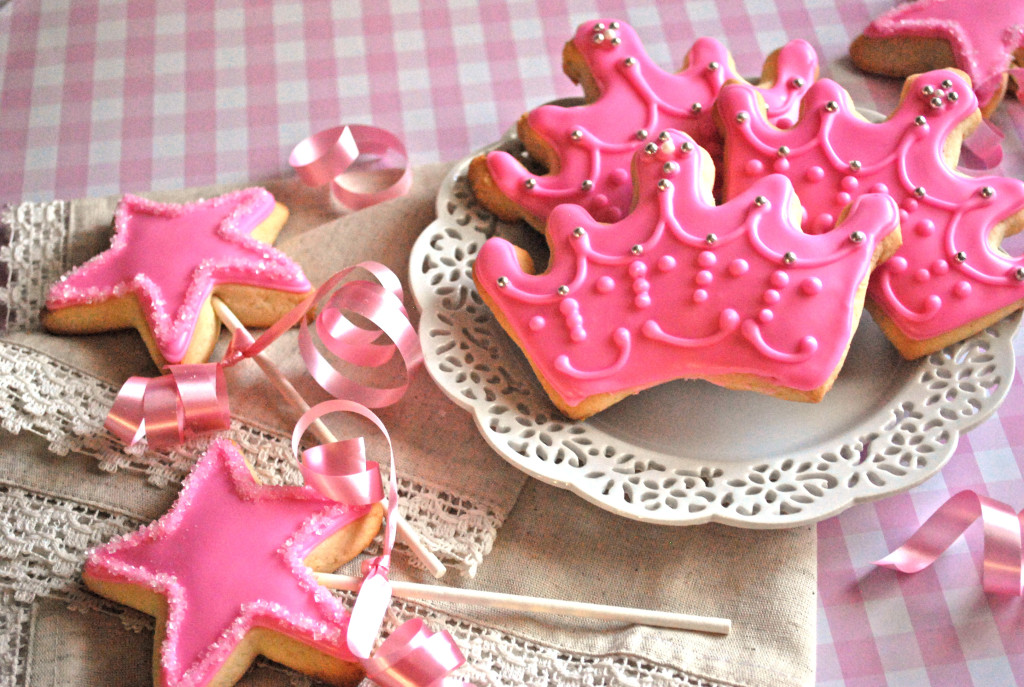
And there you have it, folks. You have a gorgeous variety of adorable cookies for the little princess in your life.
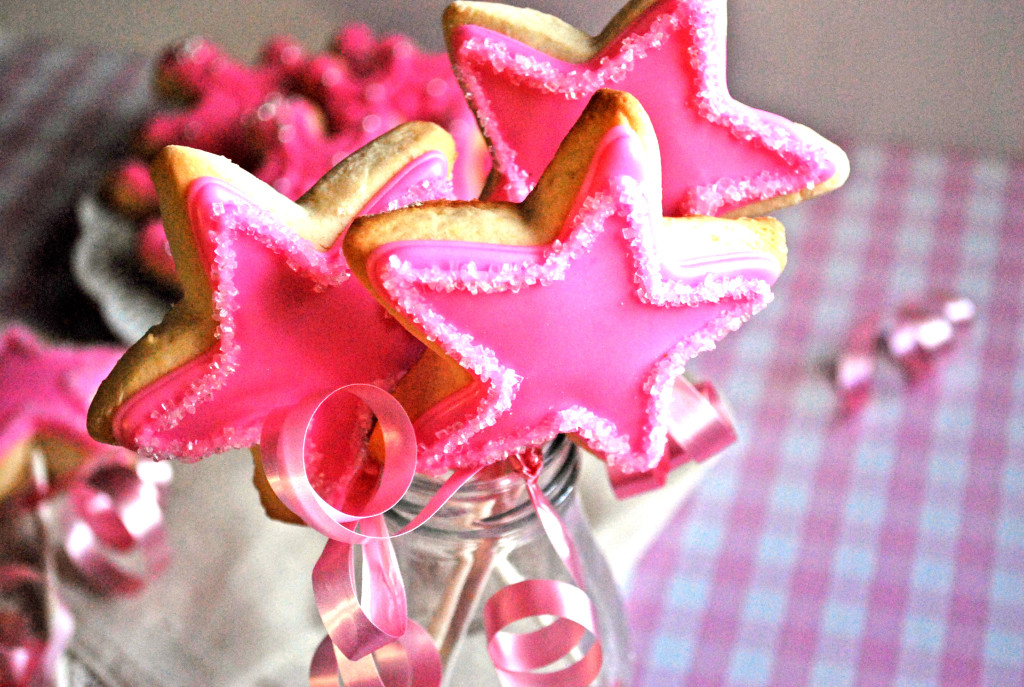
Place some Magic Wands in a jar for a cute cookie bouquet that doubles as a centerpiece. (*whispers* This means that you can do double duty with food and decorating. This means . . . you might actually have time to watch a show that isn’t a cartoon, tonight, after your kids go to bed. But don’t say it out loud, because we don’t want to jinx it).
You also have some adorable crown that the kiddos will love to eat. Who doesn’t love to eat edible pearls? I mean, seriously?
You’re decorating cookies with royal flair. You’re making your little girl’s day. You’re watching TV that isn’t cartoons.
And you’re doing it . . . like a boss.
You did it. And I’m just so proud of you.

Disclosure: This post may contain affiliate links, which just means that we get a few pennies if you purchase through our link. I never recommend products that I don't personally use and love. Thanks!