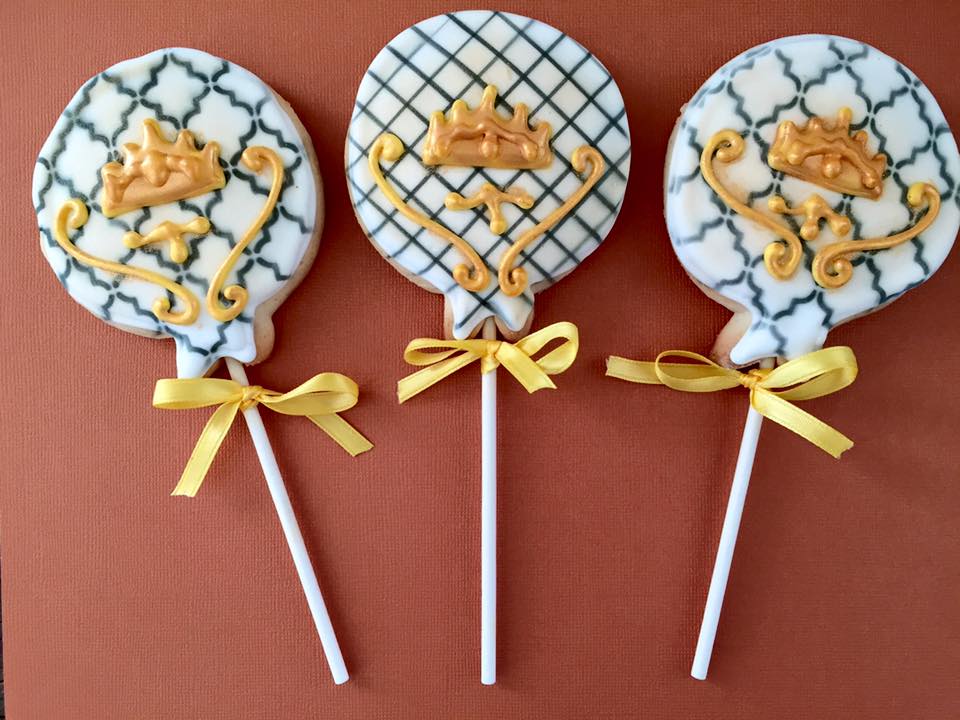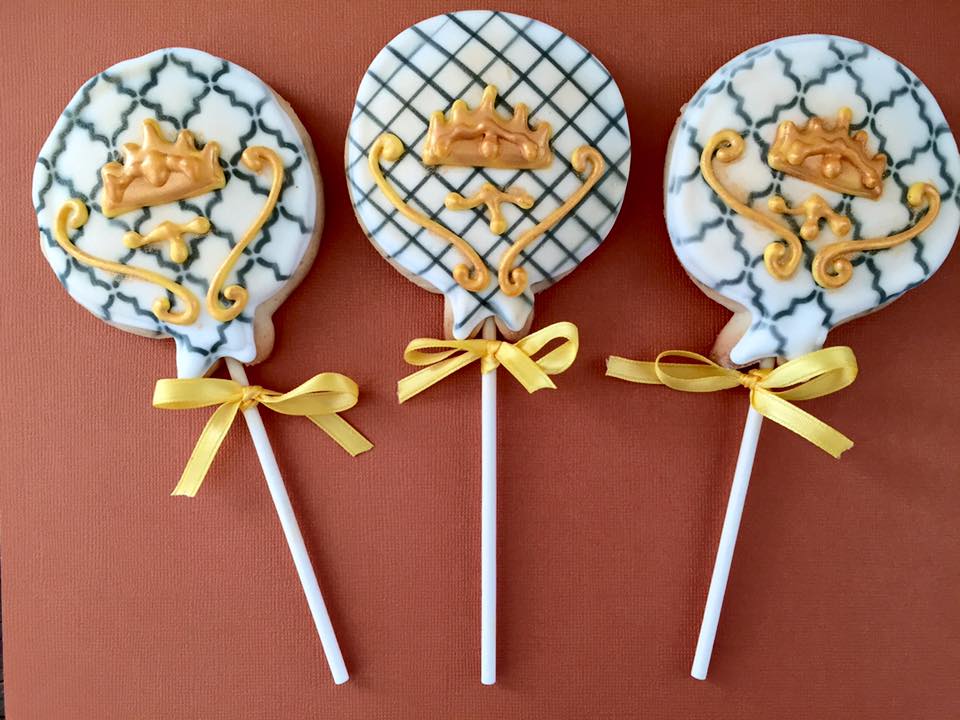
Photo by Jill Lang
My Grandpa used to joke that, when his siblings and he were asked where their parents were, they would answer, “I don’t know where Ma is, but Pop’s in the cooler.”
Perhaps you need to have grown up in Western PA to understand that “Pop” refers to soda. But anyway, it’s clear . . . pops make everything better. We have lollipops at the doctor, popcicles in the summer to quench the horrible heat, and now . . .
COOKIE POPS!
Seriously. What could be better than a cookie, unless it’s a cookie that is ALSO a lollipop? Not much could be better than that.
What are we waiting for? Let’s do this!
First, you need to make your cookie dough. More on a good recipe and the technique for this here.
Then, you need your lollipop sticks. There are a few different schools of thought on this. I’ll tell you the different methods, and you can decide for yourself which path you will take.
(1) Use specially made “cookie sticks.” These can be found at craft stores, such as AC Moore or Hobby Lobby. These are typically around $5 for a bag of 50-100 sticks, depending on how long you wish your sticks to be (I generally go with 6″ or 8″ sticks).
(2) Use regular “lollipop sticks.” These can also be found at craft stores. They are cheaper than cookie sticks. You will pay about half the price of cookie sticks for lollipop sticks. Although these aren’t specifically made for baking, I use these for my cookie pops, and I’ve never had a problem with baking them in the oven. However, I bake my cookies at 375 degrees. I’m not sure what would happen if you bake at a higher temperature.
Either way . . . use whichever sticks you prefer. Just keep an eye on the lollipop sticks if you go that route. I’ve never had a problem, but each oven is different, so make sure they don’t start to smoke or anything when you bake them. I use the 6″ lollipop sticks most often.
Once your dough is prepared, go ahead and roll it out. You want cookie pop dough to be thicker than the dough for normal sugar cookies. You want this to be quite thick– just a hair below 1/2″ thick. Keep in mind that this means you will get fewer cookies per batch of dough, so plan accordingly. I usually get about 2 dozen regular cookies, or 12-15 cookie pops per dough recipe.
You also want this dough to be well floured. You want to be able to pick it up without it sticking to your fingers.
That reminds me of a joke. A woman said she wanted all women pallbearers at her funeral. When the funeral director asked why, the woman said, “The men wouldn’t take me out when I was alive, and I don’t want them taking me out when I’m dead, either.” haha.
Moving along. Pick up the shape and hold it gently in your hand.
Take your lollipop stick and gently smoosh it into the dough. I find that it helps to gently roll the stick back and forth as you insert it– it helps it go into the dough more easily. Be sure to keep the lollipop stick centered and straight– don’t push down or up too much, or the stick will push through the dough. If you accidentally do push through, go ahead and remake that cookie.
I push the stick entirely through the shape– just about a finger width below the top of the design. That way your stick will be supported entirely through the cookie and have less chance of slipping out or breaking.
You can see the outlines of my lollipop sticks in this unbaked dough.
Cookie pops take up a lot of room on the baking sheet, too. You can bake 8-10 of them at a time, depending on the size of your cookies. Plan for that, too– fewer cookies per batch, and fewer cookie pops per sheet while baking. Don’t plan to make hundreds of these when you’re in a hurry.
I generally bake these a little longer than regular cookies for 2 reasons: (1) cookie pops are thicker, so they take a bit longer in the oven to bake thoroughly, and (2), I want them to be very firm so that the sticks don’t slip out.
The cookies should be nice and brown on the bottom when they are finished.

And that’s it! Allow your pops to cool, and then decorate them however you like. You can make anything from royal scepters to Magic Wands for a Perfect Princess birthday party.
A quick note, too– cookie pops make a beautiful gift. Put them in a cute vase or arrange them in a Styrofoam block in a cute basket, with some artificial flowers. They are sure to make someone’s day 🙂 Make these soon– they’re sure to bring a smile to someone’s face. 🙂
You did it. And I’m just so proud of you!

Disclosure: This post may contain affiliate links, which just means that we get a few pennies if you purchase through our link. I never recommend products that I don't personally use and love. Thanks!


Pingback: Airbrushing Apples! – Cookies for England
Pingback: Perfect Princess Cookies – Cookies for England
Pingback: How to make a Cookie Bouquet – Cookies for England