When we talked about baseball legend Joe DiMaggio last week, it naturally put me in the mood to make some baseball sugar cookies. If you are new to cookie airbrushing stay tuned . . . it will elevate your baking game from good to awesome. 🙂
What are we waiting for? Let’s do this.
Baseball Sugar Cookies
Ingredients:
1 1/2 cups powdered sugar
2 sticks (1 cup) butter or margarine, room temperature
2 tsp. extract of your choice (I tend to use vanilla or almond)
1 egg (room temperature)
2 tsp. baking powder
1/2 tsp. salt
3(ish) cups flour
Directions:
Cream powdered sugar and butter until light and fluffy. Add extract and egg; beat well. Sprinkle baking powder and salt over mixture; mix well. Add flour, a little at a time, until it forms a stiff dough that does not stick to your fingers. Place on a floured surface and allow to rest for 15-20 minutes. Roll out dough to 1/4 inch thickness. Cut out shapes and “peel” dough scraps (more on thishere). Bake at 375 for roughly 15 minutes until set and bottoms of cookies are lightly golden. Allow to cool on a baking rack before decorating with royal icing (more on how to make thishere).
Now, in pictures!
Lately a lot of you have been asking me about airbrushing cookies, so I thought I’d give a little general info about edible airbrush technique– AKA, airbrushes that use food coloring rather than paint. Once you use paint in an airbrush you can’t use it for food anymore, so keep in mind that this airbrush will need to be set aside for food usage only.
So what kind of airbrush gun should I get?
This is kind of one of those “what kind of car should I get?” questions. It really depends on how much you intend to use your airbrush, as well as WHAT you intend to use it for. If you are just going to use it occasionally for spiffing up cookies and cakes, then a cheaper model will do. If you are going to use it constantly (at least every few days), then I’d recommend a more higher end model, because it will stand up to the abuse of heavy usage and cleanings better. I have the Duff airbrush gun, and it has proven to be a good, reliable model that I have used heavily for years without any problems. There are also cheaper models such as the Cake Boss airbrush gun
. So what is the difference? Why are some of them more expensive?
Honestly, there is not a whole lot of difference in how they handle. All airbrush guns are, at their heart, a compressor and a gun which allows coloring (in this case food coloring) to drain through a valve and spray out around a needle at the pressure you choose. The main difference in these two airbrush guns (lower and higher end) is (1) the higher end guns can stand up to more abuse– you can take them apart and clean them more easily, and (2) it is easier to find replacement parts for the higher end guns. But if you just intend to airbrush once in a while, or you are just starting out, you could definitely start with the cheaper model and learn the ropes before deciding if you want to upgrade to something a little more heavy duty. An expensive airbrush gun is an investment, and if you aren’t sure I say start with a cheaper model and see if you even want or need something better.
Remember that beat up Nissan you had in college? It got you around just fine. Yes, eventually you might have upgraded to a Mercedes. The Mercedes might be better made and have more bells and whistles. But if your goal is just getting the job done and getting from point A to point B, then there’s nothing wrong with the old car.
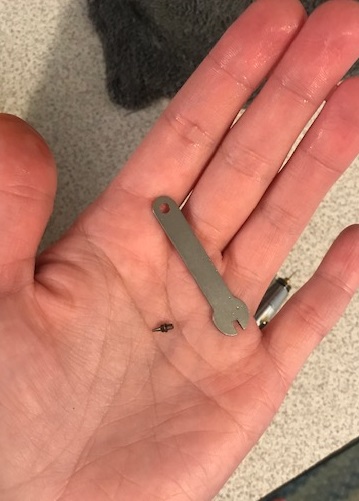
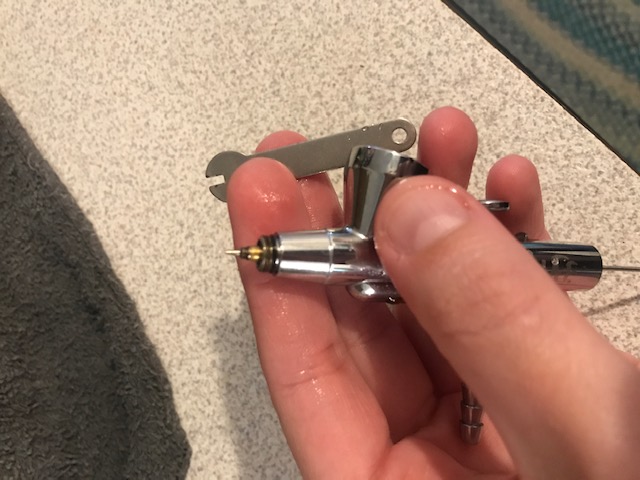
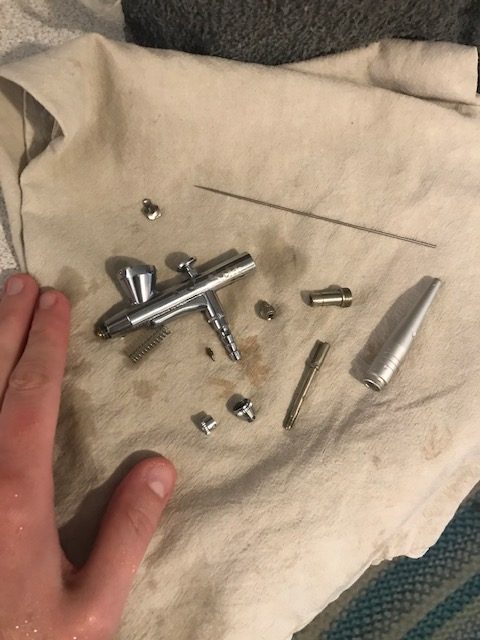
Now. Ahem. That teeeeeeeeeeeny weeny little thing there that looks like a fruit fly is actually a screw. Um, yeah. Some of the airbrush parts are ridiculously tiny. Like, Mama needs her reading glasses tiny.
(So why do we need to know what the guts of the airbrush gun look like???? *everyone looks around awkwardly*).
I’ll tell you why. Because every airbrush gun, no matter how low end or how high end, will eventually clog. It’s a sad fact of life– like the toilet clogging. No matter how careful you are, eventually it will happen and you need to know how to get it unclogged. Sigh. It’s life.
Before I bought my airbrush I spent a lot of time researching and listening to the experiences of others who had tried different kinds. One thing that everyone had in common was that, at some point, “my gun just quit working right.” Some people experienced blotchy, grainy spray. Some had the gun just quit, altogether. Many of them threw the whole thing out and got another one, only to have the same thing happen, making them give up airbrushing altogether in despair.
NOOOOOOOOOO don’t throw out your airbrush gun!!!! It’s just needs cleaned!! There is nothing wrong with it!!!!!!
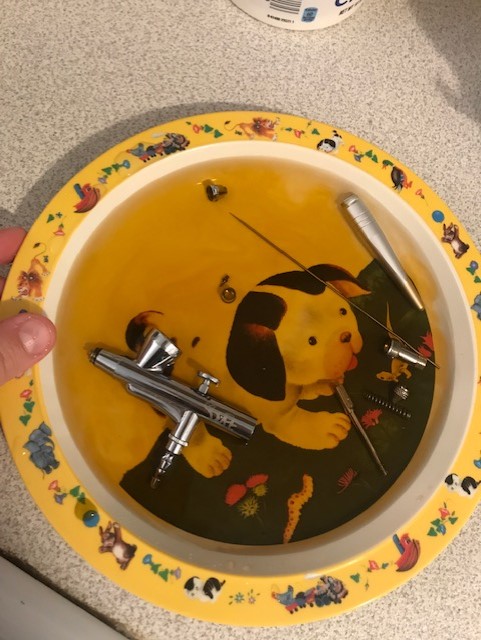
See this picture above? This is my airbrush (taken apart) soaking in a warm bath. When I put the pieces in there the water was clean. See how filthy it was? Look at all that hidden food coloring. Yep. My old gal had been holding everything in and she needed to get it allllllll out.
So what makes an airbrush gun clog, and how can I avoid it happening?
I’m sorry to say that there is nothing you can do to prevent your airbrush from clogging sometimes. Yes, there are things you can do to reduce how often it happens (using real airbrush colors, rather than watered down gels, cleaning the gun super well after each usage (I run a full syringe of Everclear or vodka through the gun after using to clean it), cleaning especially well after using the sheen colors (which contain small, sparkly bits that get stuck in there), and not letting too much time pass in between usages). Does this sound complicated? I promise that it seems complicated at first, but it’s not hard. Basically just keep the gun clean and don’t let it sit for months without being used, or the ink may dry up inside and cause it to stop working.
HOWEVER! Even if you get the dreaded “I just turned this on and nothing is happening!” syndrome, never fear. Every airbrush gun (for the exception of the SUPER low end cheap models which are basically meant to break and be replaced) can be taken apart and cleaned with warm water and some white vinegar. Learn your gun and learn how to clean it, and you and your airbrush will have a long and happy life together. Oh– use a light colored towel to keep track of all those teeny little pieces. You don’t want to lose them. Trust me. Please don’t ask me about the time I had to dig through the trash looking for one of those minuscule screws. The story still makes me wince.
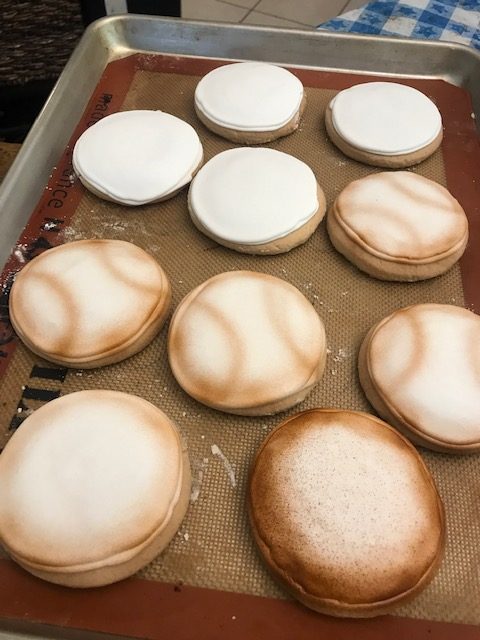
My baseball cookies started this way. See the grainy, blotchy spray on the left? Yep. Sigh. I said, “Really? You need cleaned NOW? I need to just spray these cookies and go!” But my airbrush is a particular little lady, and she said NOPE. No work until she gets a nice bubble bath. She isn’t a slave, after all. She was giving me an entire speech about women’s airbrush rights and I cut her off and said “Yes dear,” which seems to be the cure all to every situation. Men, take note.
So, sighhhhhh again, I took her all apart, let her have a nice soak, let the parts dry (looking at my watch because come ON I’m on a deadline here!), finally got her all back together and reassembled and voila. Look at the spray on the right. Perfect. Your spray should never have individual “dots” of spray. If it does then something it making your ink come out unevenly (generally a speck of dried coloring deep in the gun that you can’t even see). Your color should always be a soft, almost “shadow” of spray. Also, less is more. Give a few light coats and let them dry in between, rather than dousing on gallons of color too fast. Too much color will make the colors run and the icing bubble oddly. Less is more. Clean often. Eat cookies. These are my rules of life.
Another thing to remember . . . always have some extra “tester” cookies available. Never make just exactly the number of cookies you need. Always have extra. Airbrushes are unpredictable sometimes, and you don’t want to need 12 cookies, HAVE 12 cookies, and then ruin one finding out that ye olde airbrush wanted a bubble bath before she performed and WAS NOT WORKING UNTIL HER DEMANDS WERE MET. Can someone say “Diva?” Sheesh. *eyeroll*
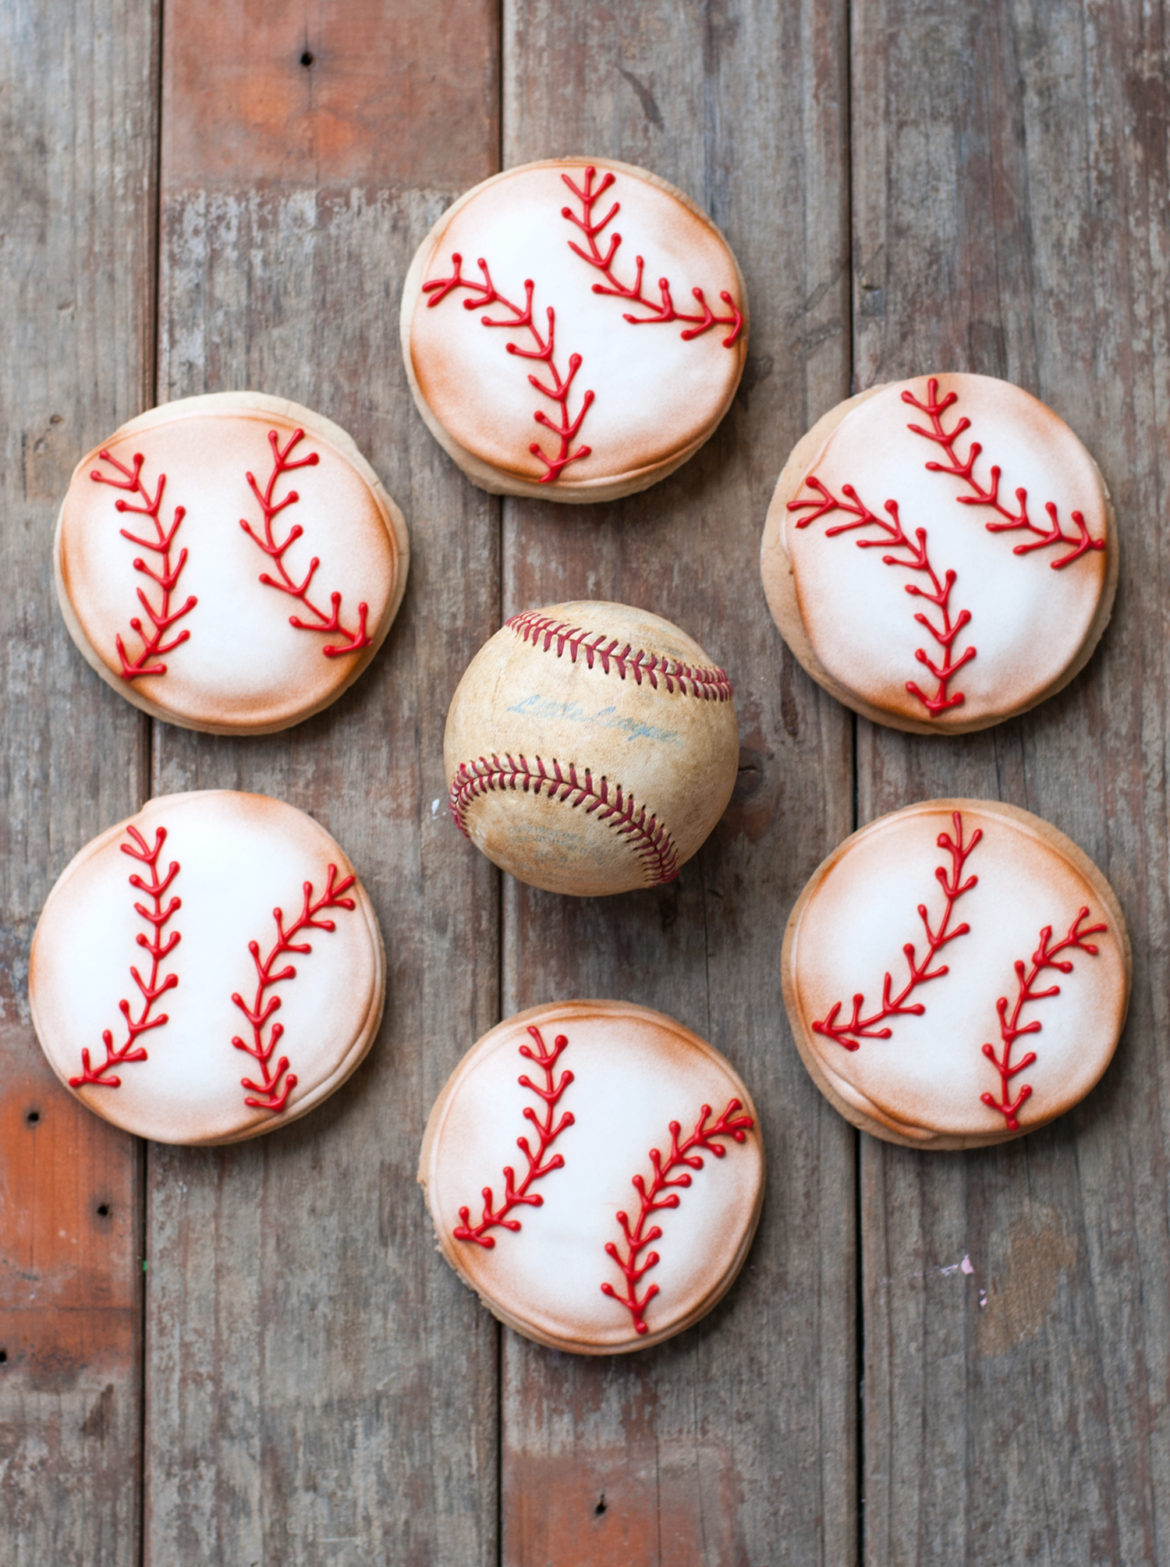
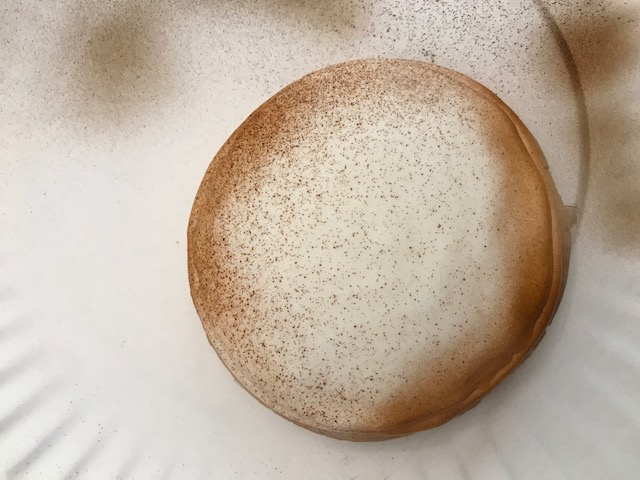
I was making baseballs so I took white rounds (don’t worry about minor imperfections– you can sand those off with a zester at the end if they bug you) and gently sprayed the edges and “lacing” area with brown airbrush color. I am using brown Americolor airbrush mist for these. I love the aged/weathered look that it gives cookies.
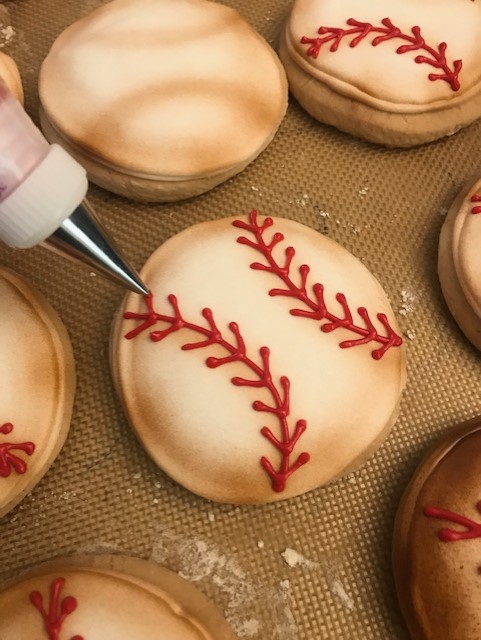
Again, I wanted kind of a rustic, “played with” look. If you want perfect geometric circles be sure to sand the edges of the cookies with a zester before you airbrush. Honestly, these are cookies and I didn’t feel like using a slide rule, but that’s just me.
I used red royal icing for the lacing. This is a Wilton 2 tip.
I just love my silpats. I have 8 now, I think. I use them for everything. You can knead bread dough on them without the dough sticking to everything, roll out pie crust between 2 of them (again, no sticking), make macarons, and of course, bake cookies. Then you can just leave the cookies on the sheets when you decorate and wipe off any icing spills. Silpats are the busy mom’s friend.

Airbrush color (and any icing color, really) shouldn’t get wet. The colors can run if they are in a super wet environment. This means that freezing and thawing airbrushed cookies can be a bad idea, unless you dry the cookies uncovered when you thaw them. Generally you can thaw cookies just fine, but don’t add the airbrush color until after they are dry and room temperature.

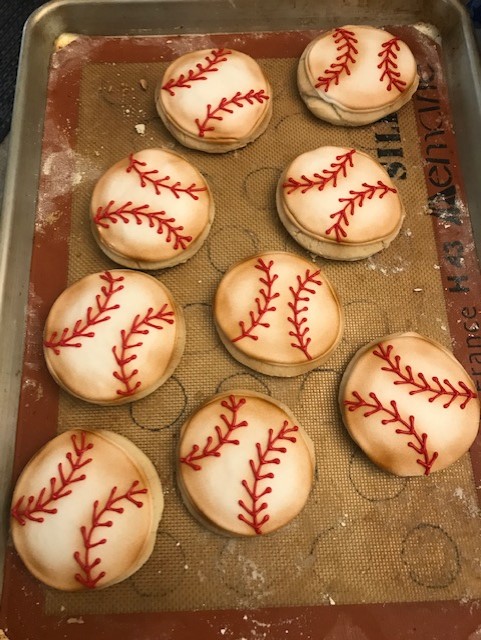
I loved how these turned out– there was almost a sepia tone to them. I often add a kiss of brown airbrush color to the edges of cookies to “antique” them.

Perfect. And see? We managed to get our airbrush gun all put back together again, and no airbrush guns were harmed in the making of this tutorial.

A few cookies may have been, though. *crunch, crunch.”
Oops. You weren’t supposed to see that. But hey . . . there were extras. 😉
You did it. And I’m just so proud of you.

Disclosure: This post may contain affiliate links, which just means that we get a few pennies if you purchase through our link. I never recommend products that I don't personally use and love. Thanks!


Amazing cookies, my Lovely.
XO <3