

My toddler and I have a neat tradition when we go grocery shopping– we like to take a swing by the bakery case and look at all the cool birthday cakes. I remember doing this same thing, with my Mom, when I was little, and it’s neat to be able to “ooohhh” and “ahhhh” over the beautiful decorating skills with my little guy, just as I did with my parents, so long ago. Hopefully someday I can teach him to bake and decorate, if he wants to learn, but until that time, we just look and admire.
One of the coolest things about bakery decorations is that they hold their shape FOREVER. While I don’t have access to all of the stabilizers and thickeners that a professional bakery has, I often wish that I could make my baked goods last a LITTLE bit longer. There is nothing worse than creating cupcakes with dreamy whipped creamy frosting, only to have them drooping and leaking all over creation only a few hours later. Well, now you can finally make stable whipped cream, right in your own kitchen, without any exotic ingredients. Yes. You can make gorgeous, billowing whipped cream that holds its shape for up to 3 days (at which point we gave up the cupcake test and ate ’em ;). It didn’t shrink or melt, and it tasted just as delicious as the day I made it, fresh. The fact that this whipped cream is crammed with drool-worthy Nutella and is naturally gluten free is just a fun bonus. You don’t even need cupcakes– you will be eating this right out of the bowl, with a spoon. And the best part is . . . you can keep the party going for at least 3 days 😉
What are we waiting for? Let’s do this!
Sinful Nutella Whipped Cream
(my own creation– please use away and change it up, but please credit back here so no one steals my work 🙂
Ingredients:
2 tbsp. cool water
1/2 tsp. unflavored gelatin
1 cup heavy cream
1/2 cup Nutella
Directions:
Sprinkle gelatin over cold water to soften it. Allow the gelatin to rest, undisturbed, for about 3 minutes, until the water becomes jello-like. Heat 2 tbsp. of the cream in the microwave until the cream is hot, but not boiling. Mix the hot cream into the softened gelatin mixture until all gelatin clumps are dissolved, and place mixture into the refrigerator until it is cooled to body temperature (about 5 minutes). Meanwhile, whip your cream and Nutella together, using the whisk attachment of your mixer, until the mixture holds soft peaks. Add in your cooled gelatin mixture and whip for about 30 more seconds, just until combined. Cover mixture and refrigerate 1 day, or until firm (gelatin needs a chance to “gel” and thicken the icing). This whipped cream will hold its shape for up to 3 days (and maybe longer, but that’s all the longer we could wait to eat ’em 😉
Now, in pictures!
To start with, let’s talk unflavored gelatin. I adore this stuff. It’s a little finicky, and it can get a little temperamental, at times, but it really is the magic ingredient that can turn almost any floppy or wilting substance into something great. It is the puff of courage that wimpy ingredients need to turn and face the battle with strength. Too bad they can’t infuse us with gelatin when we have to do our taxes, eh? haha. I could use some infused courage when facing all that paperwork 😉
Basically, gelatin is a powdered coagulant, Eeeewww . . . isn’t that BLOOD??? Well . . . blood has coagulants in it, too, so that when you get an annoying little cut, your blood can step in and helps you out by stopping you from bleeding to death. So sweet . . . and creepy. Eeeeek. Let’s move on. Anyway, coagulants are just substances that make a liquid firmer– almost a semi-solid. Have you ever made gorgeous whipped cream, topped your desserts, and then come back later on, only to find all your gorgeous, effervescent puffs drooping and weeping all over the place? Man . . . that’s heartbreaking. But those days are over. Because NOW you are going to be able to make whipped cream that not only firms up and gives you more substance for piping, but also holds its shape happily and contentedly for up to 3 days. Heck . . . it could probably go longer than that, but 3 days is as long as we could wait to devour our cupcakes 😉 If you have more willpower than I do, then please let me know just how long this stuff lasts.
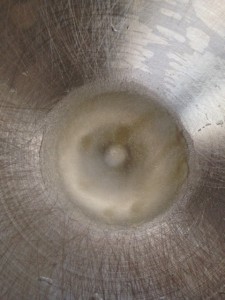
Start by “softening” your gelatin. This just means that we are going to kind of “soak” the powdered gelatin by sprinkling it over 2 tbsp. of cool water. The gelatin will absorb slowly into the water, until you have a substance that almost looks like a puddle of semi-firm gel at the bottom of your mixing bowl. It looks weird, but don’t worry– you’ve started the magic. Let that gelatin/water mixture sit for about 3 minutes, to make sure all the powder gets a nice drink.
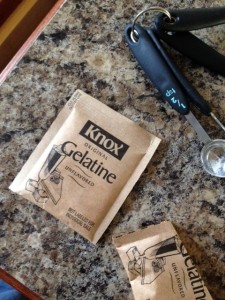
Oh– while we’re waiting on that softening to happen, let me show you what the unflavored gelatin packets look like. You can find these little guys in an orange and red box in the jello section of the store. Just a side note, too– if you ever want to try flavored gelatin (like strawberry or orange), you can totally do that, too, and give your stable whipped cream a delicious hint of fruit flavor. Of course, if you do that, leave the Nutella out– unless you’re trying to make a chocolate strawberry or orange/chocolate flavor. Hmm. There might be something to that. I’ll have to file that idea away, for another day. 😉
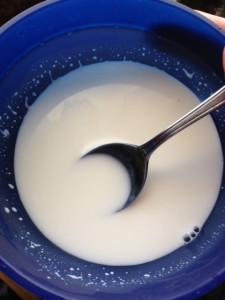
While your gelatin is finishing up the softening process, let’s move on to the next little step. Take 2 tbsp. of the cup of heavy cream we are going to use, and heat it in the microwave for a few seconds until it is hot, but not boiling. Make sure you stir the cream so that you get it heated evenly, throughout, instead of blazing hot at the edges and cool in the center. When your cream is hot, scrape the gelatin/water mixture (which should be kind of a thick gel, by now) into the cream. Stir with a spoon until all the gelatin clumps are gone. Put this bowl into the fridge so that the mixture can cool to lukewarm– this process takes about 5 minutes. If you used your mixing bowl to soften the gelatin, rinse it out so that you don’t have any clumps left in there. Who wants clumps in the icing? Eeeew. Not me!
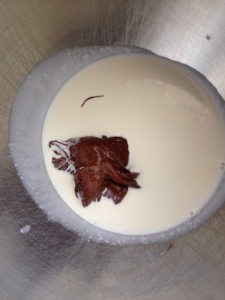
Haha. The more I stare at this photo, the weirder it looks. There is just absolutely no way to make a brown pile look good, under any circumstances 😉 So I’ll just ignore what that looks like and say go ahead and place your remaining cream and 1/2 cup Nutella into the rinsed out mixing bowl.
Bwahahaha! Sorry. I just looked at it again. Moving on.
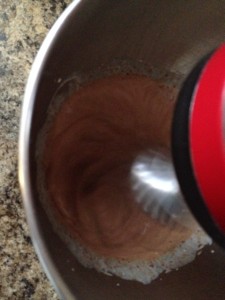
You don’t want to start whipping your cream until the gelatin is almost cool, so that you can use it when you’re ready, without the cream having to sit around, after it’s been whipped. So wait 4-5 minutes, and then start whipping your Nutella/cream mixture. Use the whisk attachment on your mixer on medium high speed for about 3 minutes, until your mixture holds soft peaks. At this point, add in your cooled gelatin mixture and whisk for about 30 more seconds. You don’t want to overbeat, or the cream will separate and become grainy and kind of curdled. Don’t ask me how I know this ( O_O innocent face). You want it to be adorably squishy. Don’t overbeat. The mixture will kind of look like a melting Frosty– it will gently and slowly ooze when you tilt the bowl. It won’t be firm or anywhere near piping consistency, yet.
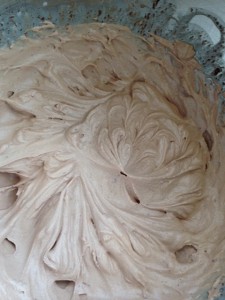
It will also be the color of a Frosty– that super light, chocolate color. At this point, it needs to be refrigerated for a while (overnight is best), but here’s a little time-saving tip: you can refrigerate your icing in a “tube” of plastic wrap, and then it’s all ready to go, when you’re ready to pipe. More on that here. I love to use this technique when making sugar cookies, as well as when making cupcakes (although the piping tips are much easier to clean 😉 You basically dump out your icing into the center of a piece of plastic wrap, gently roll it into a sealed “log,” twist the edges to keep the air from it, and tie a knot in one end. Then, when you’re ready to pipe the icing, you thread your plastic wrap “log” into your regular piping bag, go to town with your beautiful decorating, and throw the plastic wrap tube away, when you’re done, no bag cleaning required. Oh, it’s a great system.
If you can, leave this whipped cream in the fridge overnight– because as the gelatin has a chance to work its magic, a beautiful thing happens– the whipped cream receives the courage and strength to face the world. It seems to grow up– to stand a little stronger, a little taller, and a little more dark and beautiful. You will know the icing is ready when it turns just a teensy shade darker– like cheap hot chocolate 😉 At that point, poke the bag a little bit, and you should feel that your whipped cream is still soft, but much firmer than the goo we started with. This is whipped cream, after all– not cream cheese icing. It’s really pretty amazing and cool to see our little baby grow up 😉 Sniff, sniff.

And, oh . . . what a beautiful baby it turned out to be!
You did it. And I’m just so proud of you.

Disclosure: This post may contain affiliate links, which just means that we get a few pennies if you purchase through our link. I never recommend products that I don't personally use and love. Thanks!