Food Photography Basics
My food blog recently turned one year old. *Cue the “Happy Birthday” song, and now everyone together . . .
“AWWWWWWWW.”
OK. Anyhoo . . .
I have learned a lot in the past year– especially about food photography. I have always loved cooking, but food photography took a little longer for me to learn. In the beginning I just put my food on a plate, put the plate on the kitchen counter, and used my phone to take a picture. It cracks me up, now, to look back at those earlier photos. I thought they were so awesome– cringe-worthy yellow lights and all. Haha. Oh my goodness. *Hides face in embarrassment.*
Behold . . . one of my first “glorious” photos. This photo makes me cringe. And believe it or not . . . this was a SECOND attempt of the first photo, which was so horrifying that I destroyed it and sent its ashes to the bottom of the sea. I remember I thought the crooked photo was super creative, and I thought the fact that I added a side dish (even one that looked like previously digested food) was awesome. I held my iPhone over-top of the food and snapped this little piece of food glory. I thought, “YEAAAAAHHH . . . awesome.”
I look at this photo now and look around for the creator so that I can put a donation into her begging cup, because I figure she’s unemployed by now.

Now, feast your eyes on my third attempt. This photo of my Southern Fried Chicken was taken almost a year after the previous one.
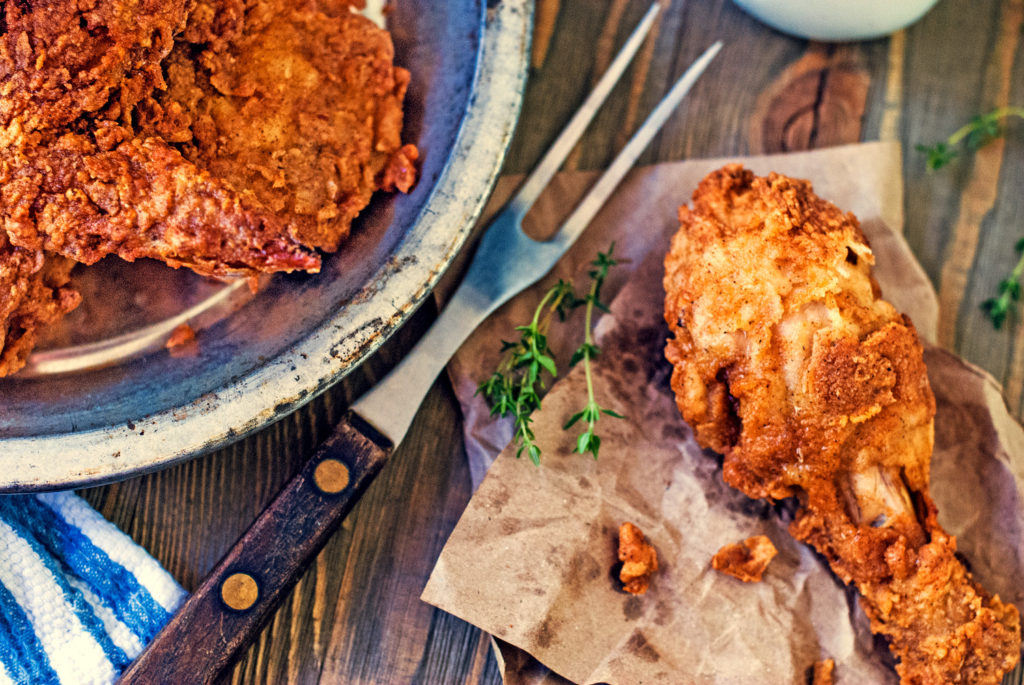
Yesssssss. Of course, this photo isn’t perfect, either . . . but it’s a HECK of a lot better than the first (er, second . . . the first shall remain nameless) one. I am going to start a series of easy photo tutorials for you. Hopefully they will be helpful– whether you have aspirations of starting a food blog, or if you just want to take better photos of the pretty dessert you got at a restaurant for your facebook page. I’ll try to break everything down nice and easy so that you can take better photos without losing your mind trying to figure out . . . what is aperture? ISO? Shutter speed? What the heck is RAW format? Don’t worry or stress. The more I worked with these crazy things, the more I understood them, and we will cover everything step by step, as the weeks go on, so you understand it.
Let’s start at the beginning. LIGHT. Light is probably the single most important thing in your photos. And, contrary to what most people think, MORE light is not always BETTER light. Let me show you what I mean.
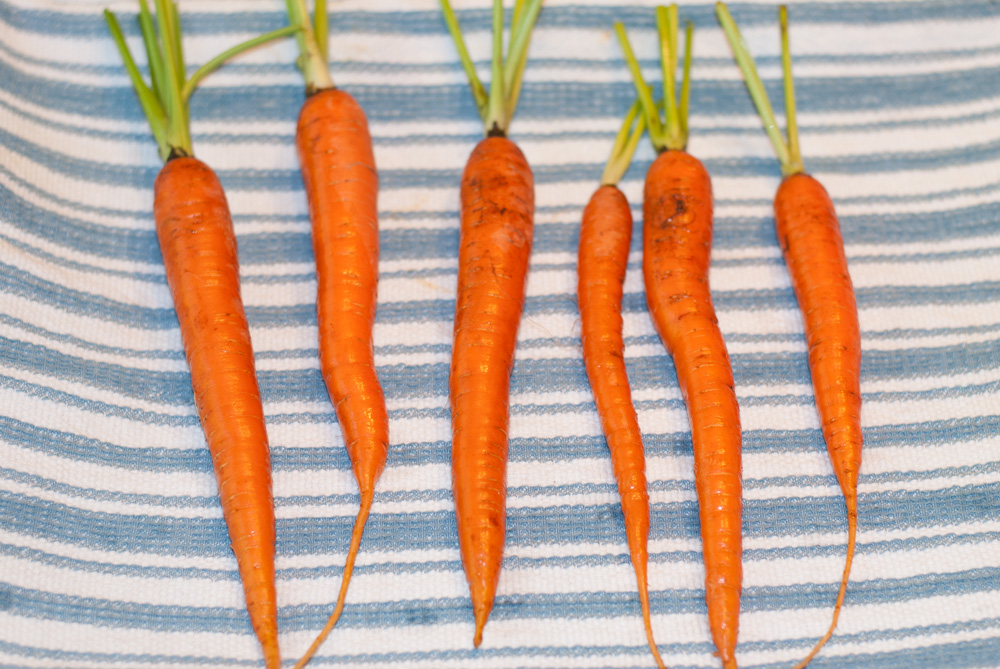
This is a photo I took of some carrots I got at the Farmer’s Market this week. I took the picture with the camera in Auto mode, with the flash on. Meh. Not so much. There is way too much light, and everything is blown out. If possible, NEVER shoot with your camera on Auto. I used to always use auto for everything, figuring that the camera knew best.
Nooooooo. The camera does not know best.
YOU know best. (“Father knows best . . .”).
The camera is a machine. It can make estimates, but you are the one with real eyes, and you can compensate when you see something wonky (like when the light through the window changes), whereas the camera will just do the best machine estimate. When you shoot in auto, you give your power over to the machine. Don’t give your power away. Shoot in Manual mode . . . and shift all the power to your own hands!!! *Earth Conquering Music Swells in Background.” In the weeks to come, I’ll explain more about manual mode and what the controls mean. But for now, all you need to know is basically this:
Auto mode/Flash are Bad. Manual/No flash are good.
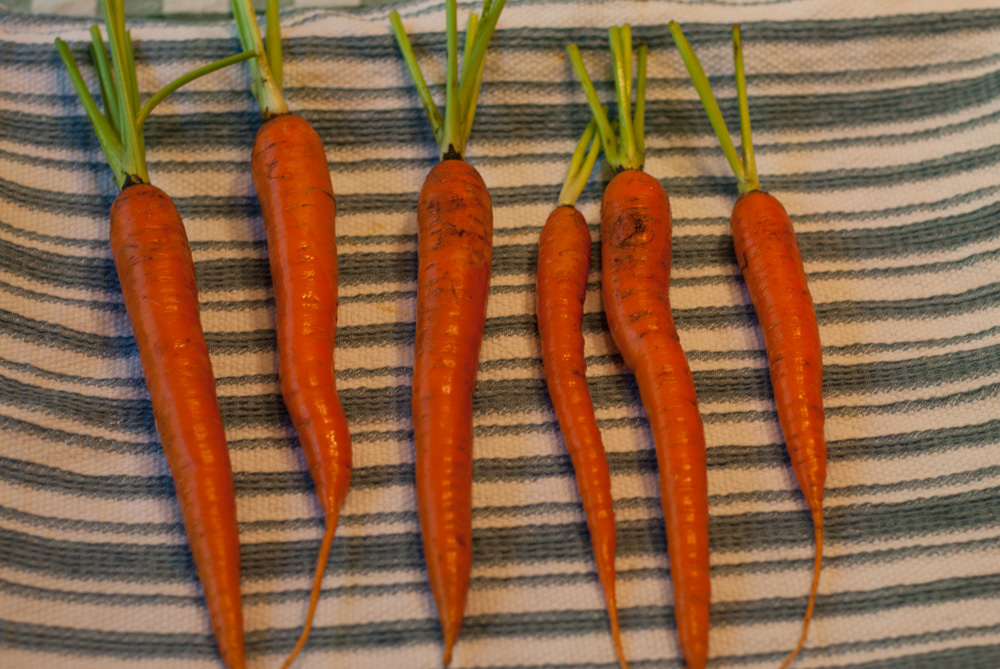
Here is the same photo with no flash– just with the lights from my kitchen. As you can see, it’s still not great, but having the flash turned off helped get rid of the glare. But those yellow kitchen lights? Yeeeeeckkk. There must be a better way!
There is. Oh . . . there is.
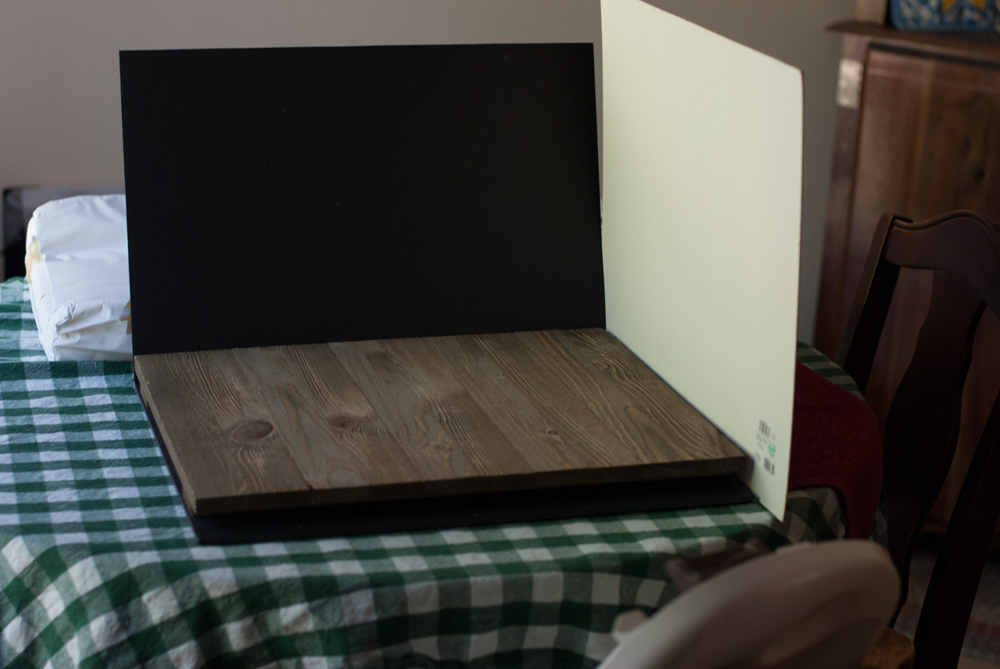
Meet my super sophisticated photo setup. *Cough, cough.* OK. Meet my super cheap, “All-my-money-goes-to-diapers-so-I-use-what-works” setup. You can make a setup like this for just a few dollars, and you’ll be amazed how much your photos improve with just a few basic photo boards like this. So let’s talk about what we see, here, and then you can make one of these little guys at home.
- First, we see . . . wait– is that a high chair tray? Excuse me . . . *Removes tray* I have a baby. What can I say. At least you know that your house doesn’t have to be perfect to take nice photos. The only thing that matters is the little square that will be in the photo.
- Next let’s talk foamboards. Foamboards are usually in the poster board/stationery section of the store. They are kind of like fat posterboard– with a thin layer of foam in the middle. Use an X-acto knife to slice through the posterboard on ONE side, only. The cut on one side will help you to fold the board in half perfectly so there is a nice, seamless crease on the side you want to use for photos. White foamboards make great reflectors if you want a bright photo, and black foamboards make dark, moody/shadowed photos.
- As I said before, I am using the white board today for reflective purposes, and the dark board for my actual background. More on that in a minute.
- I am using a regular, 18×18 inch wooden board as my “table.” You definitely don’t need a complete tabletop to take good photos. Most food backgrounds are 2×2′ or less, since the photo is small enough that you see only a little part of the board. You can make your own photo backgrounds from lots of things. You can buy them already made for around $15 (I got this one at walmart), or you can make your own from recycled pallets or scrap wood. We will probably do a tutorial at some point on how to make these, but for now just keep your eyes open– you may be surprised what you can find around the house (cutting boards, old wood scraps you have left from a project) that will make awesome photo backgrounds. Even a brown paper bag makes a pretty nice background. See? You don’t have to spend a fortune to get nice photos.
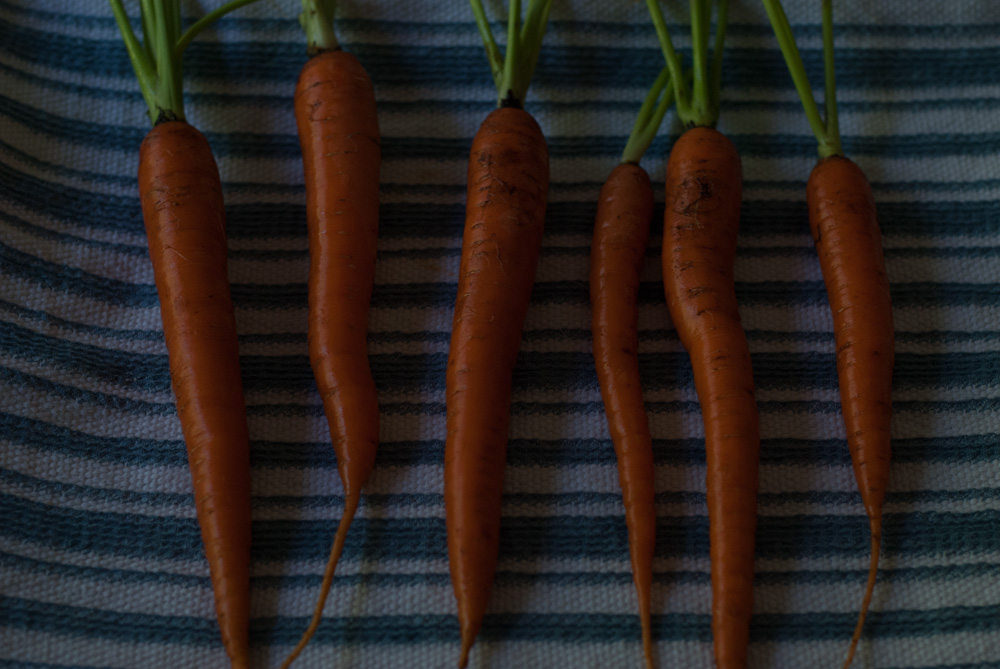
I mentioned that I like to use white foamboard as a reflector. You’d be surprised how much difference it makes when you place a white board opposite your light source (in this case, a window). Here is the photo without a white reflector.
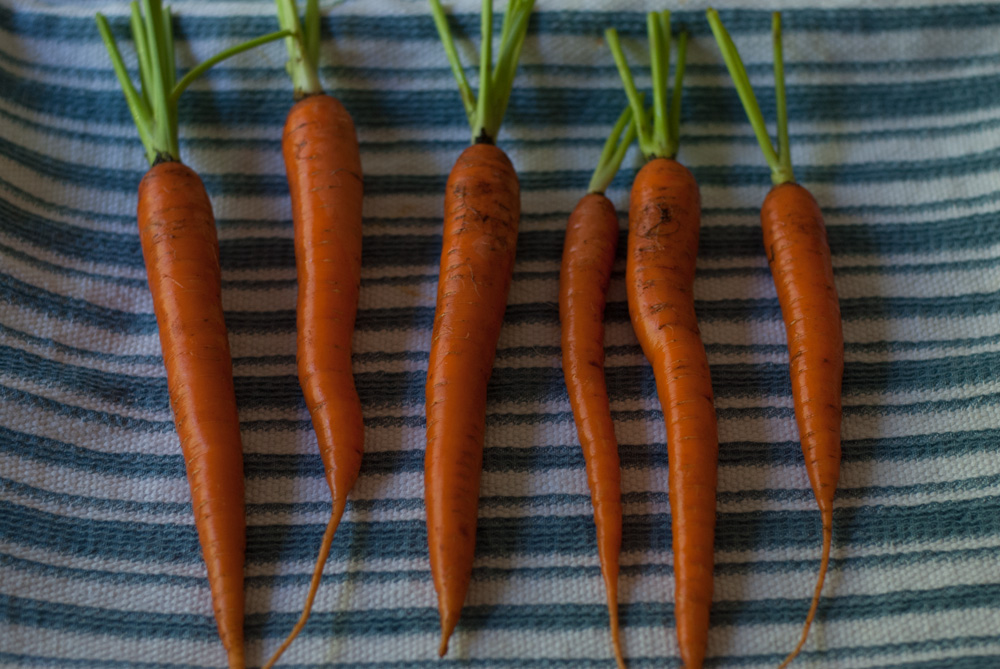
Here is the photo with the reflector added to bounce the light back and soften those shadows. Amazing, huh? And you can use those $2 foamboards for both backgrounds and reflectors. Yessss . . . I love saving money.
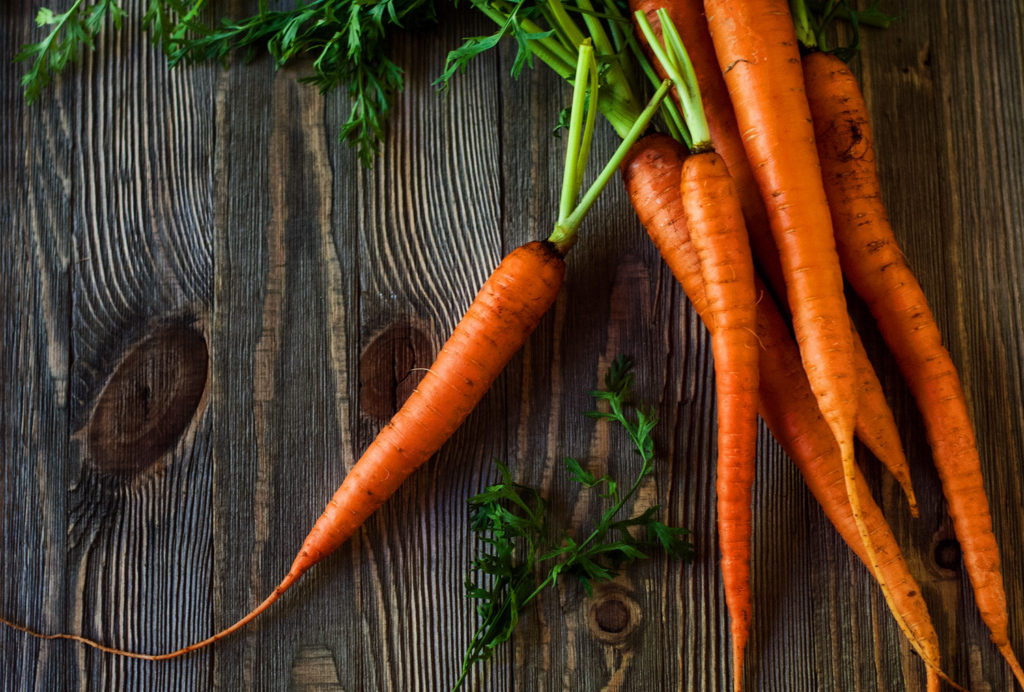
Here is a photo I took in complete Manual mode, with no flash. I used the setup exactly as I showed you– wooden board as my “table,” black foamboard as the background, and white foamboard to the right as a reflector. Gorgeous, isn’t it? Look what a difference that light makes when it is correctly channeled with reflectors and when YOU have control over your camera. Good job. Told you that you could do this.
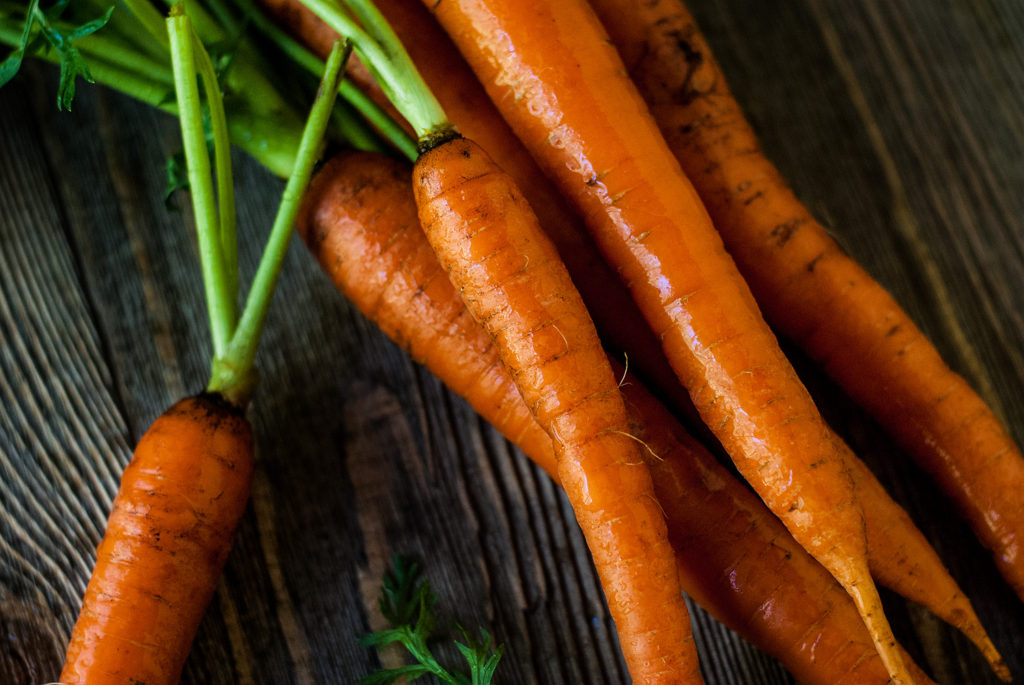
Here’s another little trick that elevates your photos with almost zero effort/money. WATER. Yep– just simple ‘ole water. Use a cheapie spray bottle to lightly mist the carrots and greenery. Voila . . . instant allure. These carrots look fresh and delicious. And it only cost you about 1 penny to give these deserving little carrots a makeover at the carrot salon. You’re so sweeeeeeeeet.
Well that’s it for today’s tutorial, folks. In the weeks to come I’ll dig into some more info about shutter speed, aperture, ISO, styling, and all the pretties that help your photos to look their best. I’ll also try to get together a tutorial soon on how to make an indoor light studio (mine cost about $20 for me to make) for the dark, rainy days or nights when there is no natural light coming in your window. For now, though, just focus on your light. This is one time where walking TOWARD the light is a good thing. haha.
You did it. And I’m just so proud of you.

Disclosure: This post may contain affiliate links, which just means that we get a few pennies if you purchase through our link. I never recommend products that I don't personally use and love. Thanks!


Pingback: What is ISO? – Cookies for England
Pingback: All About Aperture – Cookies for England
Emilie,
First of all, happy blogiversary! I am so excited for this series from you! I know that photos are so, sooo important for blogging, but I “just haven’t had the time” to figure out all the settings on my camera, etc. As you know, I love your photography! This post/series definitely just kicked my butt into gear and has inspired me to learn, explore, and improve. I can’t wait to read more!
Thanks so much, Olivia! Your sweet comment made my day! 🙂 All of us can always learn something new (definitely myself included!), and I’m excited for this series and what we can learn to make each of us better food photographers!
Pingback: Figuring Out Shutter Speed – Cookies for England
Hi there! This is kind of off topic but I need some advice from an established blog.
Is it difficult to set up your own blog? I’m not very
techincal but I can figure things out pretty quick.
I’m thinking about setting up my own but I’m not sure where to
begin. Do you have any ideas or suggestions? Appreciate it
Hi there– starting a blog is exciting, but a lot of work. My best suggestions are (1) always study and improve your photography, (2) post regularly, and (3) have fun and don’t stress too much. 🙂 Good luck!
I cant believe that your blog is just a year old I thought you were so much more established than that. It looks it. And what a difference. I know mine has got better but not that much better from when i started. I have to do almost all my shooting with lights so look forward to hearing what you have to say on that. and Im still at a complete loss re editing photos after shooting and just wing it at the moment.
Thanks so much, Jacqui! If you think #2 looks rough, you should have seen the cringe-worthy first photo that I destroyed, hopefully never to be heard from, again. haha. Yes– I can’t wait to do some more tutorials, including how to make a quick and easy inside light setup for those dark winter evenings! 🙂 If you can think of any other topic you’d like to hear about, let me know– if I don’t know the answer I’ll do my best to find out! 🙂