
One of the most fun things about learning to make sugar cookies is learning all the cool things that royal icing can do. This stuff really is a versatile little guy– you can make anything from 3D gazebos to those cool little “dot” candies on a sheet of paper. Yes. You really can. Making your own candy . . . the world is about to get dangerous.
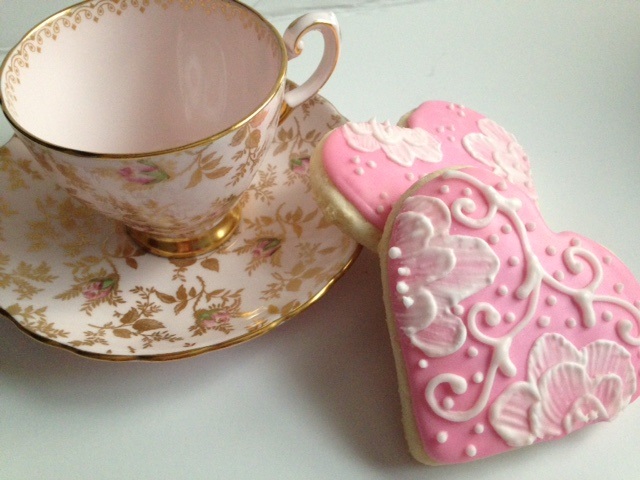
Well, today I’m going to show you something awesome that royal icing can do– it can become a painting medium and turn your ordinary cookies into stunning masterpieces. Painting with icing is not super hard, either– and I guarantee you that, if you master this technique, you will hear lots of “ooohs!” and “ahhhs!” the next time you bring cookies to a get together.
What are we waiting for? Let’s do this!
Start out by baking some cookies in the shape of your choice. See a step by step tutorial on baking sugar cookies here. I’m using hearts, today. Another great shape is a scalloped circle. These make adorable and dainty tea cookies.
Next, mix your icing into the color of your choice, to a flood consistency. More on that, here. I’m going with pink– the great thing about this technique is that you can match it to any party/wedding/baby shower décor. Just choose a base color to match your color scheme, and the rest is easy peasy!
Start out by piping a petal outline. The petals don’t have to be separate from each other (although, you can do that, if you want to). Try to picture the silhouette of a flower. You’re just going to outline the outer edge of it, to start.
This is what it will look like if you make the brush too wet, rather than just dampening it. A wet brush makes the icing kind of bleed together instead of making defined “petals.”
Go ahead and make several flowers on various sides of your hearts. There is really no right or wrong way to do this. On a medium size cookie, I try to do 2-3 flowers. You don’t want to overwhelm the cookie– just accent it with white.
After your first layer has dried (I usually do my entire cookie sheet of “first layers,” and by the time I finish my last cookie, the first ones are dry enough to continue), go ahead and go through these steps again, with a second petal layer. Do the exact same thing as you did for the first layer– draw your petal outline, dampen your brush, and “brush” the icing down.
After the second layers are done, go ahead and make a third layer. Usually, the third one is more a half circle, rather than a series of petals.

Disclosure: This post may contain affiliate links, which just means that we get a few pennies if you purchase through our link. I never recommend products that I don't personally use and love. Thanks!










Pingback: Snowy Christmas Tree Cookies – Cookies for England