
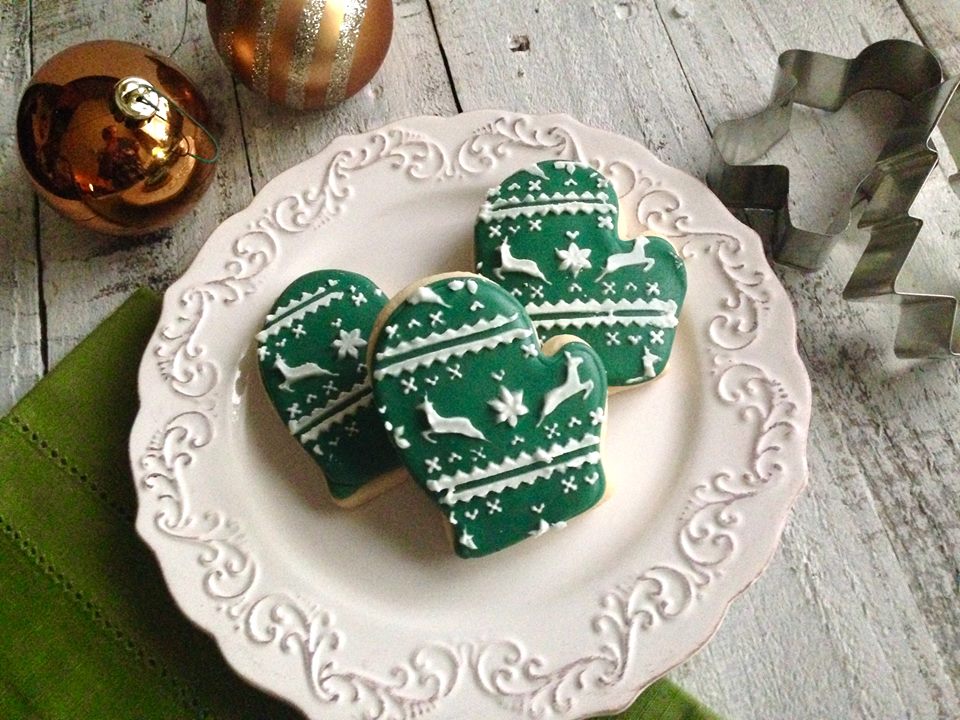
Festive Winter Mitten Sugar Cookies
There is really nothing quite so cozy as a warm mitten. Mittens are kind of hard to find, nowadays . . . their humble, homespun presence has been crowded out of most stores by neon plastic gloves in all shapes and sizes– texting fingers, anyone? But I still love them– homey warmth and all.
I still remember the first pair of mittens I had, as a kid– they were soft and warm, with a velvety fleece lining. They kept my hands cozy on the coldest of days– and, somehow, I always felt that my hands were happier in there– with all the fingers able to visit and mingle, instead of being given cold, separate apartments. That sounds weird when I say it out loud. But that’s what I used to picture, at the time– my fingers as one big, happy family. So I can’t think of a better way to celebrate the warmth of the Christmas season than by making some cozy mitten cookies.
Decorating cookies should be fun. You shouldn’t be trying to throw together something amazing, a few days before Christmas, and stressing because your icing isn’t right, you have no idea how long to roast the blasted turkey, and Mom STILL hasn’t mentioned anything that she wants for Christmas. A good way to circumvent the last minute cookie craziness is to start making your cookies, now, little by little, and freezing them until you need them. That way, you can have an amazing variety of cookies for Christmas, and the hardest thing you’ll have to do, Christmas week, is open a few Ziploc bags. I like the sound of that.
What are we waiting for? Let’s do this!

Start by baking your mitten cookies. Lots more on baking cookies and tips for getting them to stay the same size here.
Next, get your icing ready. Lots more on icing consistency and how to make royal icing here.
Look at that. I did all the work, so now you just have to click away. I’m such a softie.
Start with your green icing. (“I’ll have a green Christmas, without you . . .”) Hmm. Doesn’t have quite the same ring to it. Anyway . . . you want to start with some 17 second green icing. I love 17 second icing, because I use it for both outlining and flooding. That means fewer icing bottles, which translates to fewer dishes for me to do. That is absolutely A OK with me. Outline your mitten in green and smooth the joining point together, with a toothpick.

Allow your basic outlines to dry, slightly– about 10 minutes should be enough time. I usually find that, by the time I finish outlining the last cookie, the first cookies are dry enough to continue. It works out very nicely.
Flood your mittens with the same 17 second green icing. Keep a toothpick nearby to slay the evil air bubbles, should they show their ugly heads, attempting to destroy your beautiful creations.
Now, let the cookies dry, uncovered, overnight. You want them to be completely dry for this next step. It’s every boring speaker’s fondest dream– to be told that we want things completely dry.

For these cookies, I am going to use a Fair Isles stencil. You can buy this stencil over at Cookie Countess here. Just for personal preference, I find that her stencils are amazing for airbrushing, but sometimes I find them a little thin for stenciling– they tend to slither around, a little bit, because the plastic is so thin. If you’re looking for great stenciling stencils, I highly recommend Designer Stencils. But then again, they didn’t have this sweater stencil, so we do what we have to do. 😉
The cookies weren’t as neat as I normally like, with this stencil, but the design was so cute that I made an exception 😉 If you want the design to be razor sharp, I’d recommend airbrushing a stencil with this level of detail– it’s much easier to get a crisp image, in my opinion. I went for stenciling because I wanted the design to be very white, and airbrush white just doesn’t cut it for me. But feel free to go your own way on that one.

To stencil, get your icing roughly the consistency of toothpaste. Hold the stencil carefully in place and smear icing over the top. Lightly scrape the icing off, but don’t scrape so low that you see green cookie peeking through, or your shapes won’t show up. When you have your entire opening coated, quickly pull of the stencil in a single motion, to help cut down on smearing. Hopefully, if you are lucky, you will see a beautiful little pattern smiling back up at you.

Allow your cookies to dry overnight– these took a while to make, so you don’t want them to accidentally smudge! Look at your adorable little mittens. Take a walk down a snowy memory lane, complete with silver bells and a one horse open sleigh. Hey . . . it’s memory lane– you might as well dress it up just how you want it. Let’s throw a few mugs of hot cocoa in there, too. And how about some cookies? We have to have those.
Because you made adorable ones. And I’m just so proud of you.

Disclosure: This post may contain affiliate links, which just means that we get a few pennies if you purchase through our link. I never recommend products that I don't personally use and love. Thanks!


Pingback: Christmas Baking – Cookies for England
Pingback: Lemon Cream Bars – Cookies for England