Vintage Pyrex Cookies
If you have been on my site for any length of time, you know there are 2 great loves in my life: cookies and Vintage Pyrex. When I’m not baking, I’m prowling flea markets and thrift stores, looking for the hidden treasures in the dish aisle. 😉
Recently I became acquainted with Jennifer Mora, who makes custom cookie stencils. Not only is she an incredible artist, but she is also the mother of Bridgette, a sweet little 8 year old girl who is battling cancer. Jennifer creates these stencils to help pay for the staggering medical bills which have arisen from funding her daughter’s care. The stencils I used to make these cookies are on Jennifer’s website, here, and I will also walk you through the process of how to make cookies like the ones I made. 🙂
What are we waiting for? Let’s do this!
To begin with, let’s talk about one of my favorite subjects: COOOOOKIES!!!!!!!!!! Here is the recipe I use for sugar cookies, but of course you can use your favorite recipe passed down from Grandma, if you prefer, or you can even just use store-bought sugar cookie dough and cut out your own shapes. It’s a free country. Go your own way on that one. Be free. 😉
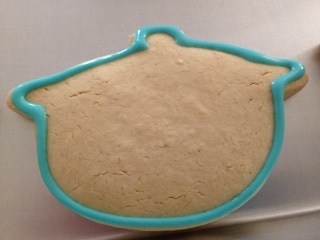
I found that the Le Creuset Dutch oven cutter here worked perfectly as a stand in for the classic Pyrex Casserole. Score. So go ahead and bake your cookies (more on this process here if you need help with that), and let them cool so we can get to decorating! 😀
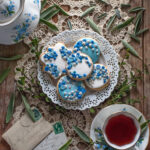
The next part that you need to know when decorating sugar cookies is how to make royal icing (Royal icing? God save the Queen??? Haha). If you have never worked with RI before, I have a handy dandy tutorial here that you’ll enjoy. Depending on what kind of “Pyrex” you’re making, mix yourself some 17 second icing in the correct color. Today I am making Cloverberry and Blue Dianthus Pyrex, so I am mixing light blue and light turquoise icing colors in 17 second icing. Again, more on Royal icing and what the heck “17 second icing” is here, if you are new to sugar cookie decorating. 🙂 Most of us have worked with sugar cookie decorations for a while, now, so I will get on with the decorating tutorial and just leave the links for those extra tutorials for those who are new. 🙂
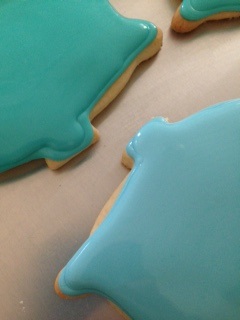
Outline your cookies in the correct color and let the outlines dry, slightly, before flooding the cookies. I usually find that if I outline all of the cookies and then come back to the first ones, they are dry enough to flood. Flood your cookies with the same 17 second icing and pop any air bubbles with a toothpick before the icing sets. Allow the cookies to dry, uncovered, overnight. This step makes sure that the icing is dry enough to decorate so that you don’t get surprised by a cookie that “looks” dry, but is actually like a pond with a layer of thin ice– ready to crack! :() (Not that I have EVER done that before, of course. *cough, cough).
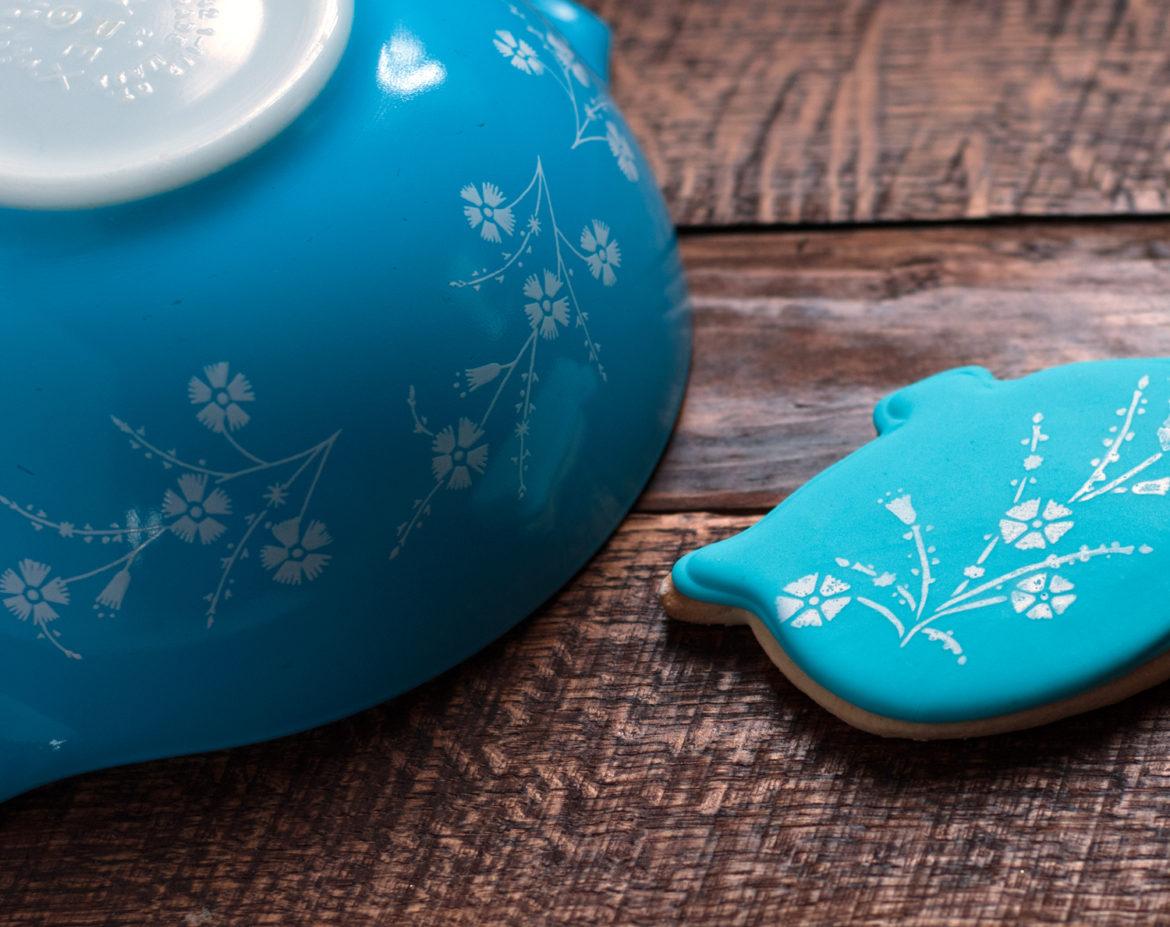
Once the cookies have completely dried, we come to my favorite part of all– actually creating the Pyrex patterns. Ohhhhh yeah! 🙂 First of all, I am using Jennifer’s Cloverberry Stencil. This is actually a rather complex stencil to do, since it has 2 layers involved. If you’ve never stenciled cookies before, check out my basic stenciling tutorial here.
Begin by positioning the stencil overtop of the cookie in the spot you want your design to be. I find that it helps me to hold my stencil if I place a paper plate on top of a metal baking pan, and then use magnets to “stick” the stencil in place. The magnets stick to the metal pan through the plate and hold your stencil in place. Voila. You’re so smart.
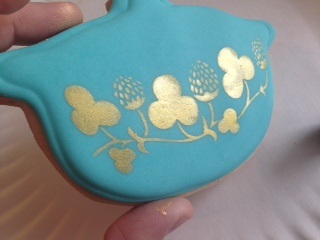
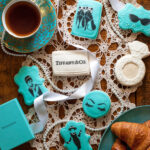
The real Cloverberry Pyrex has gold leaf in the design. So I am using Americolor gold sheen (get this here) for the first layer. Sheen is a little different from icing stenciling because it is airbrushed or painted onto the cookie, with a paintbrush. You can hand-paint the sheen onto the cookie if you prefer, but I use an airbrush gun (the one I have is here
) because I make a lot of cookies, and it I had to paint them all by hand we’d be here till Christmas . . . in the year 3017. 😉 Gently apply the sheen in several light layers, rather than in 1 heavy, dark layer. Your design will be much more crisp if you make several light passes, allowing the sheen to dry in between applications. If you glob on the color, it will run underneath the stencil and ruin your design.
Once you have finished the top layer of sheen, allow the cookies to dry for 10-15 minutes, so that you don’t smear the design when you start the second layer of the pattern.
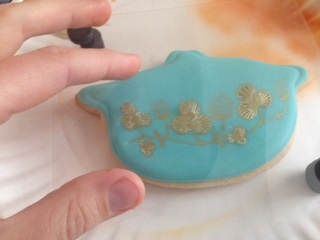
Just like the first layer, I positioned my second stencil where I wanted it, and then secured it with magnets. Finally, I used some turquoise airbrush color (like this here) to fill in the second layer of leaf veining overtop of the gold sheen. Use a super light touch, here. You don’t want to use too much color and blur the gold. Just go slowly and keep the airbrush (or your hand brush) on the lightest setting so that you don’t blob on the color. Carefully remove the stencil and allow the cookie to fully dry, uncovered, overnight.

At that point, the cookies should be dry and stackable, without destroying the design that we worked so hard to create. 😉

One word of caution– airbrush colors are great as long as they stay dry. Be careful not to get the cookies wet, though, or the color will run (like mascara when you watch “When Harry Met Sally.” Haha). The cookies can get too much moisture if they are in an airtight container that goes from, say, freezer to room temperature. The condensation inside the container will make your design run, if you’re not careful. So I try to keep the cookies always at room temperature, and never refrigerate or freeze, to preserve the design.

But, you know, even though it is hard work, sometimes a little fancy cookie making is good for the soul. Yes, they are a lot of work. Yes, you have to treat them gently. But like any good woman . . . their beauty is worth it. 😉

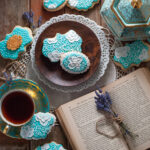
So get out there and make some pretty Pyrex Cookies. Show me all the lovelies that you create. I can’t wait to see them. And I know that you and your loved ones can’t wait to eat them. 🙂
You did it. And I’m just so proud of you. 🙂

Disclosure: This post may contain affiliate links, which just means that we get a few pennies if you purchase through our link. I never recommend products that I don't personally use and love. Thanks!

Corning, which made Pyrex in the United States, introduced its iconic colored bowls and casserole dishes in 1945 after producing clear glassware for decades.
Yes! The primary bowls were the first milk glass bowls with color that Pyrex introduced in the 1940s (just clear pieces before that). I’m a vintage Pyrex fanatic 🙂